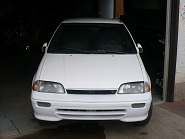
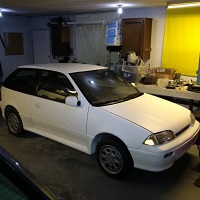
1991 Suzuki Swift GT Electric Vehicle
My EV Story
Background
In the spring of 2008 I came across project Forkenswift. I have since learned that there was
something very similar in the 70's called the Urba Electric. From that moment on, I knew I wanted to cut my dependence from oil. I had recently seen Who Killed The Electric Car. After seeing that movie, I felt betrayed by GM for withholding some of the best technologies that were fleshed out as a result of the Saturn EV1 project. To date, I have not seen numbers that are any lower for the coefficient of drag for a typical production automobile.
I consider myself to be a fairly environmentally aware individual. I ride my road bike to work in the summer pretty much rain or shine. I'll take my mountain bike in the winter. Here are the specs for the mountain bike. For shorter trips, I will typically walk. I don't use a gasoline lawnmower or trimmer and I have an electric chainsaw.
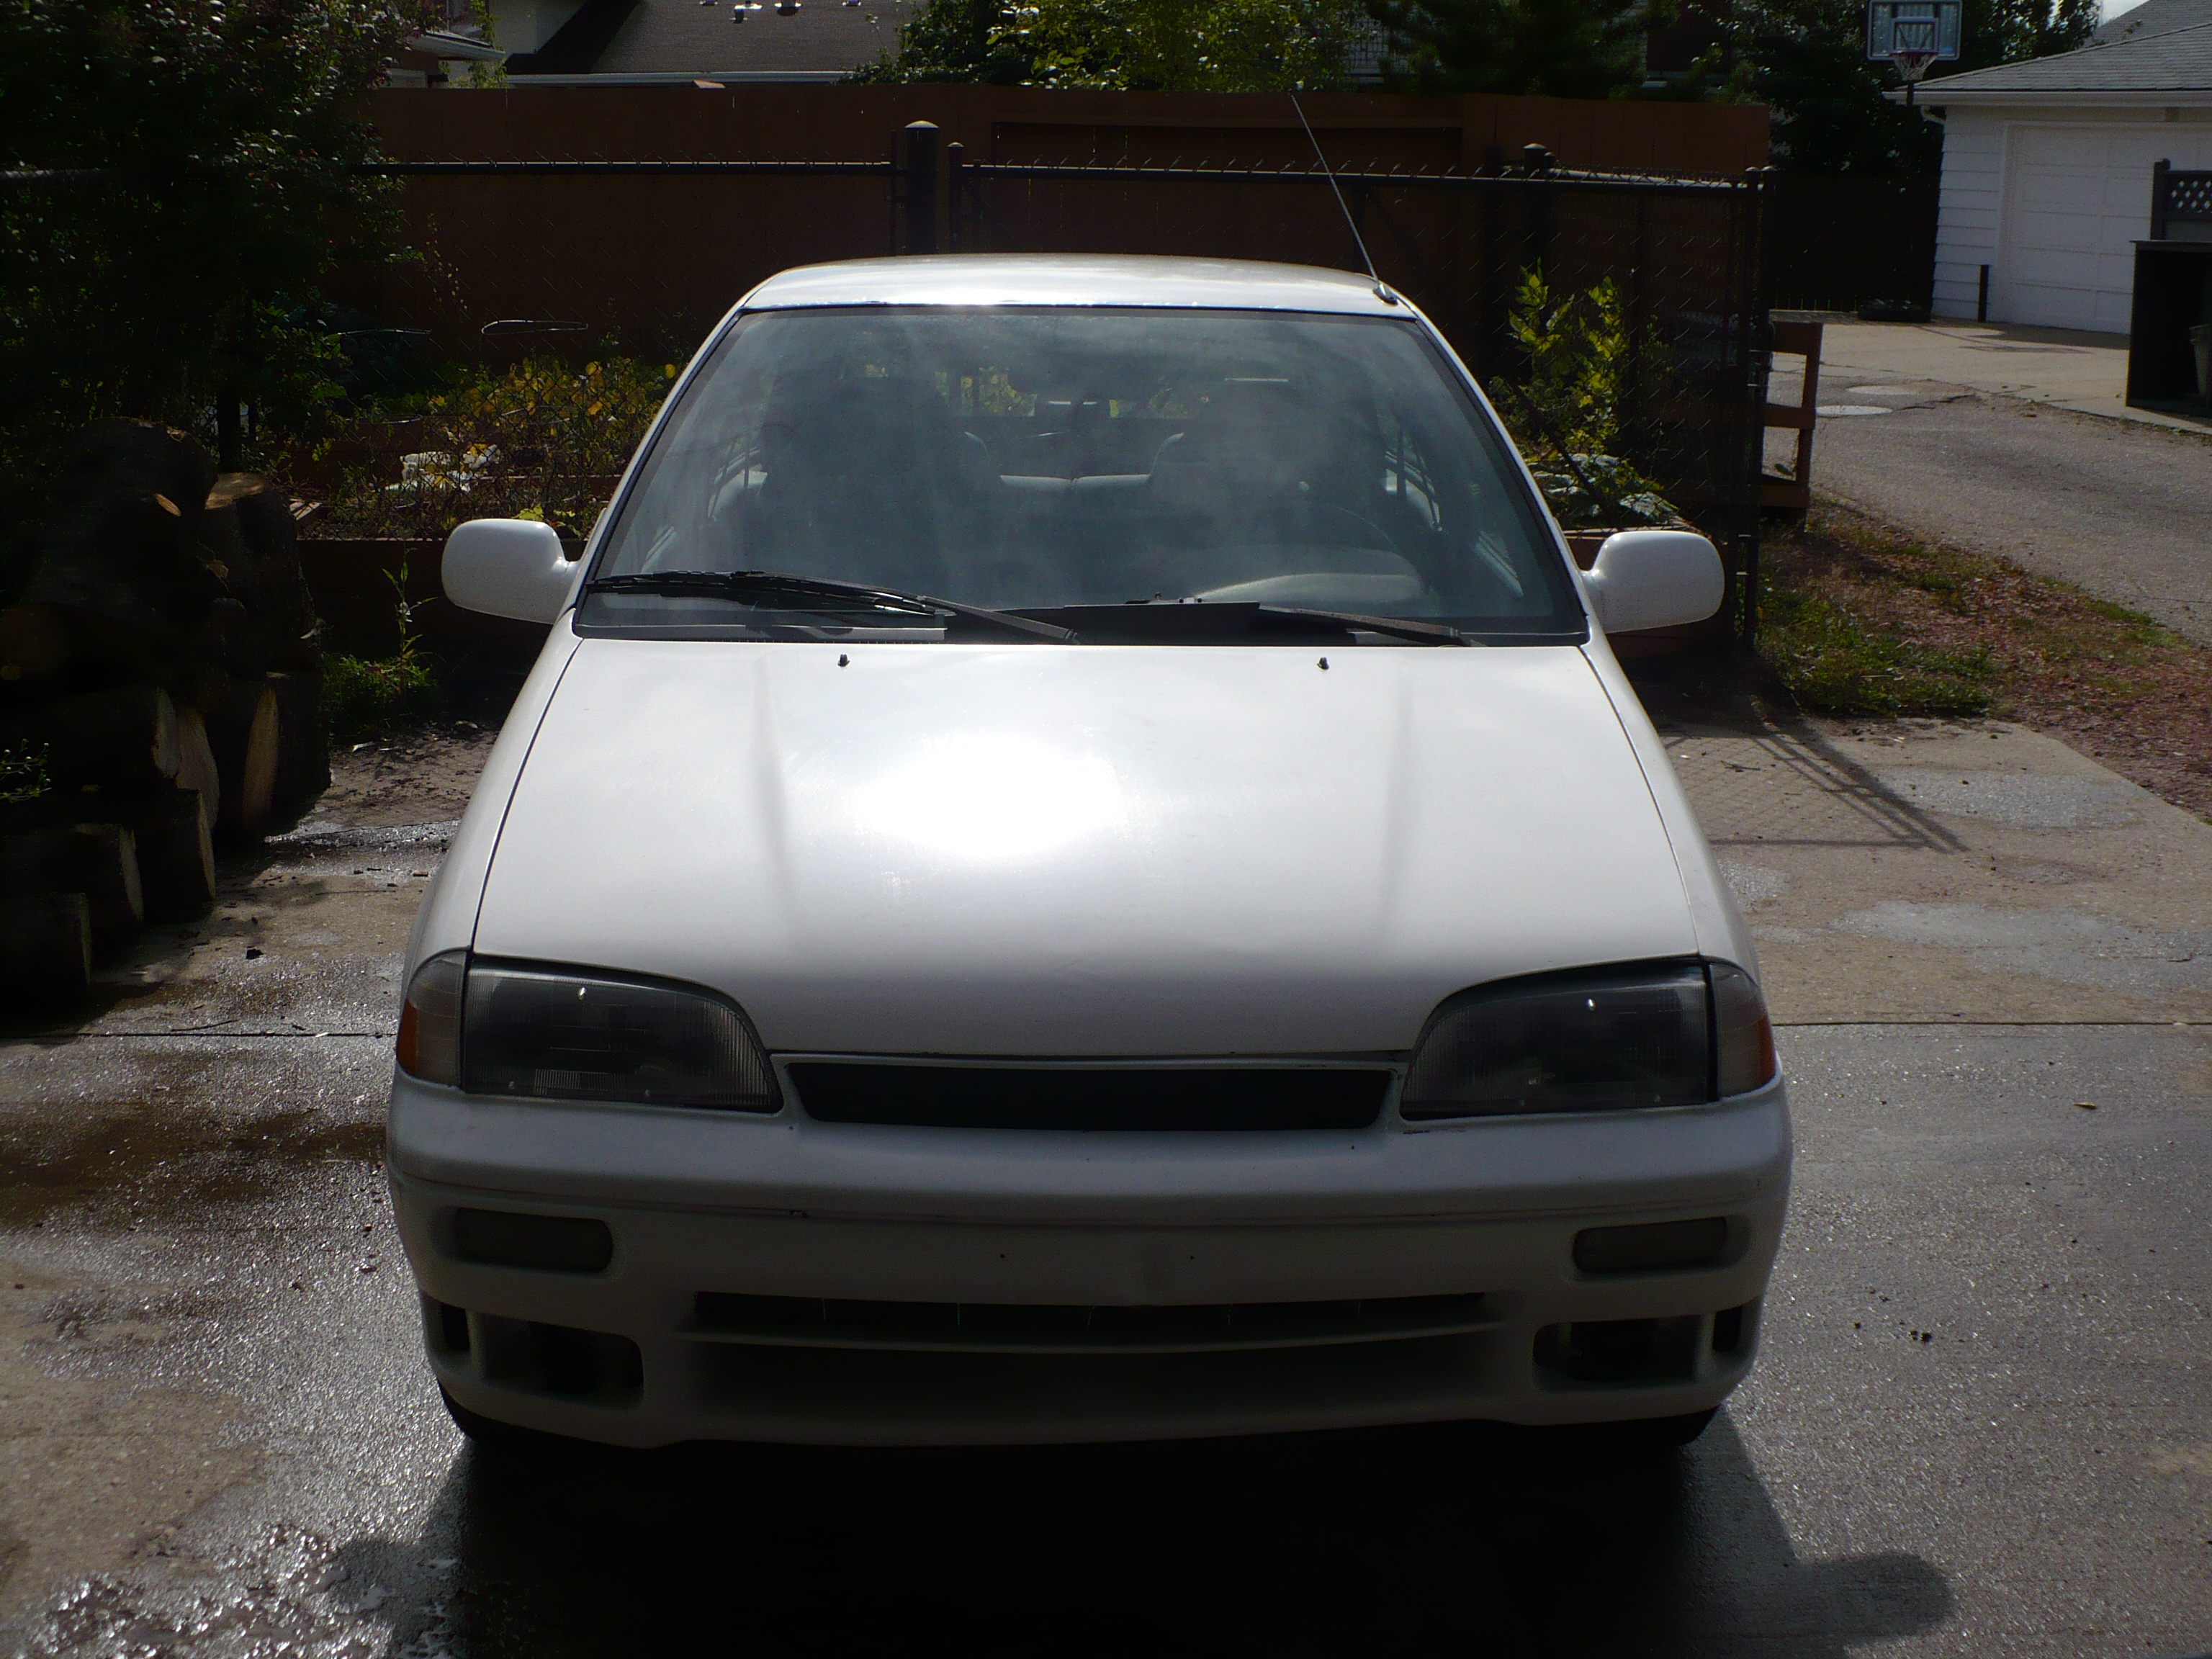
In June of 2008, I bought a 1991 Suzuki Swift GT off of Kijiji. My brother and I immediately began stripping it down. Some of the compelling reasons that drew me to the Swift platform were:
- ease of conversion - lots of others have done this
- curb weight 1733 lbs stock
- reasonably good aerodynamics - stock Cd is 0.32 with a CdA of 19.8 sq ft which is better than Smart ForTwo
- my brother already has worked on many of these cars
- relatively low cost of conversion
My basic plan is:
- strip down the car
- remove exhaust system
- remove cooling system
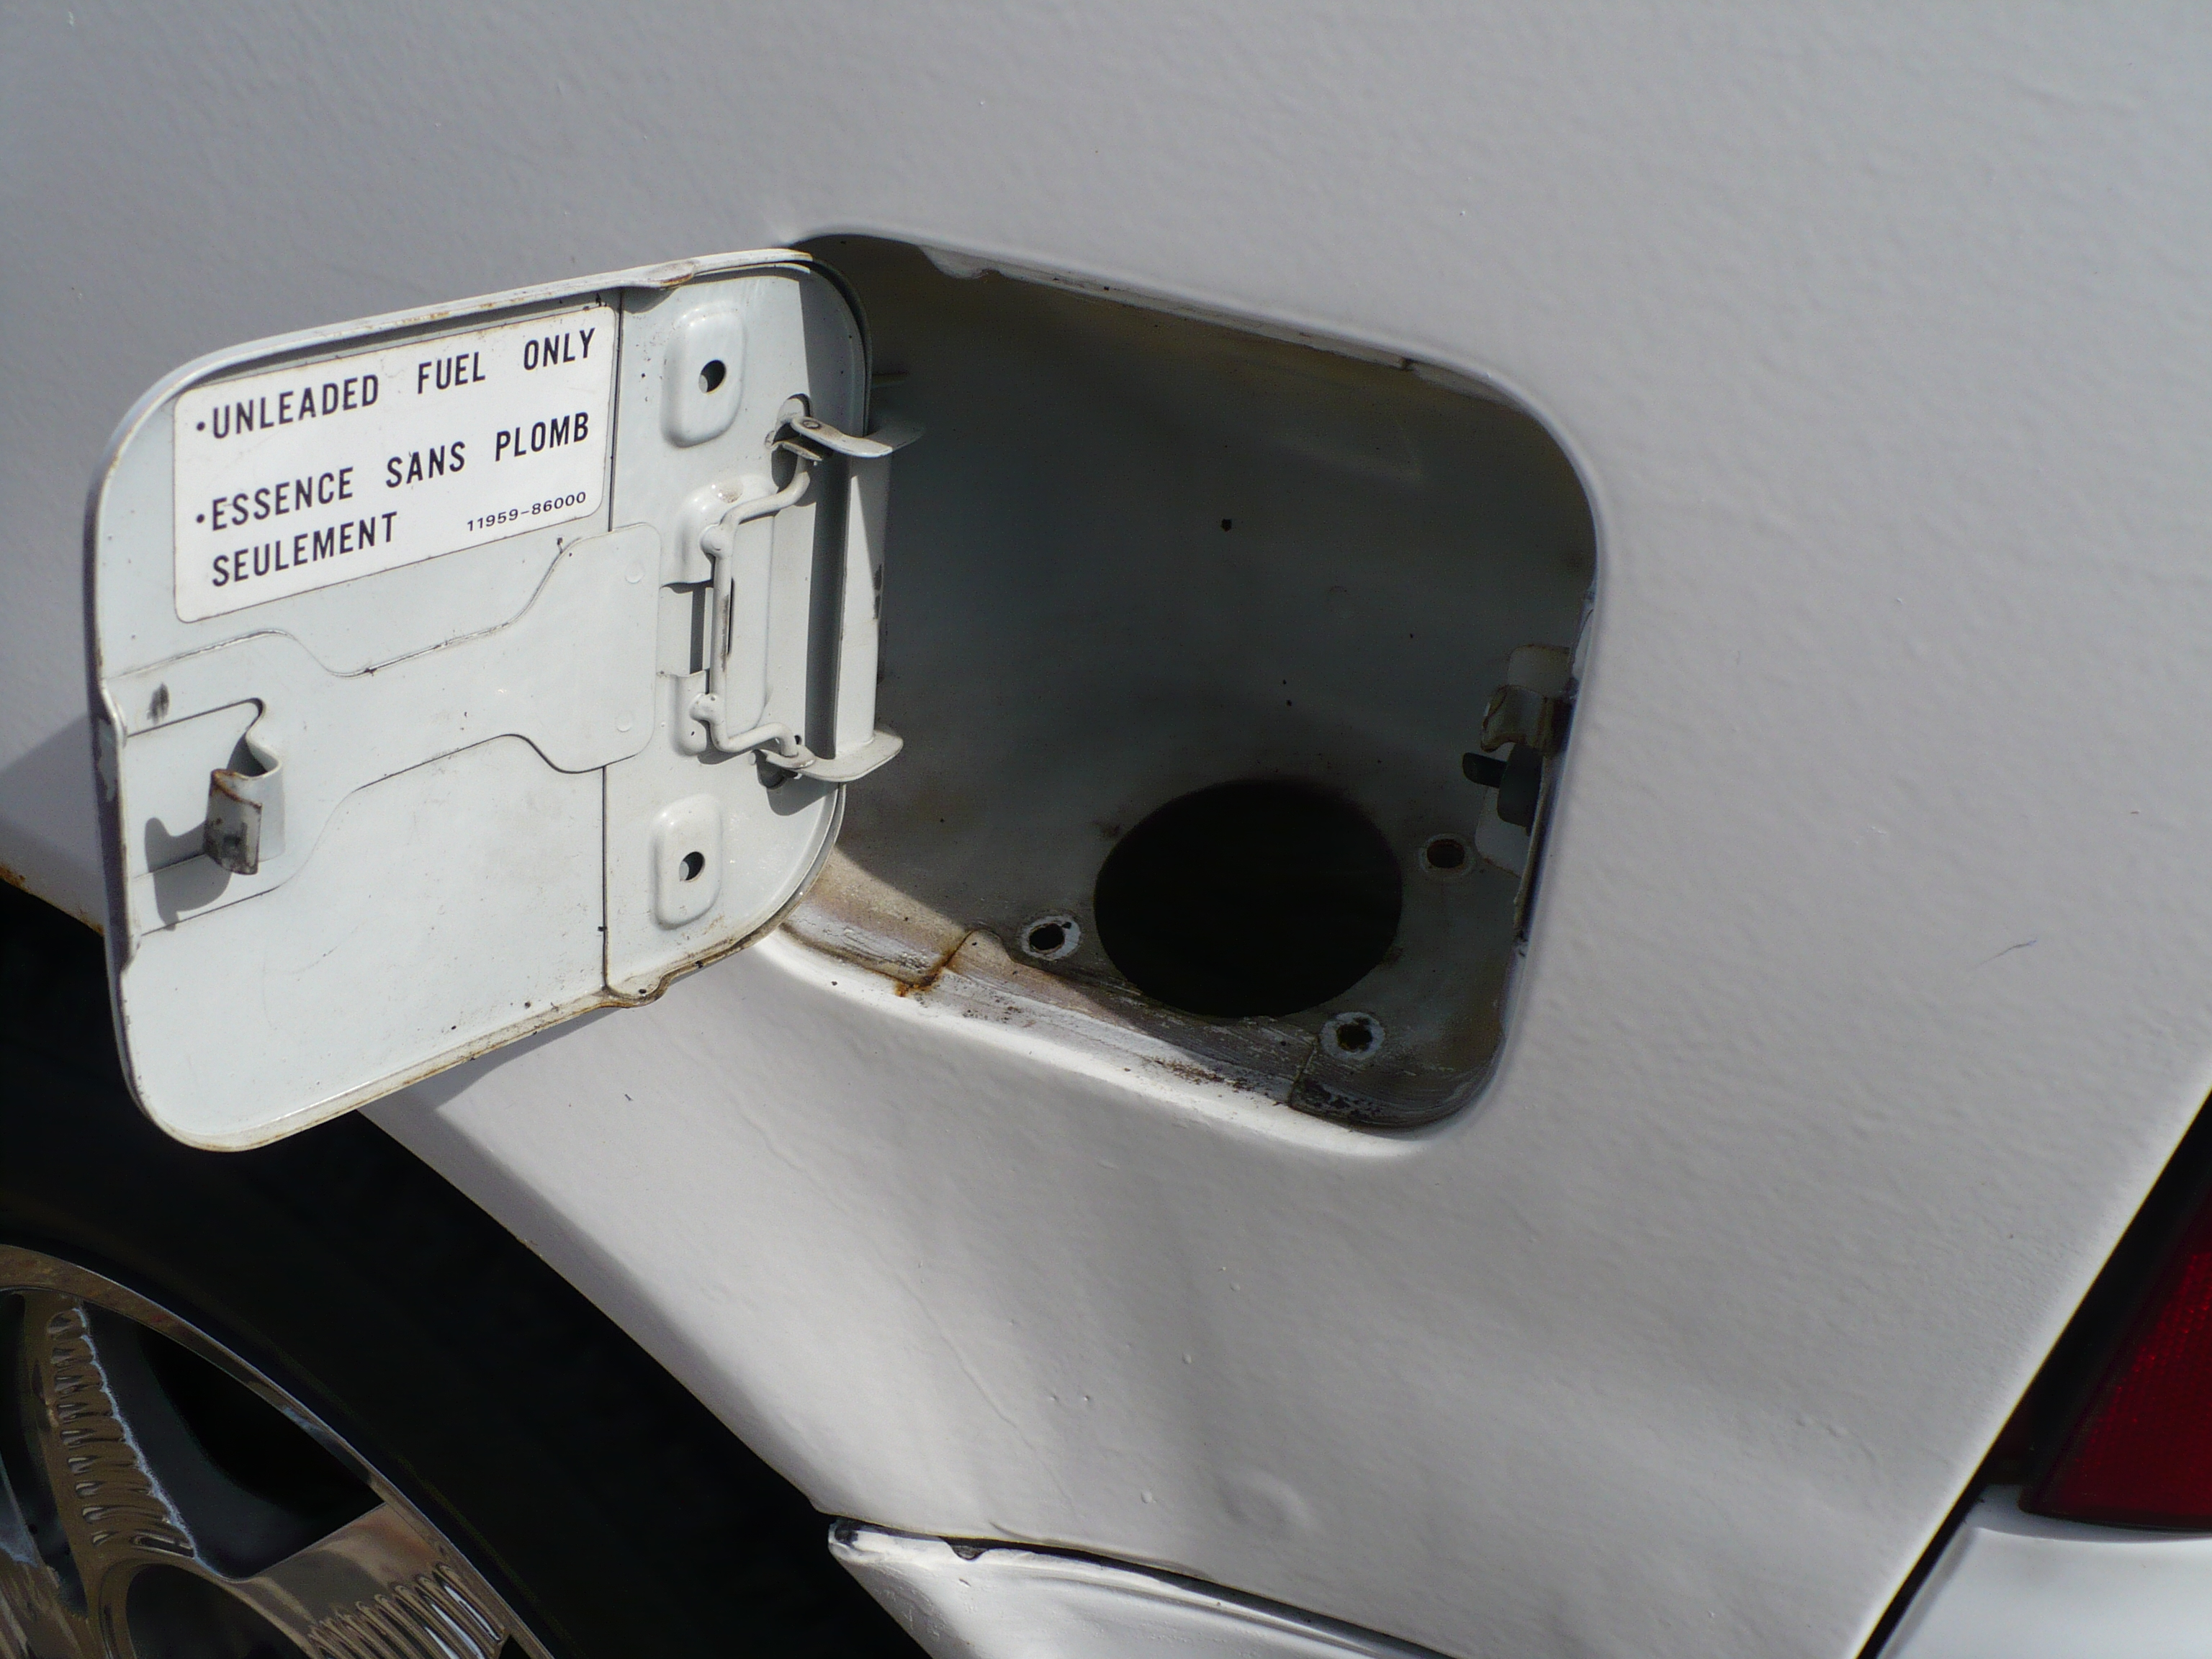
- remove fuel system
- remove ecm
- remove all non-essential electrical draws like the radio, antenna, speakers, etc
- remove spare tire and jack
- remove non-essential sheet metal under the hood beside the radiator
- paint it up to make it look half decent
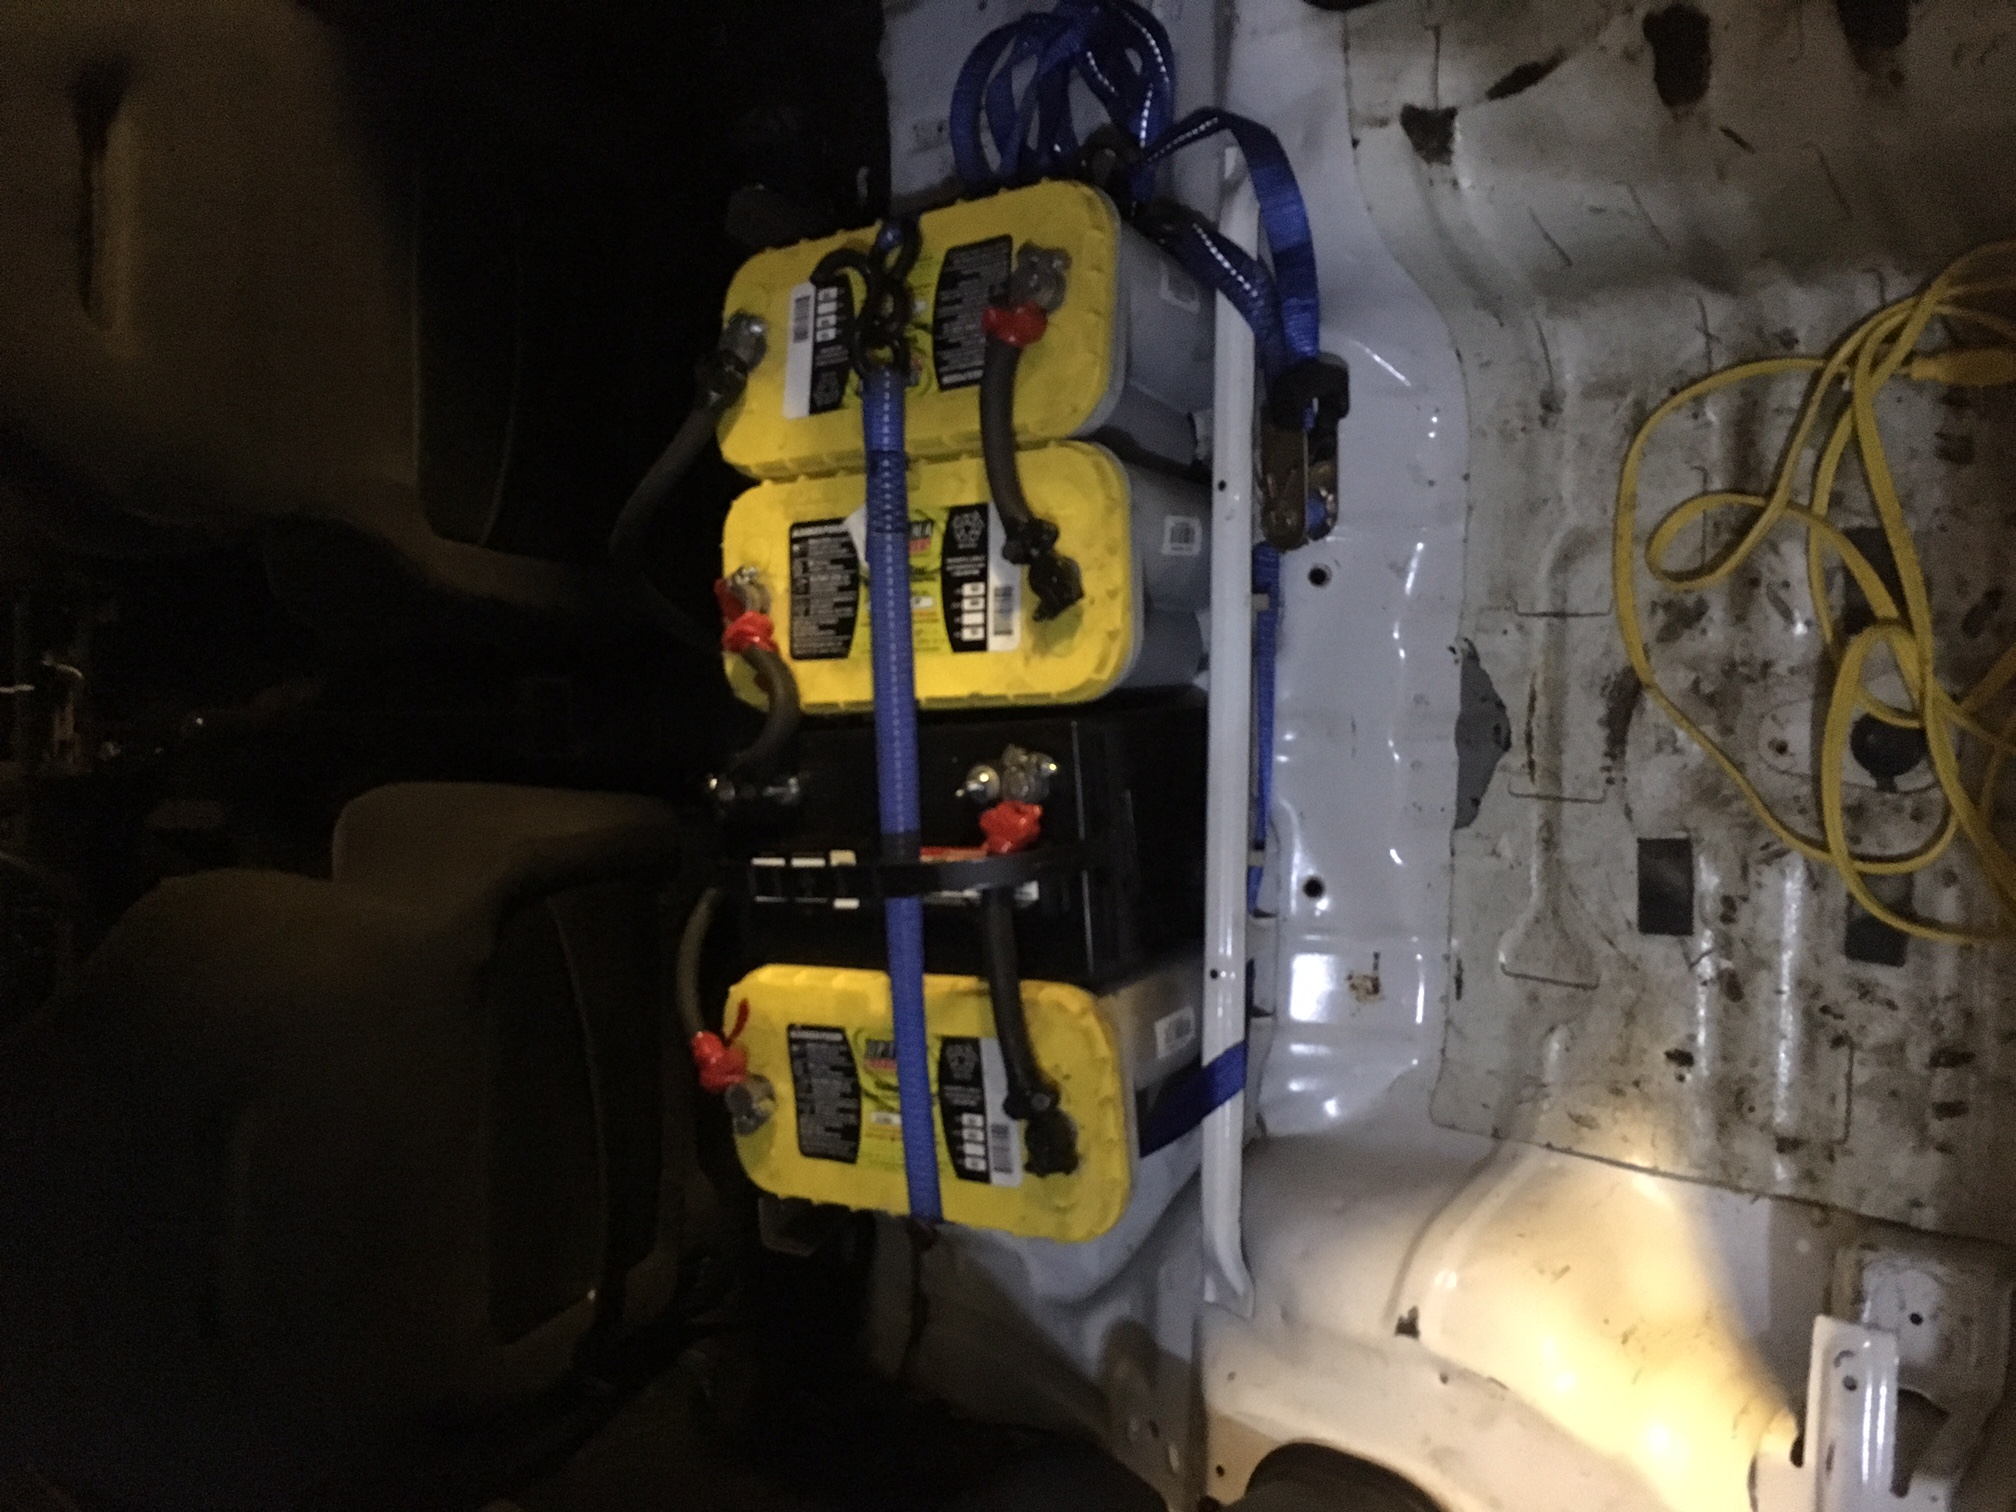
- get the batteries - Optima D31A's which I picked up at Rocky's Battery w/ 20% CAA discount - batteries will be located in an insulated battery box under the back seat
- get a good charger for the batteries
- order the conversion kit #1 from e-volks
- beef up the rear suspension - probably with cut front springs from a Ford Ranger
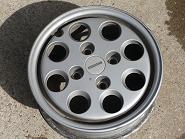
- get low rolling resistance tires for summer - Bridgestone RE92's from Japan to go on RX7 phone-dial rims
- finish polishing 5 spoke rims that have Bridgestone Blizzak WS50 winter boots
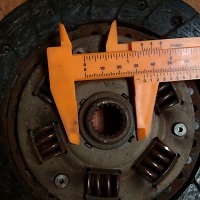
- rebuild the front suspension since the car has 309K and replace all the wheel bearings
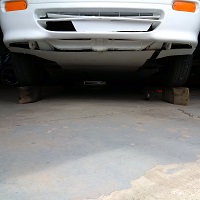
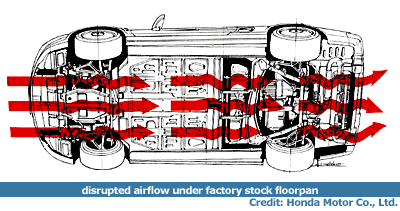
- build a belly pan to reduce air drag on the underside of the car
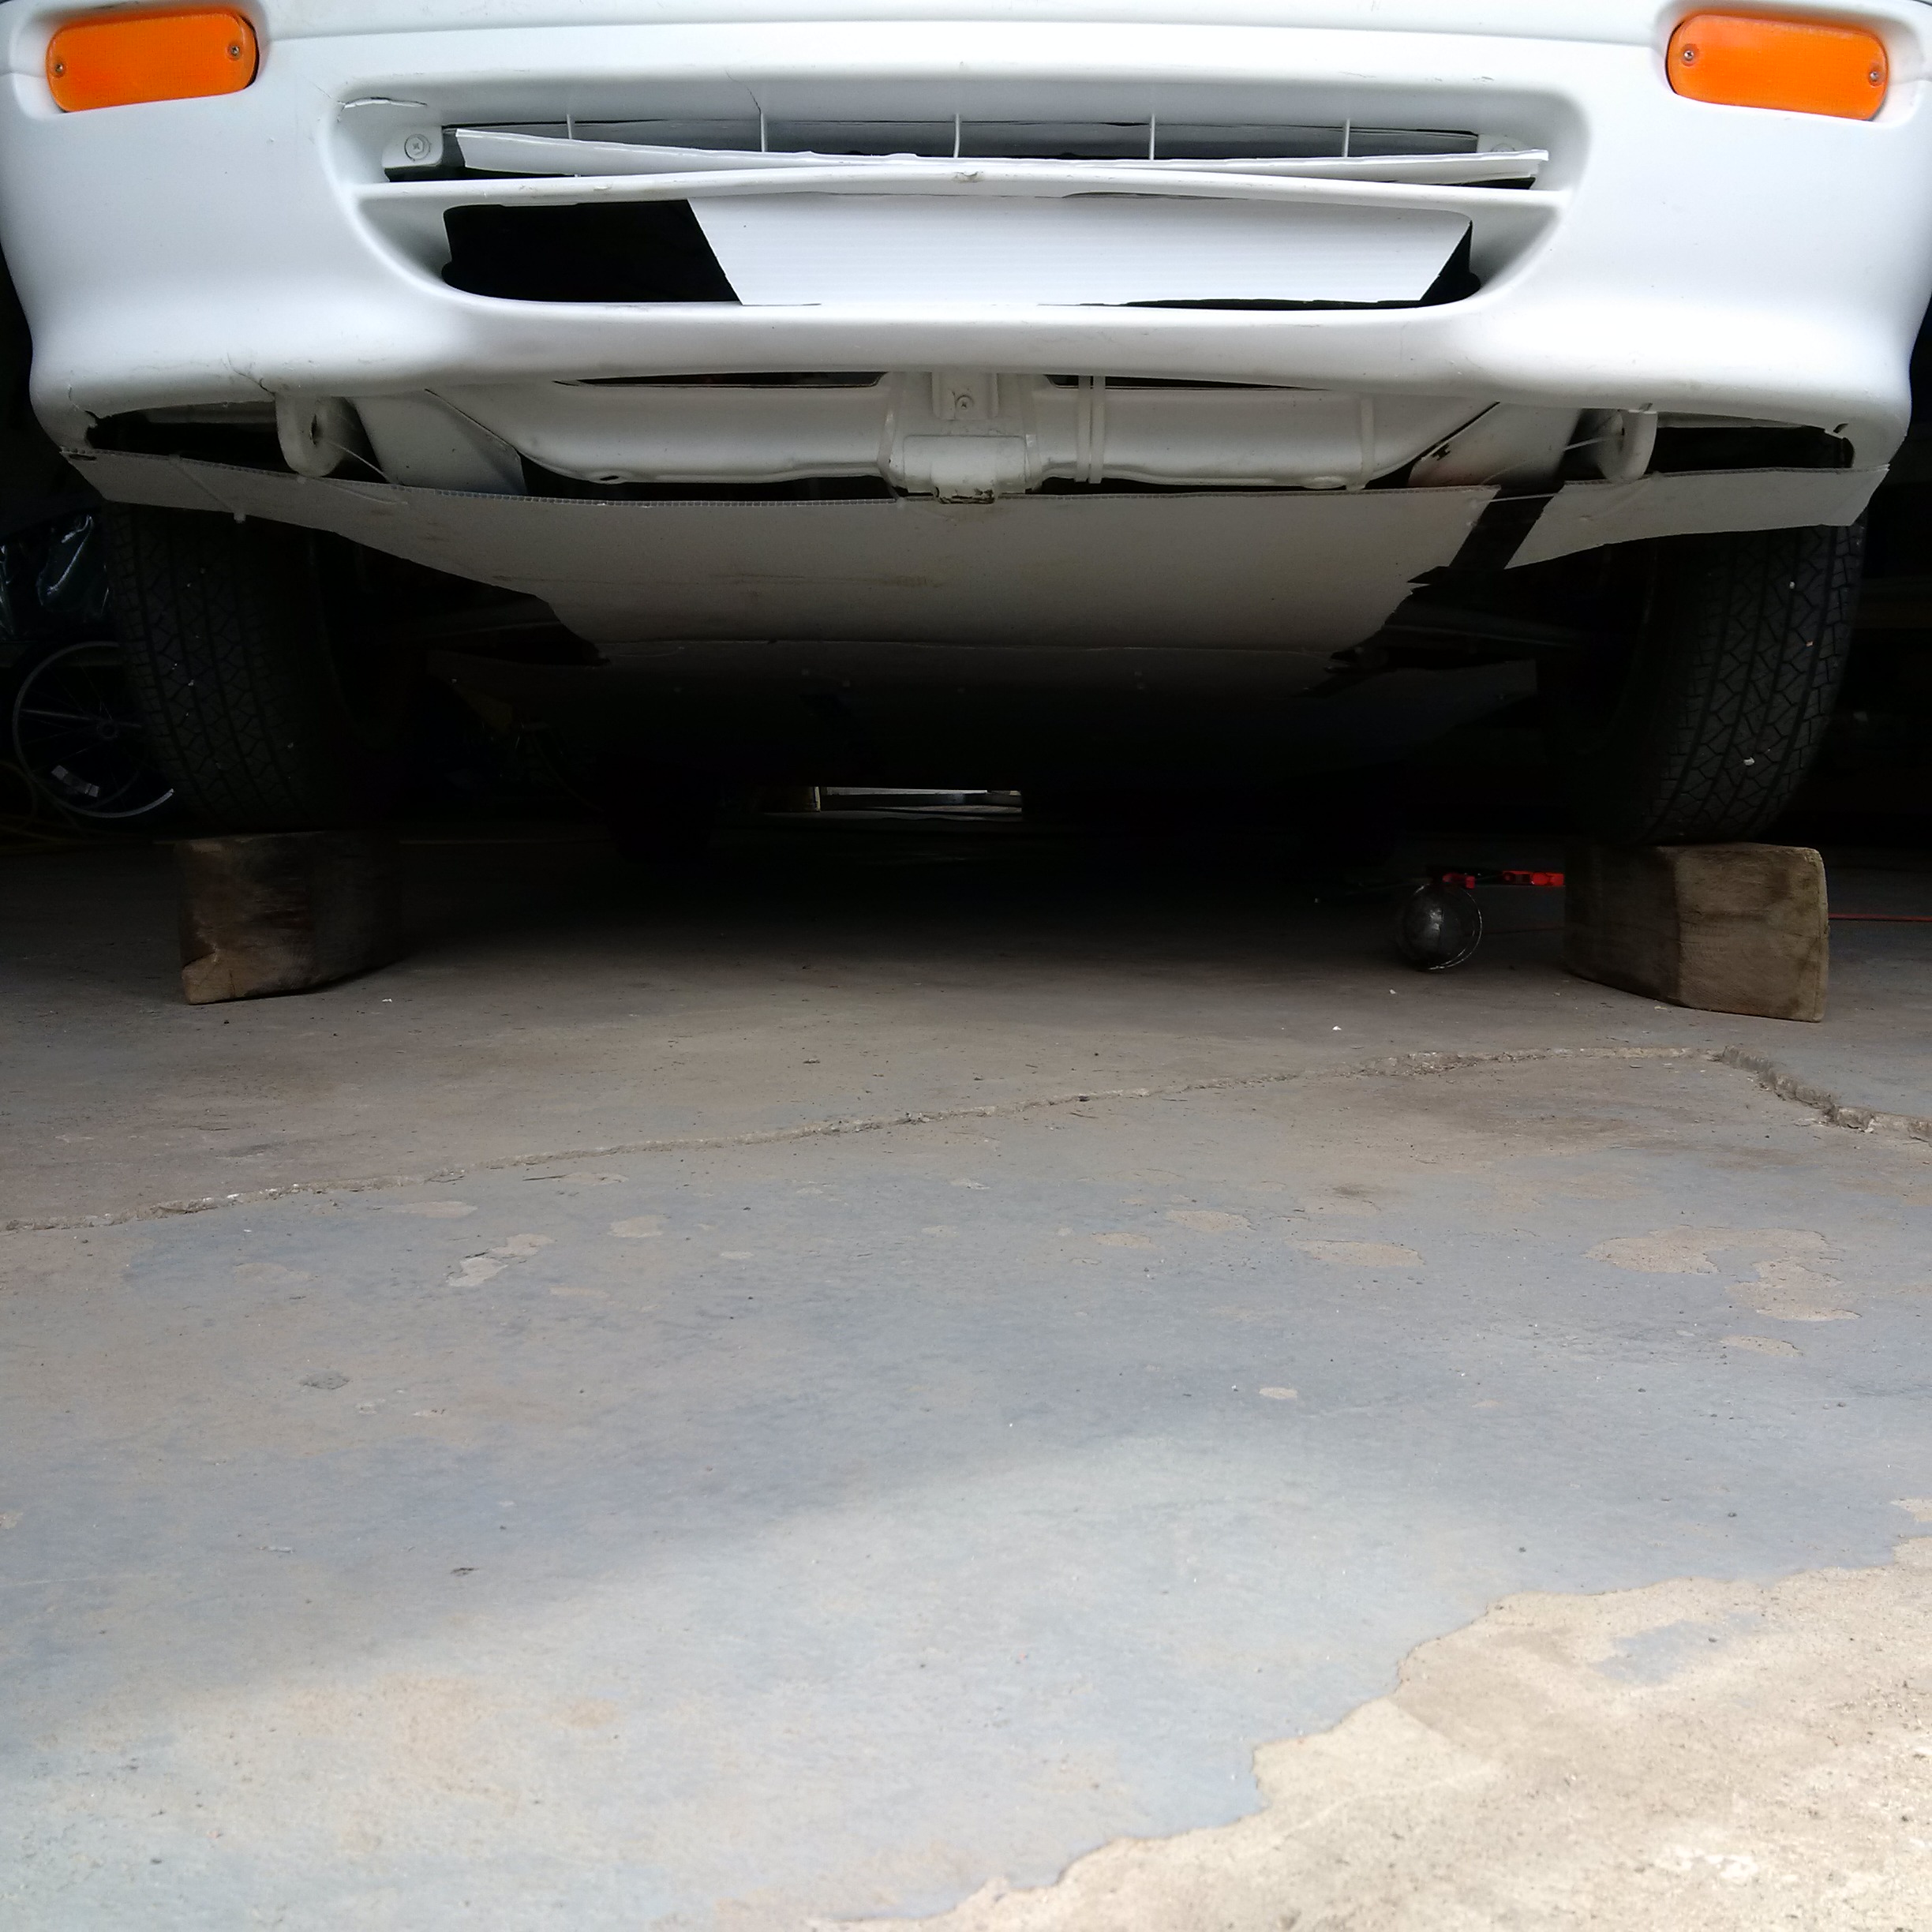
- fix up the front bumper damage
- close up all the front bumper and grille venting
- setup some type of ceramic heater or in-line car warmer w/ original heater core for winter
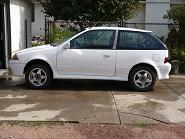
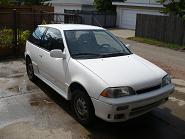
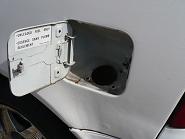
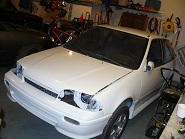
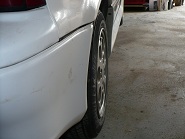
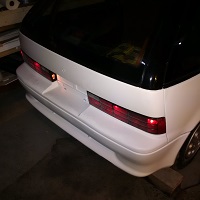
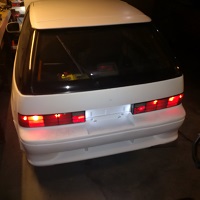
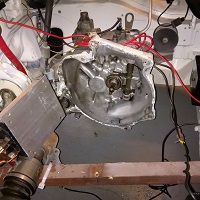
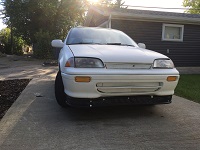
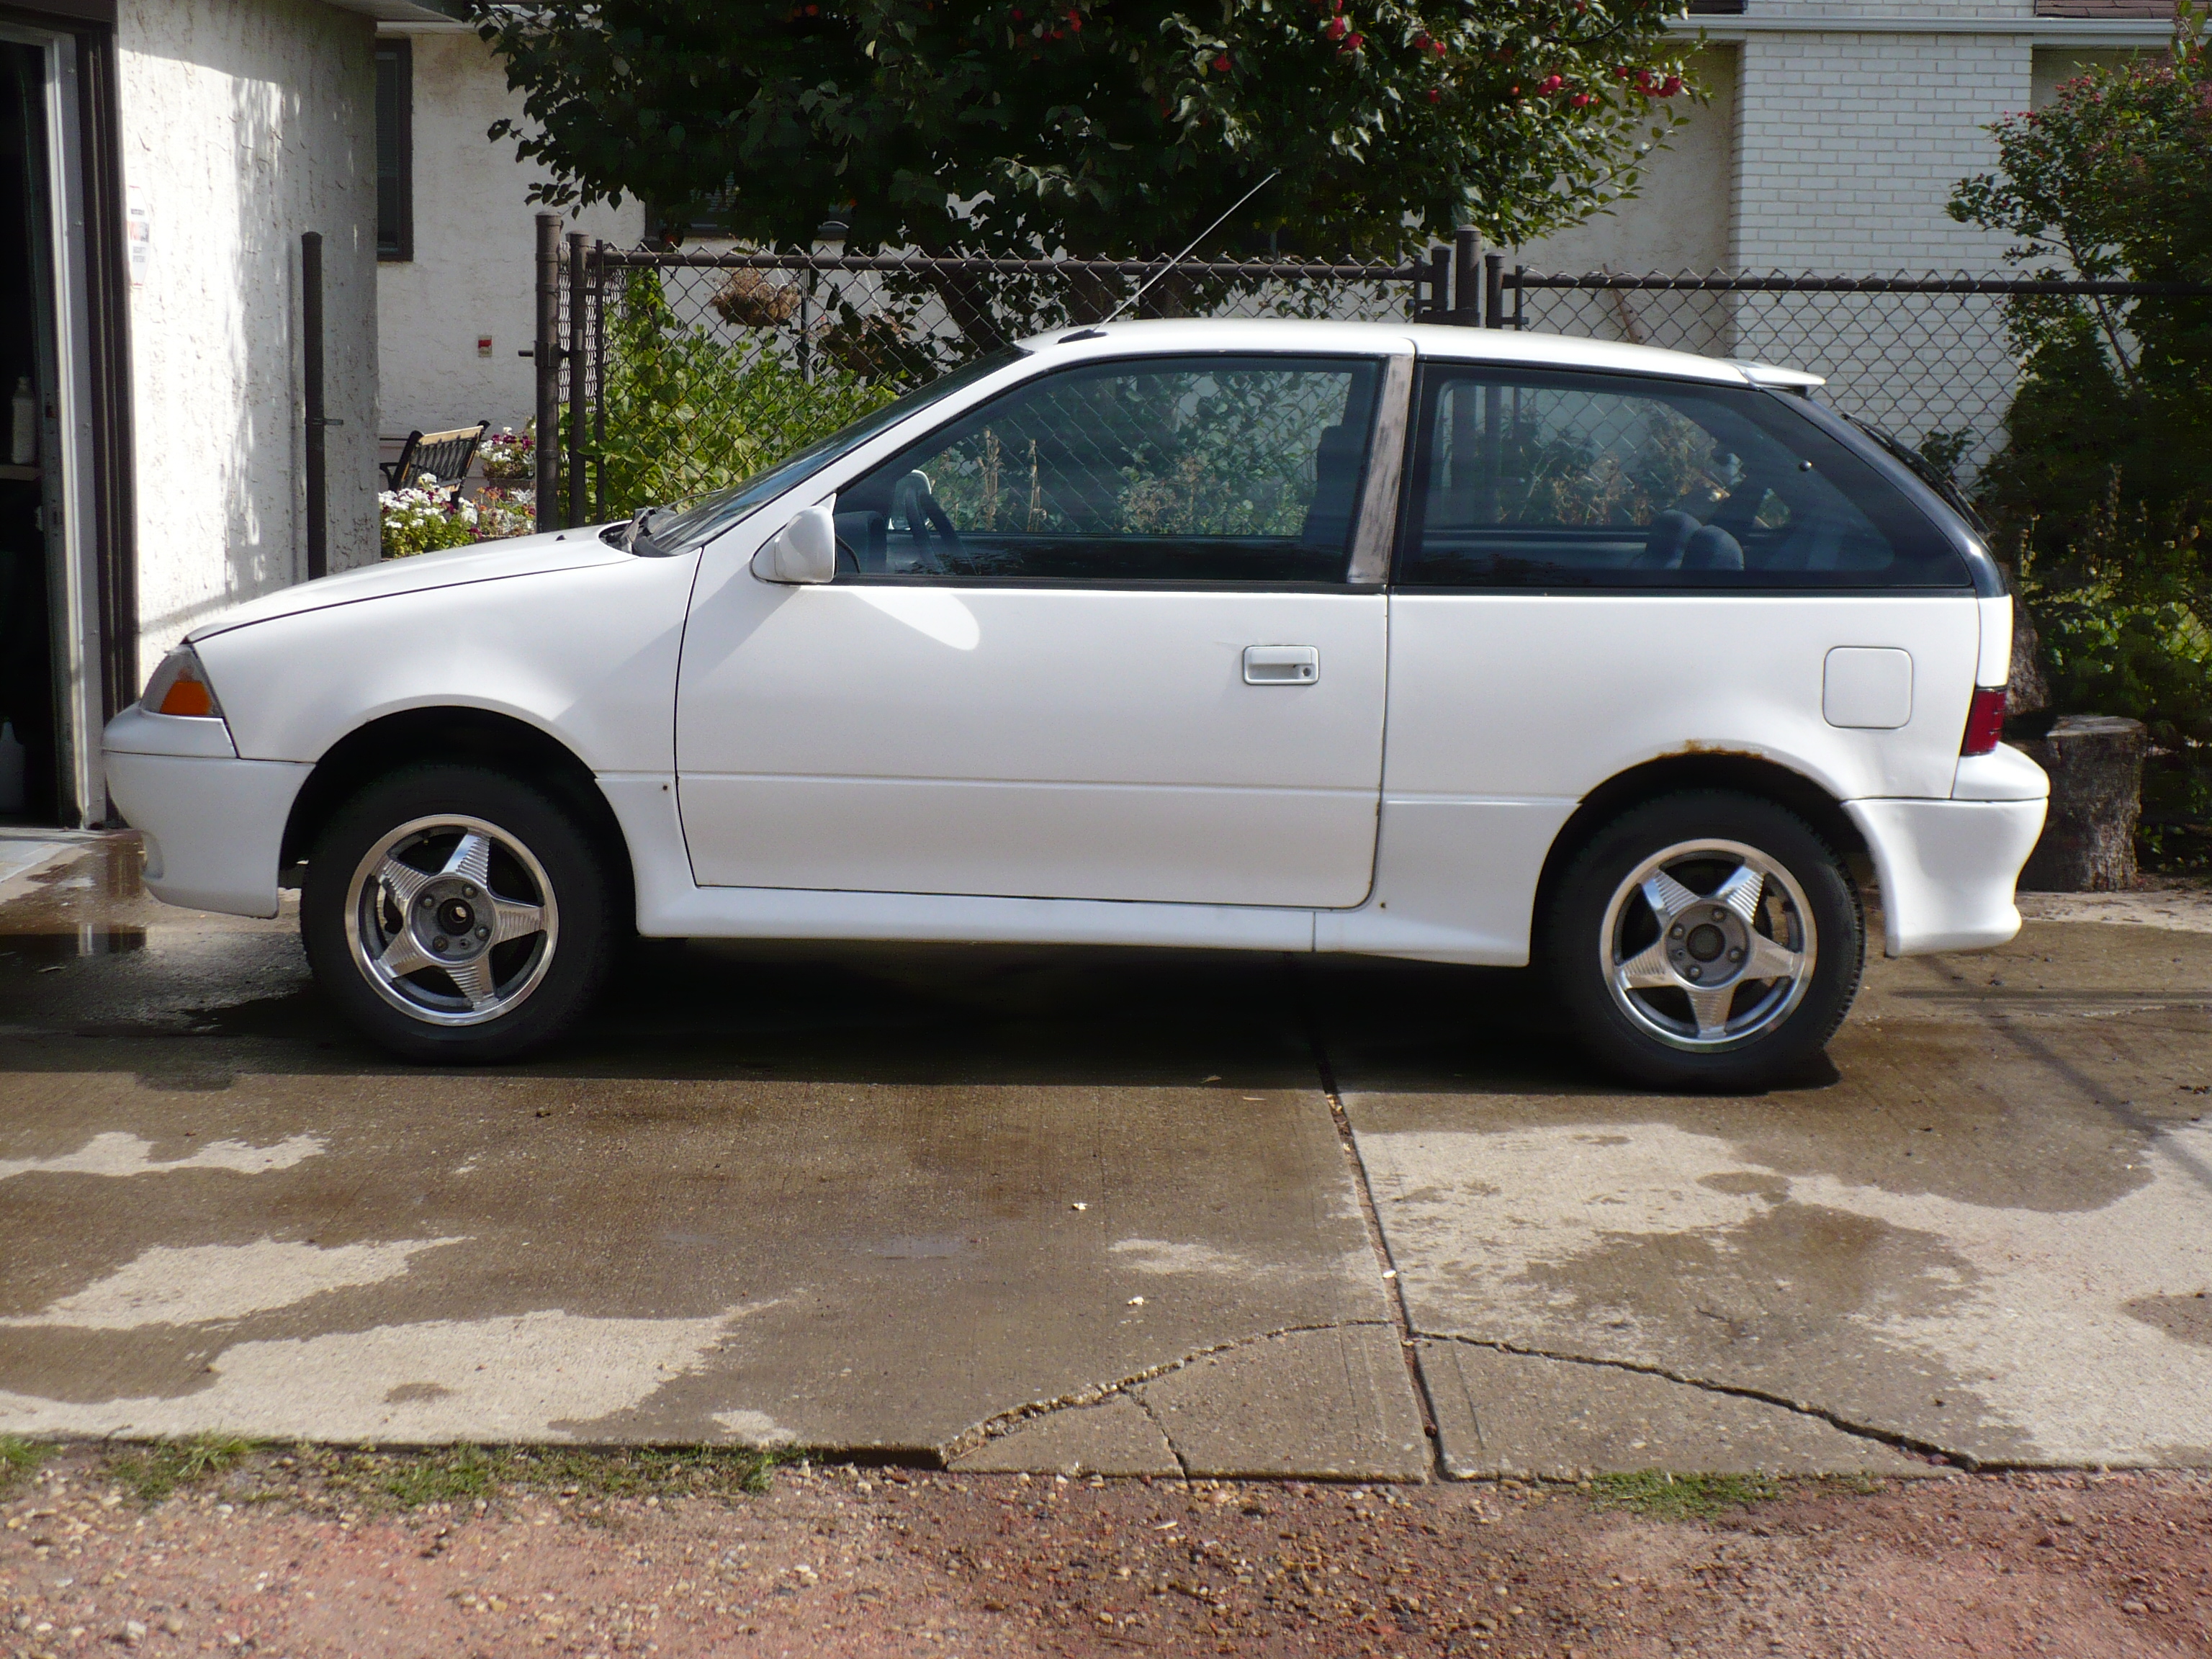
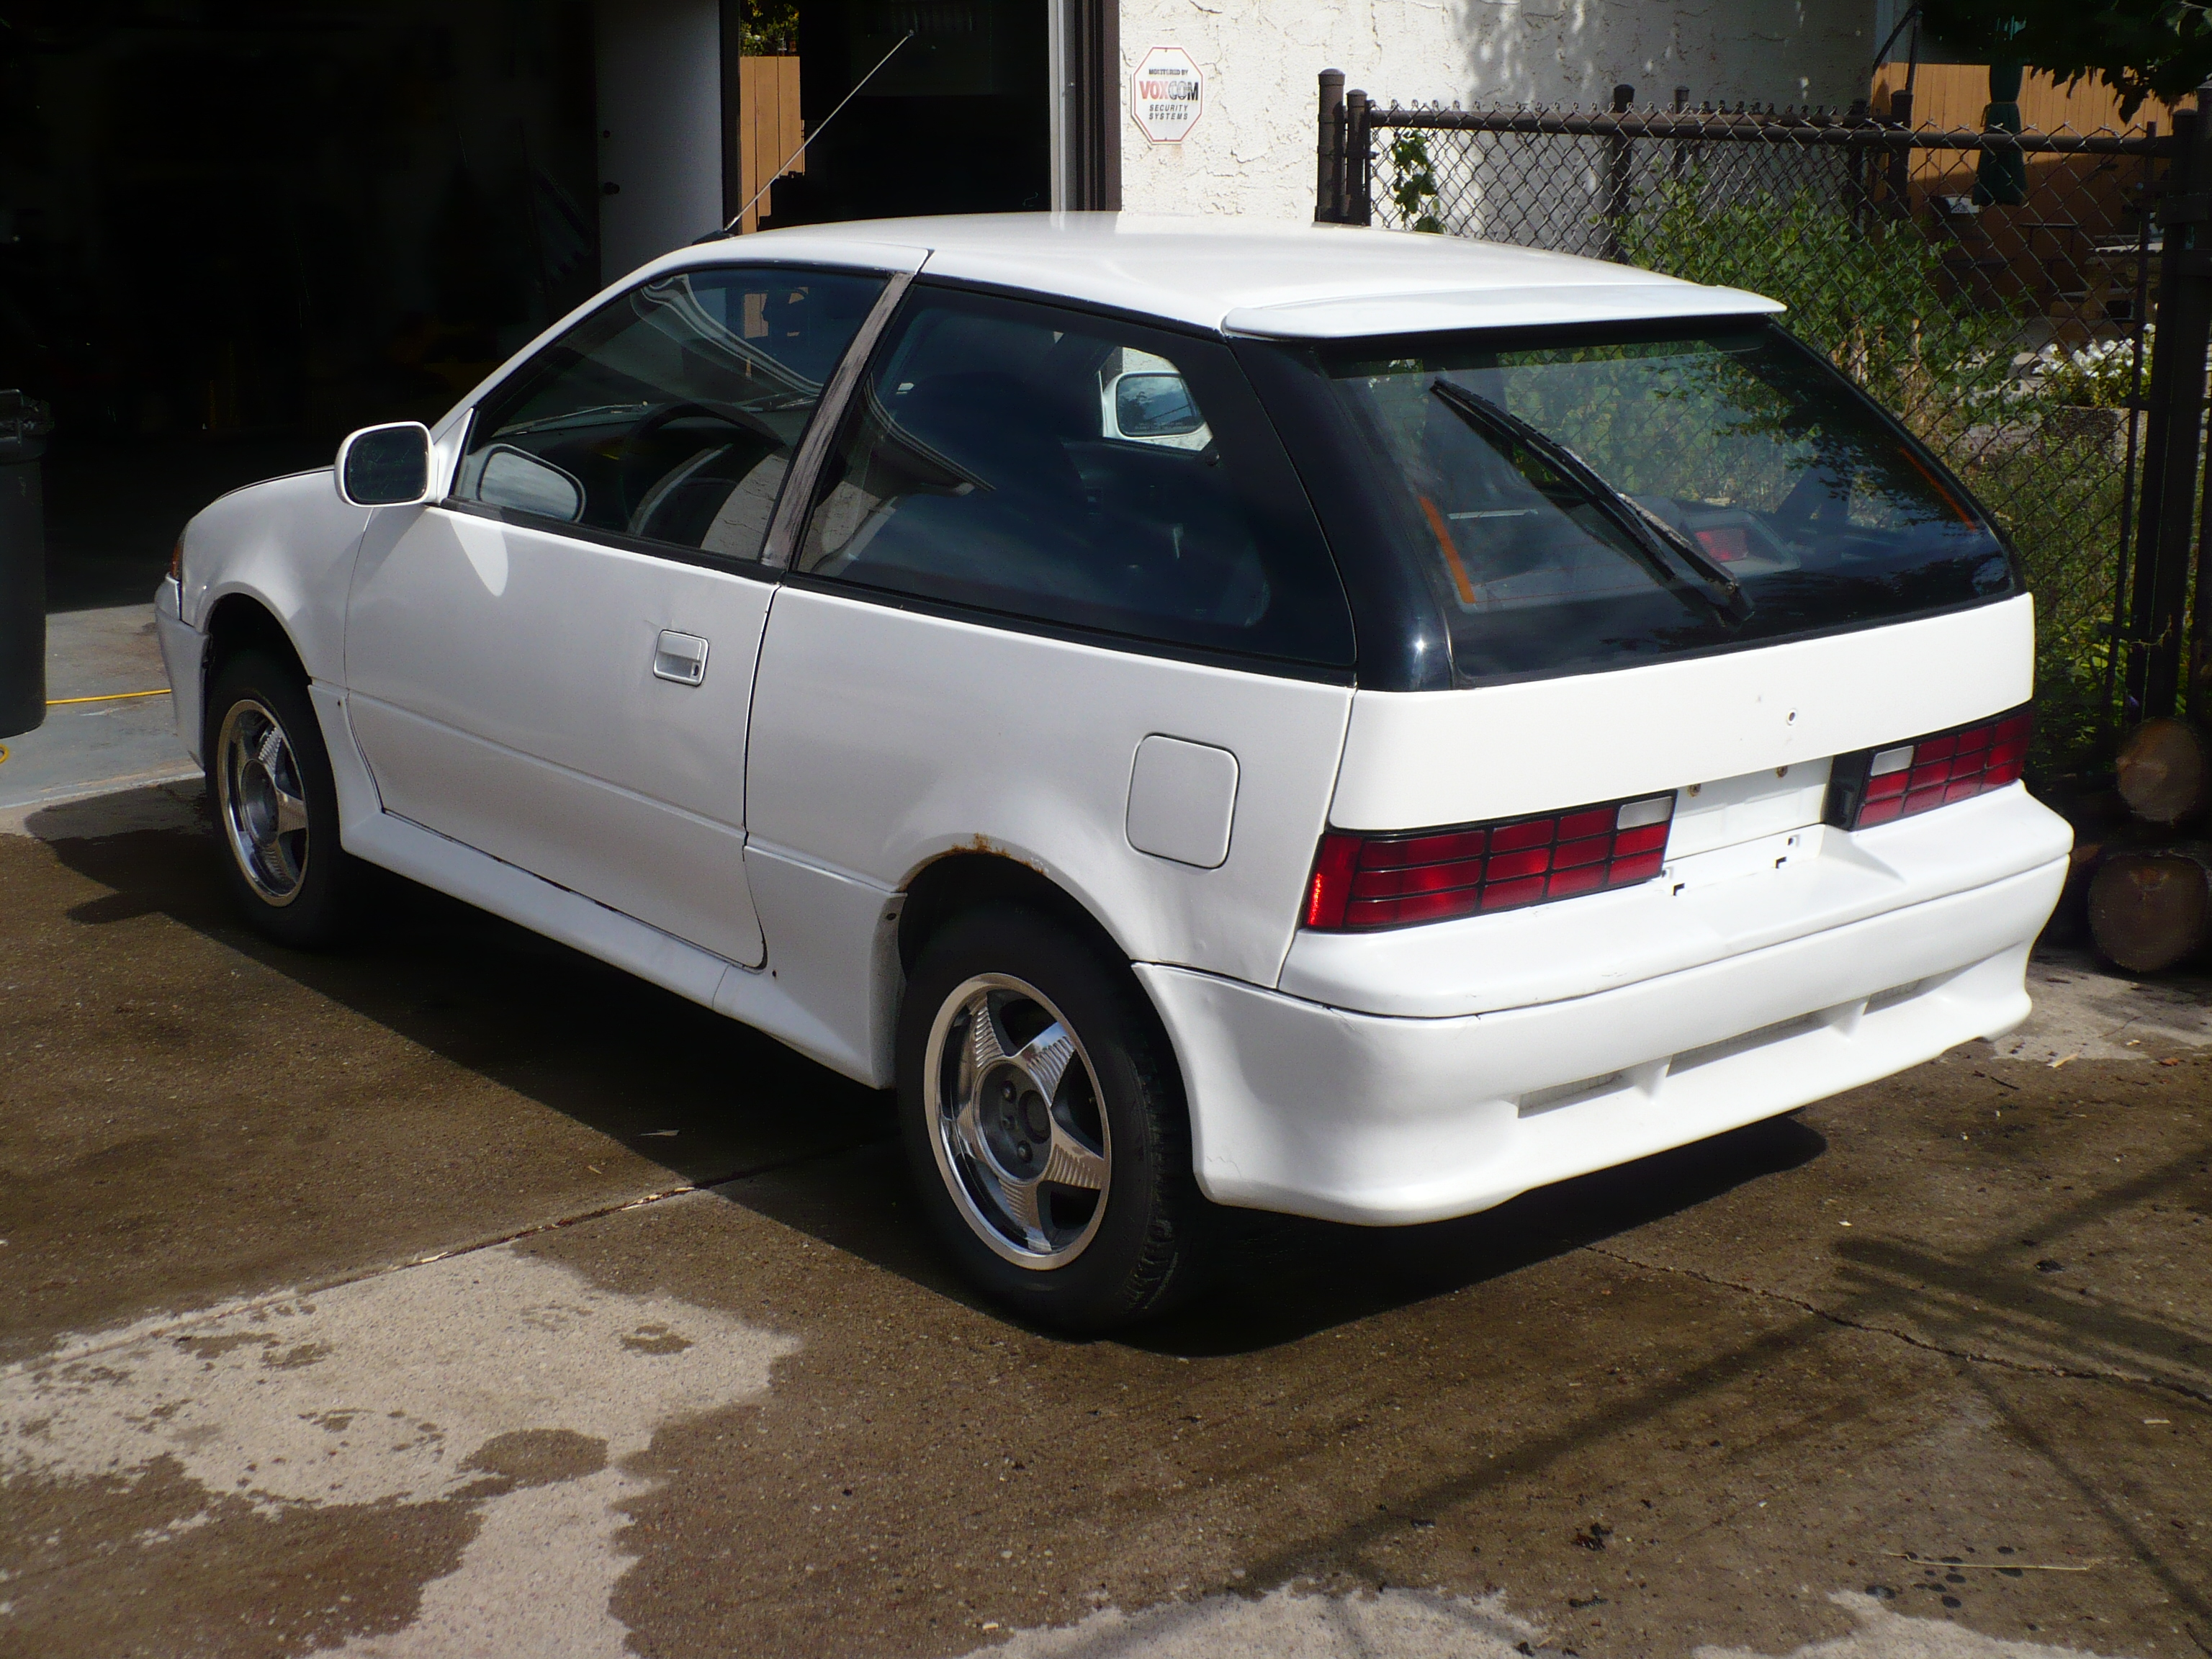
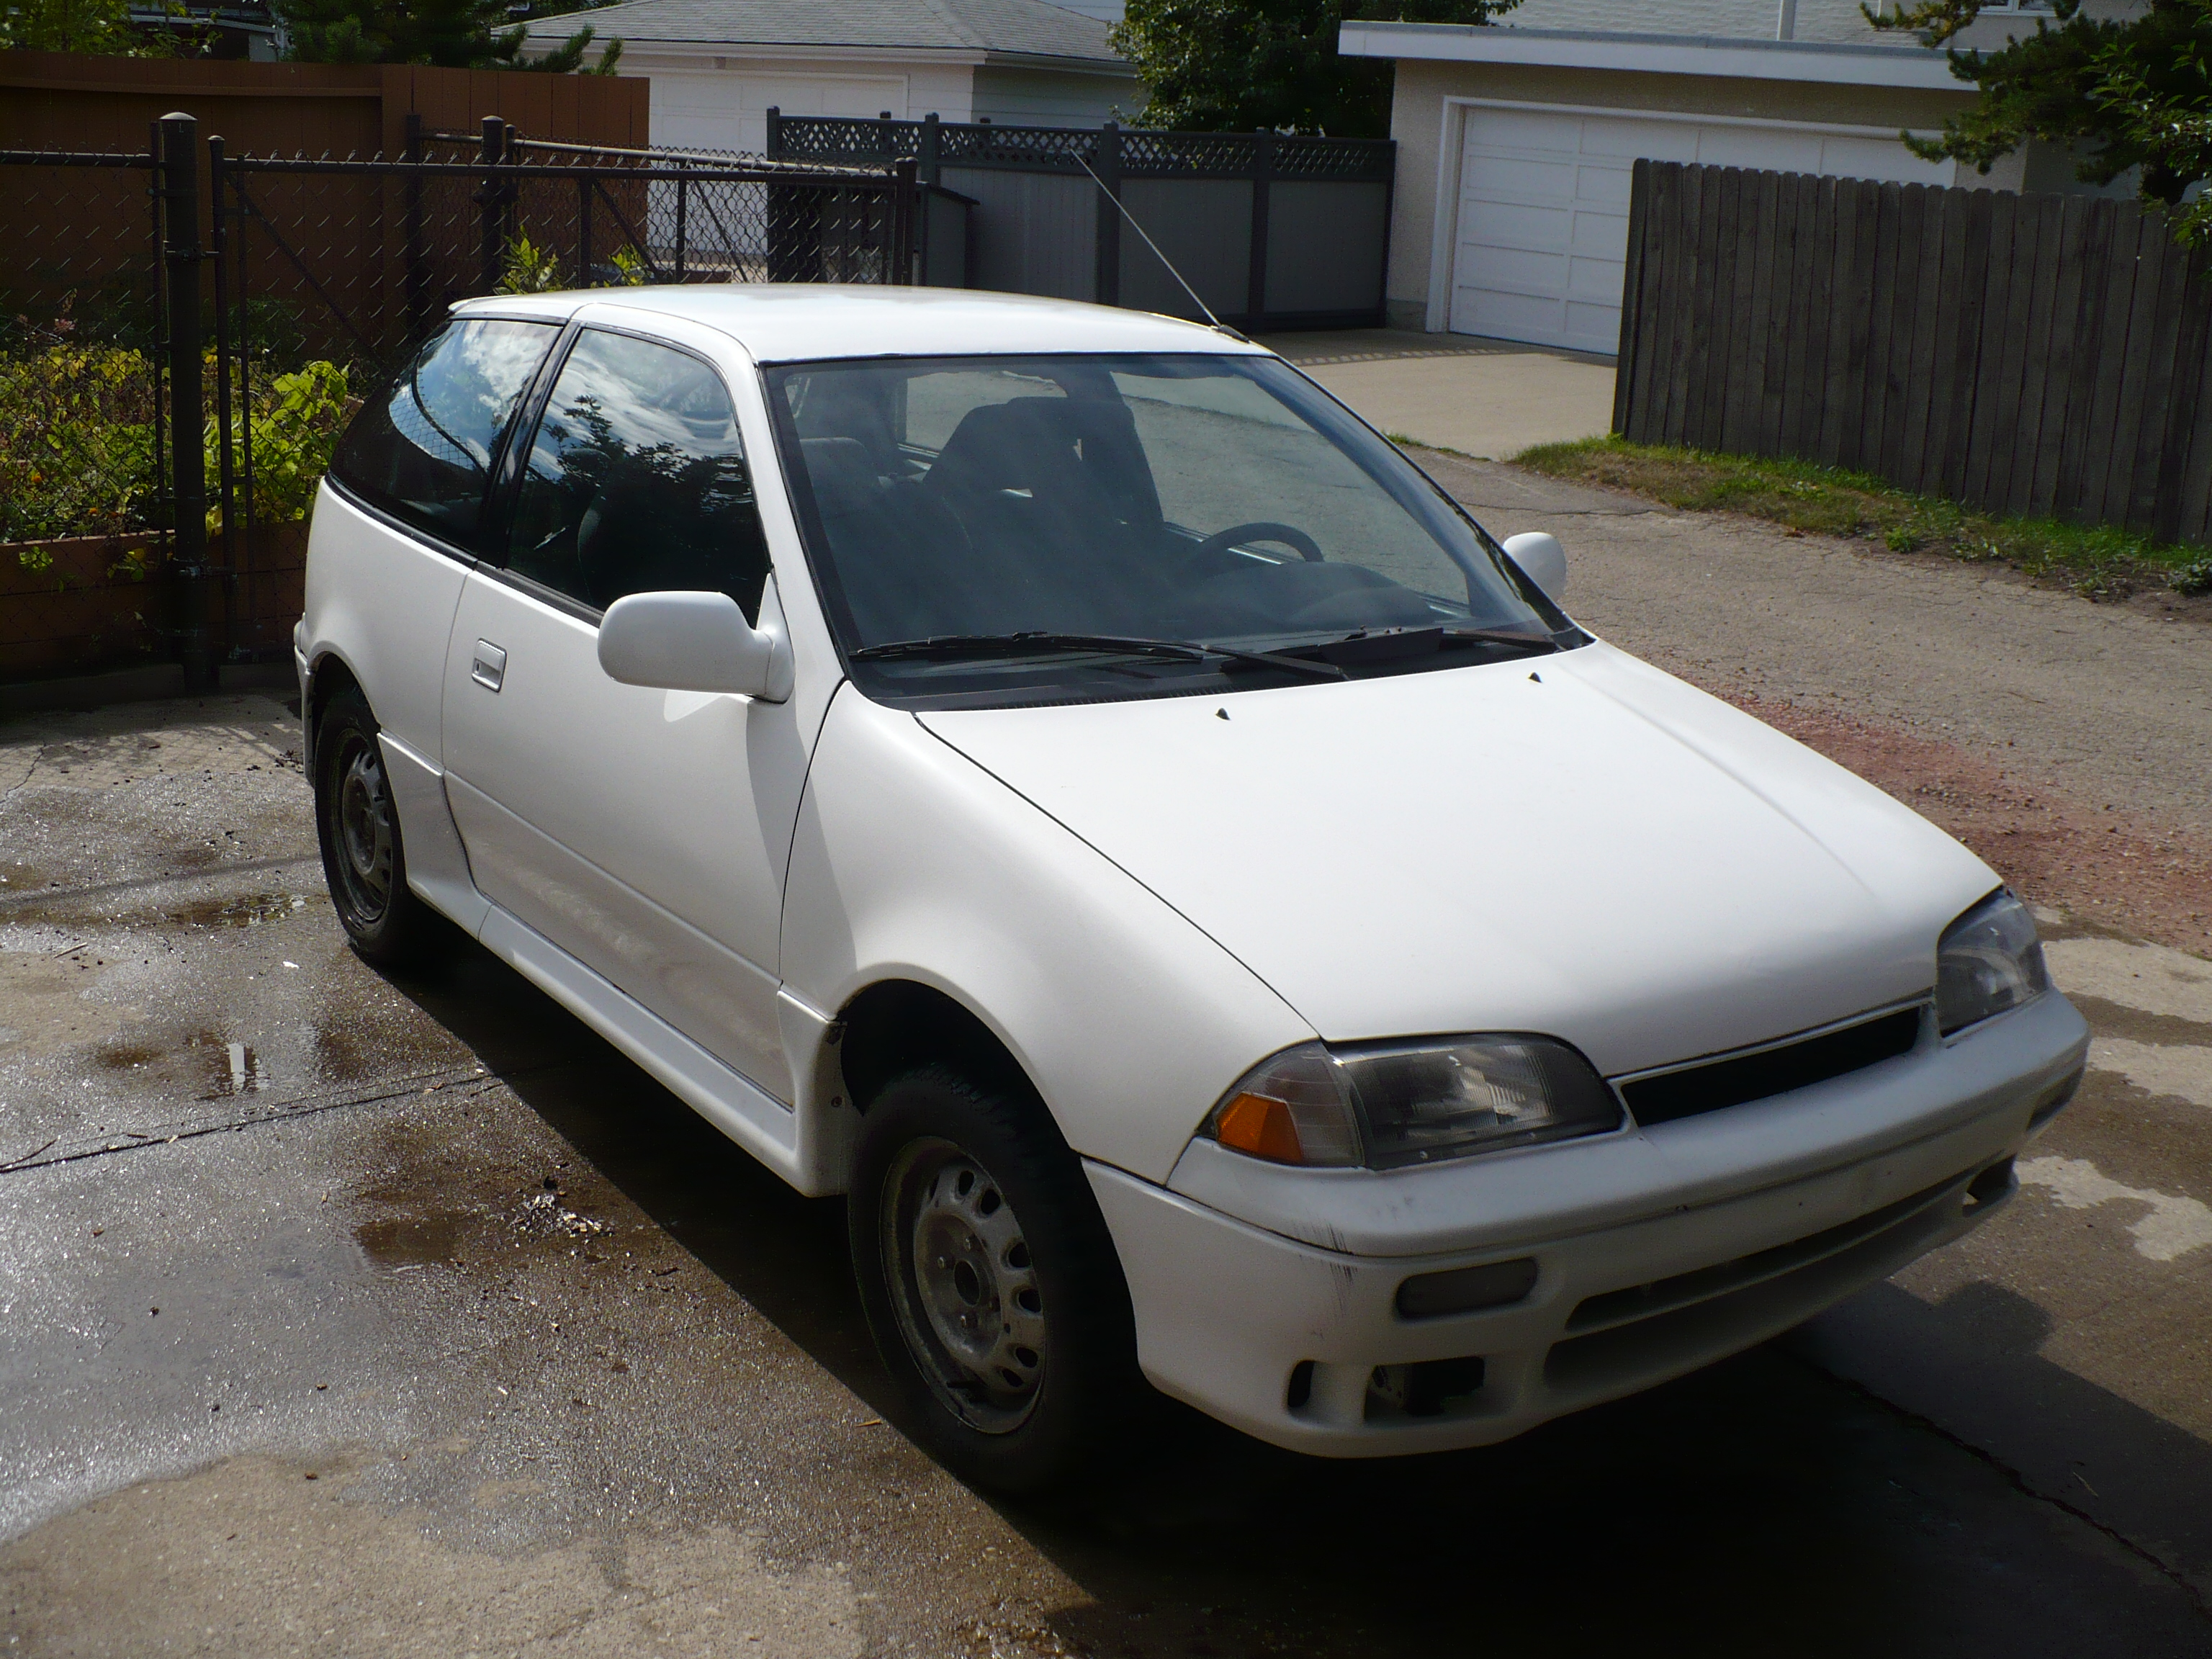
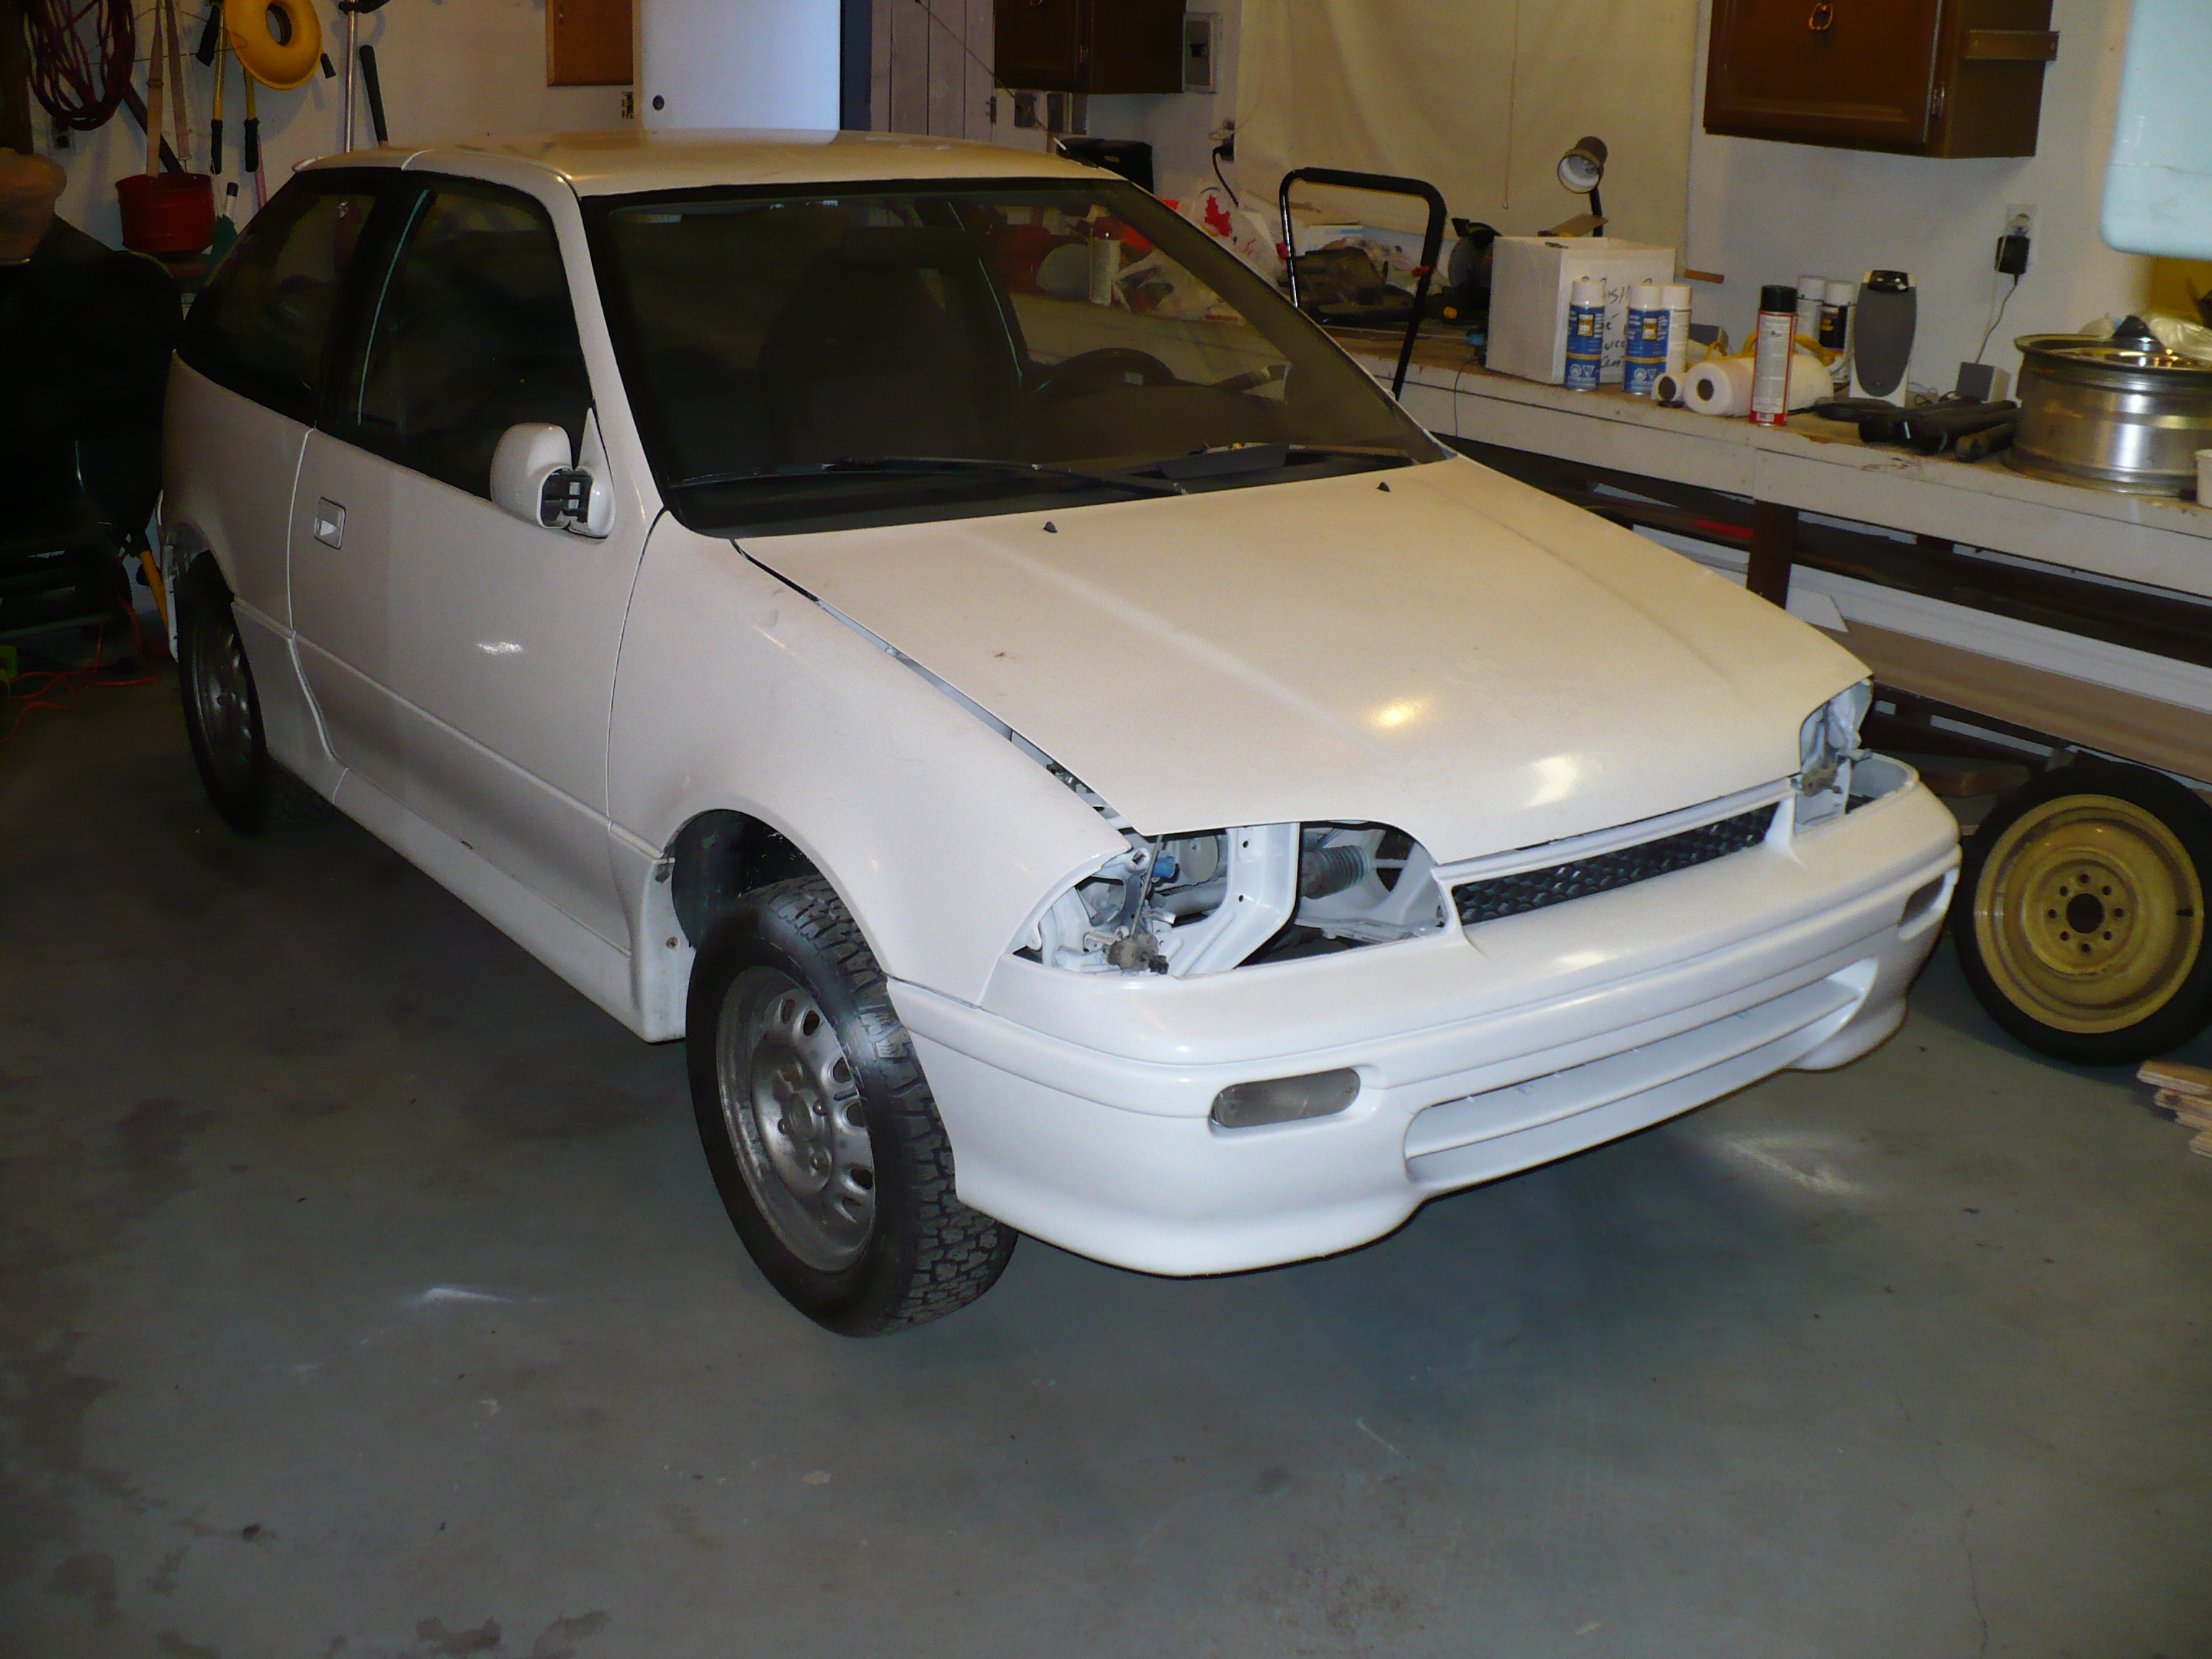
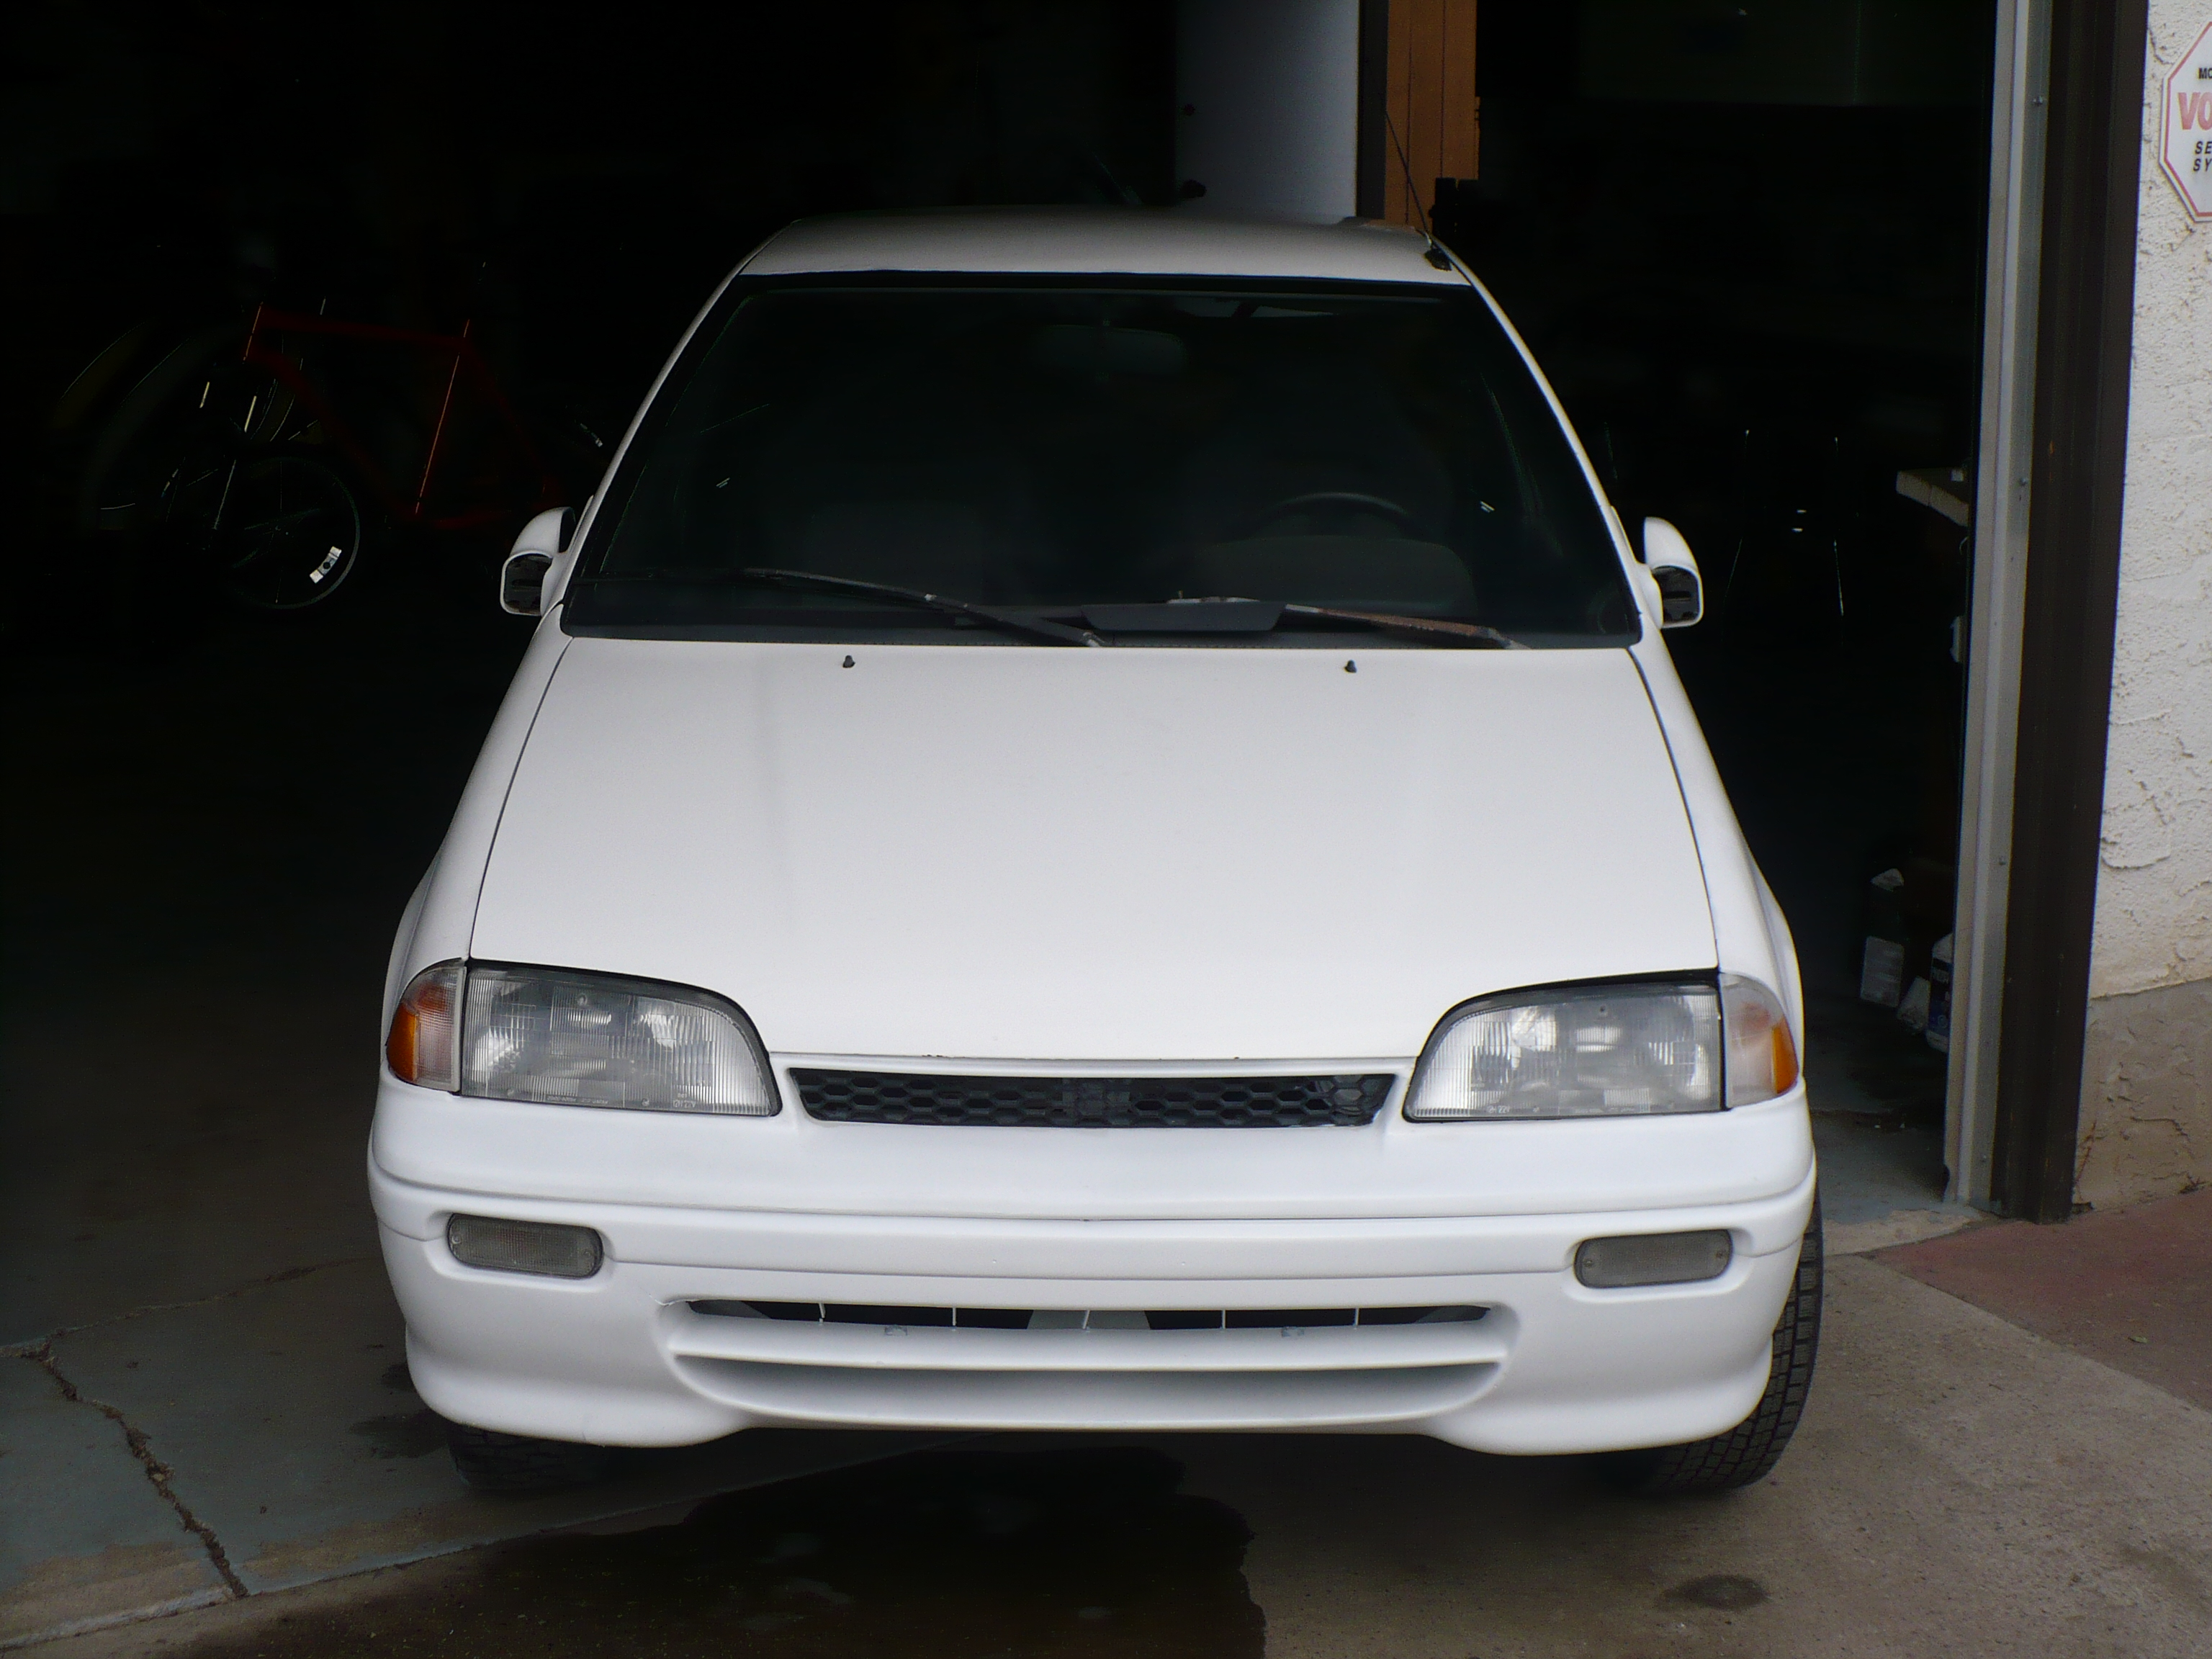
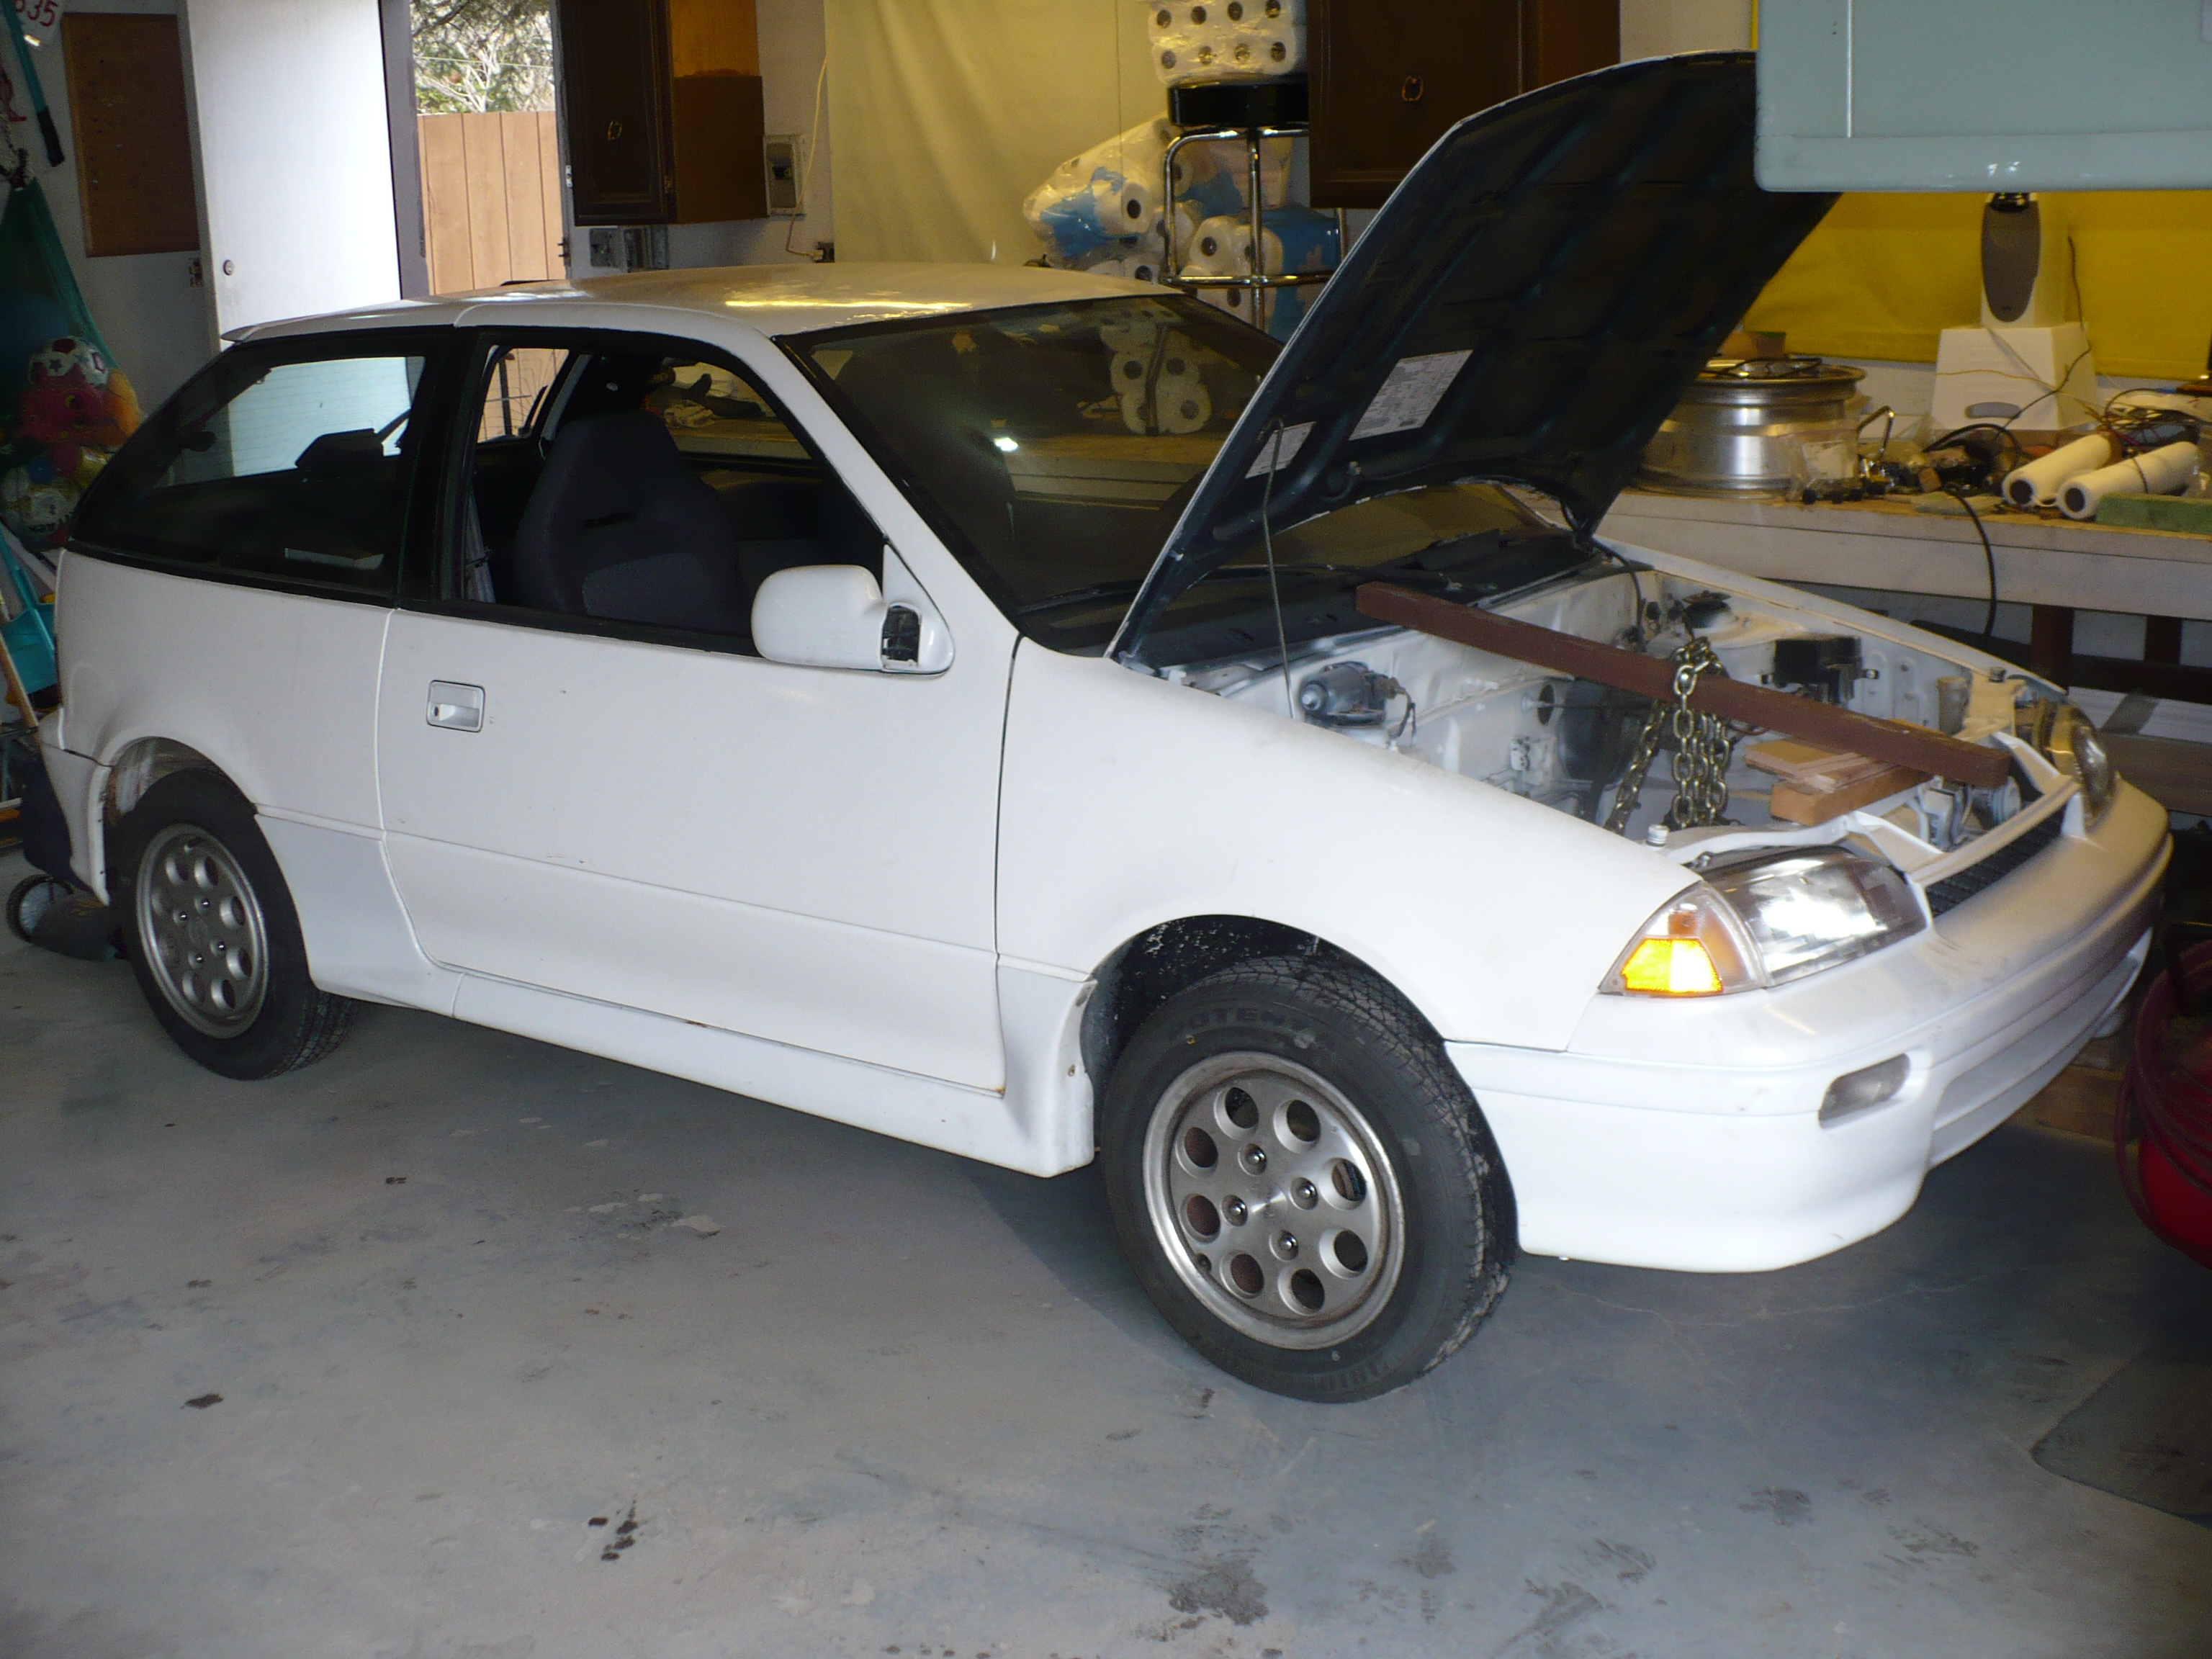
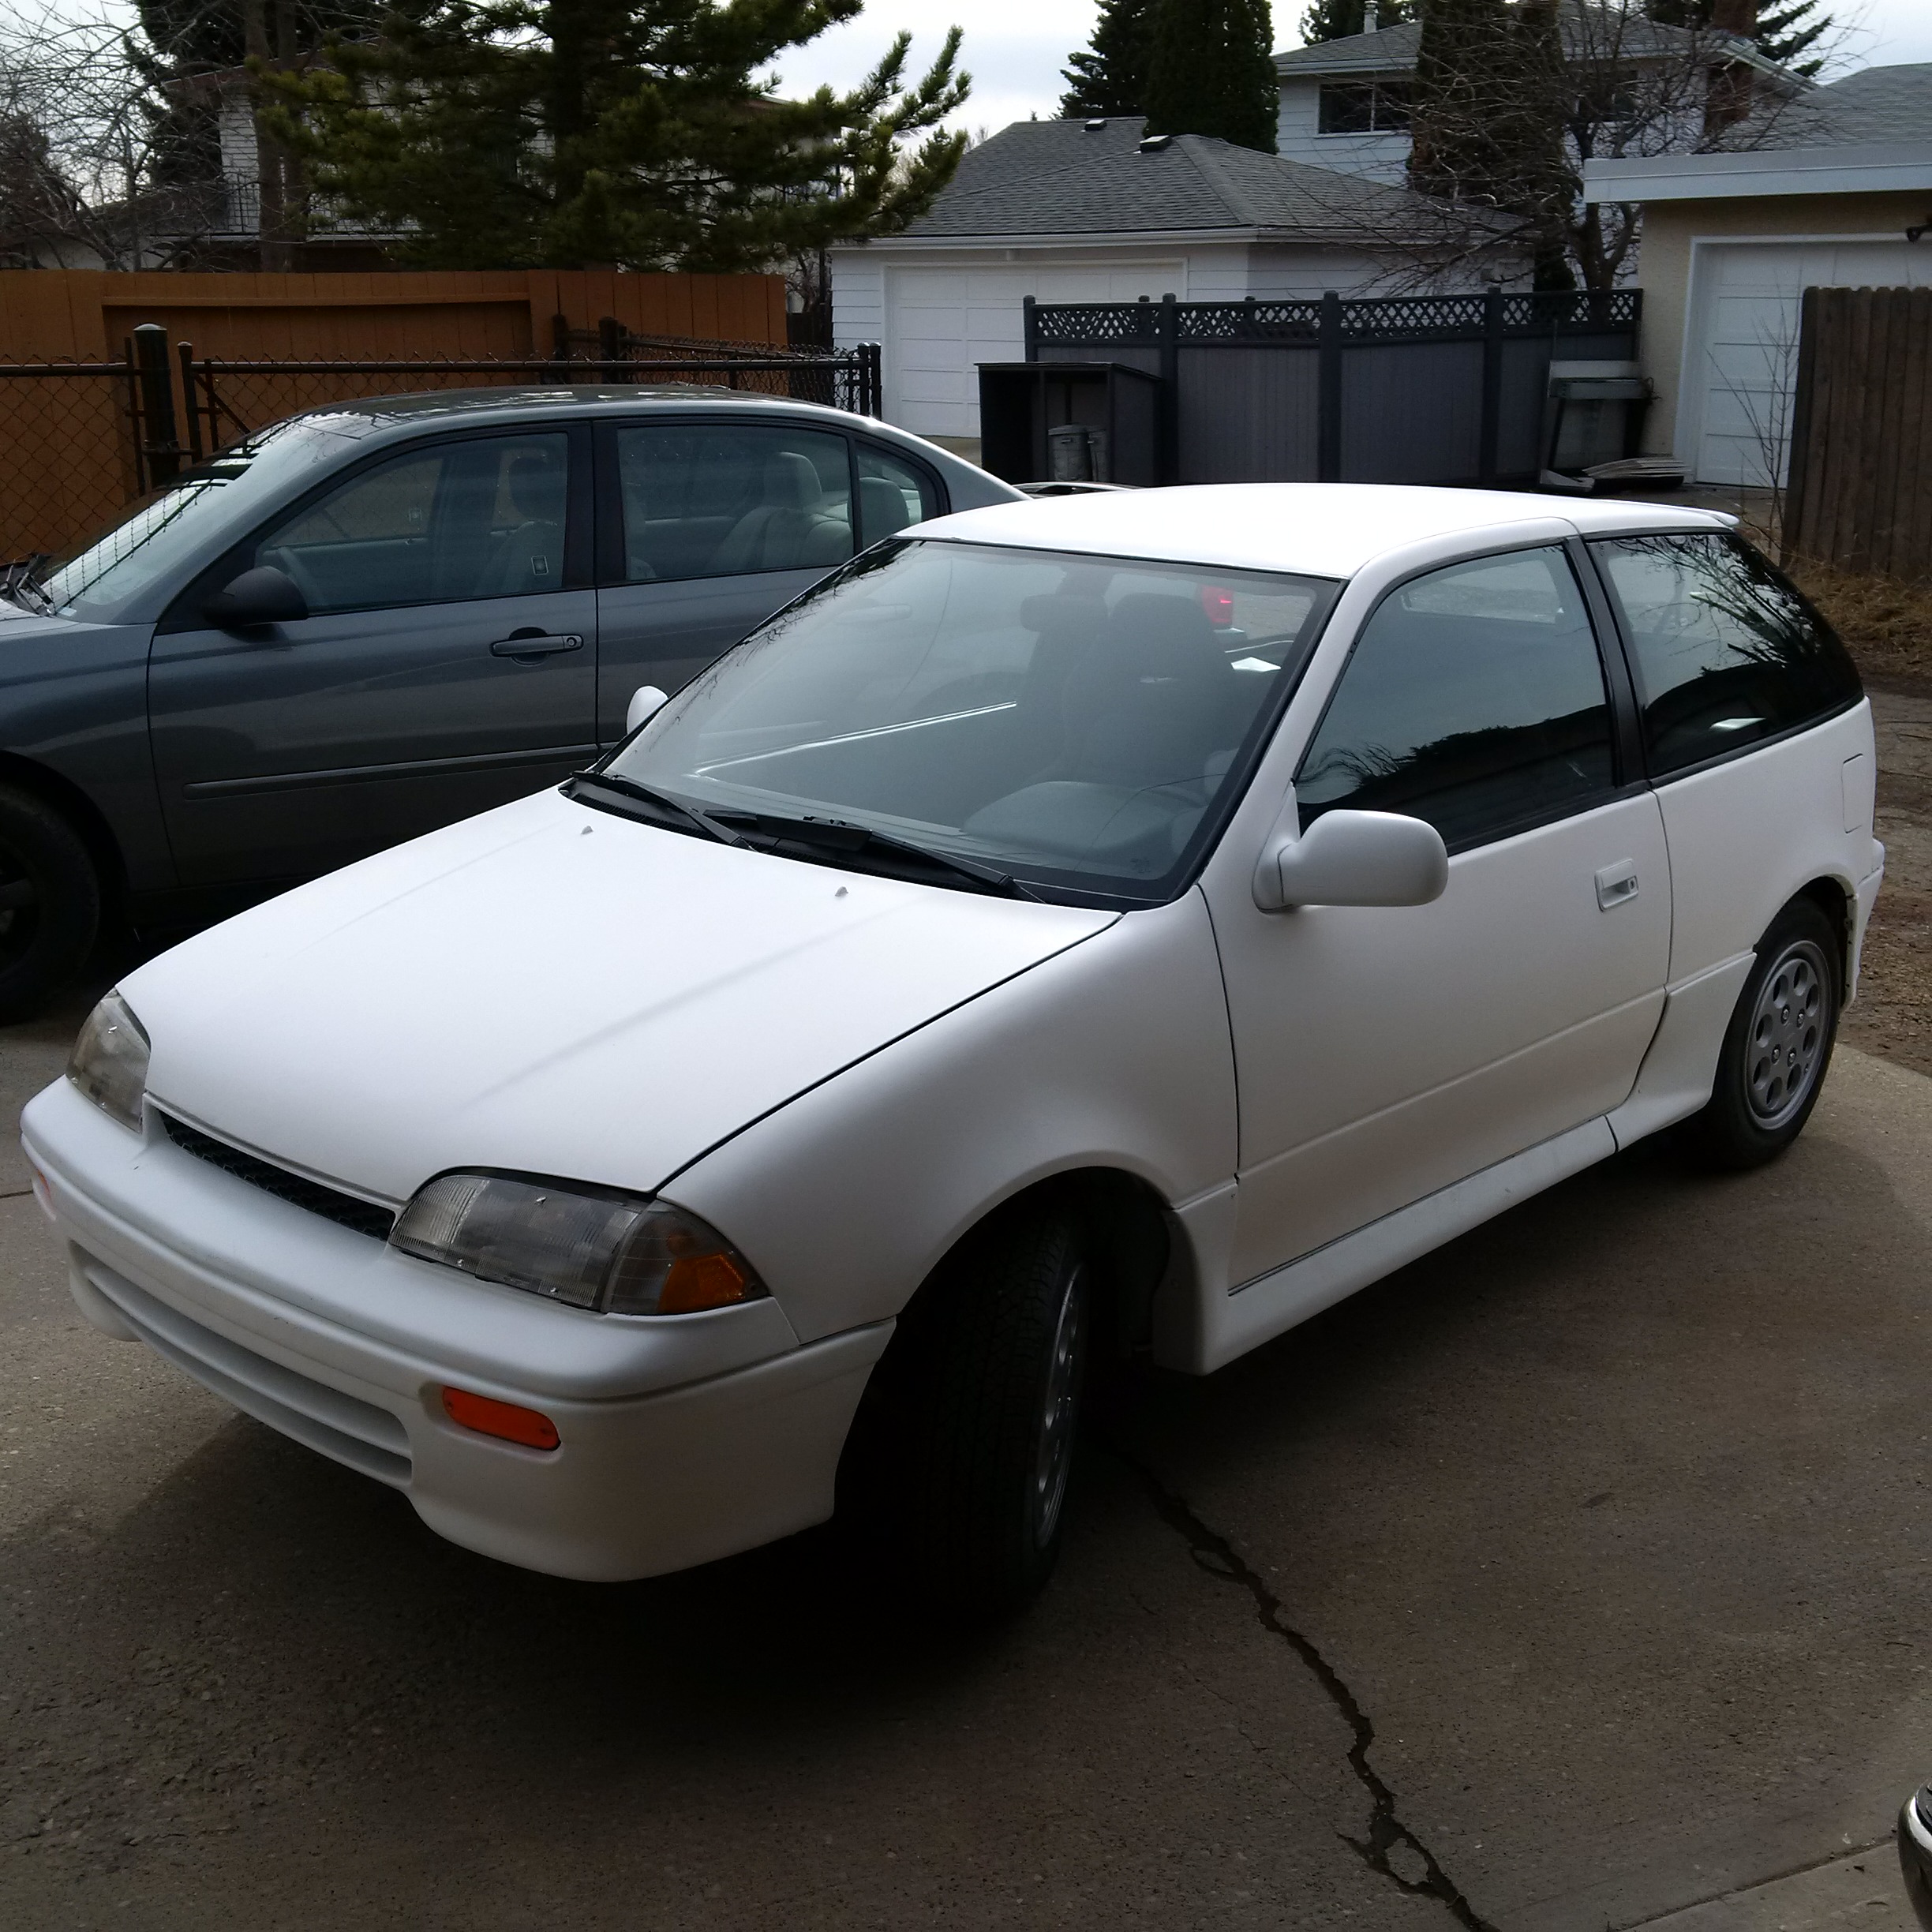
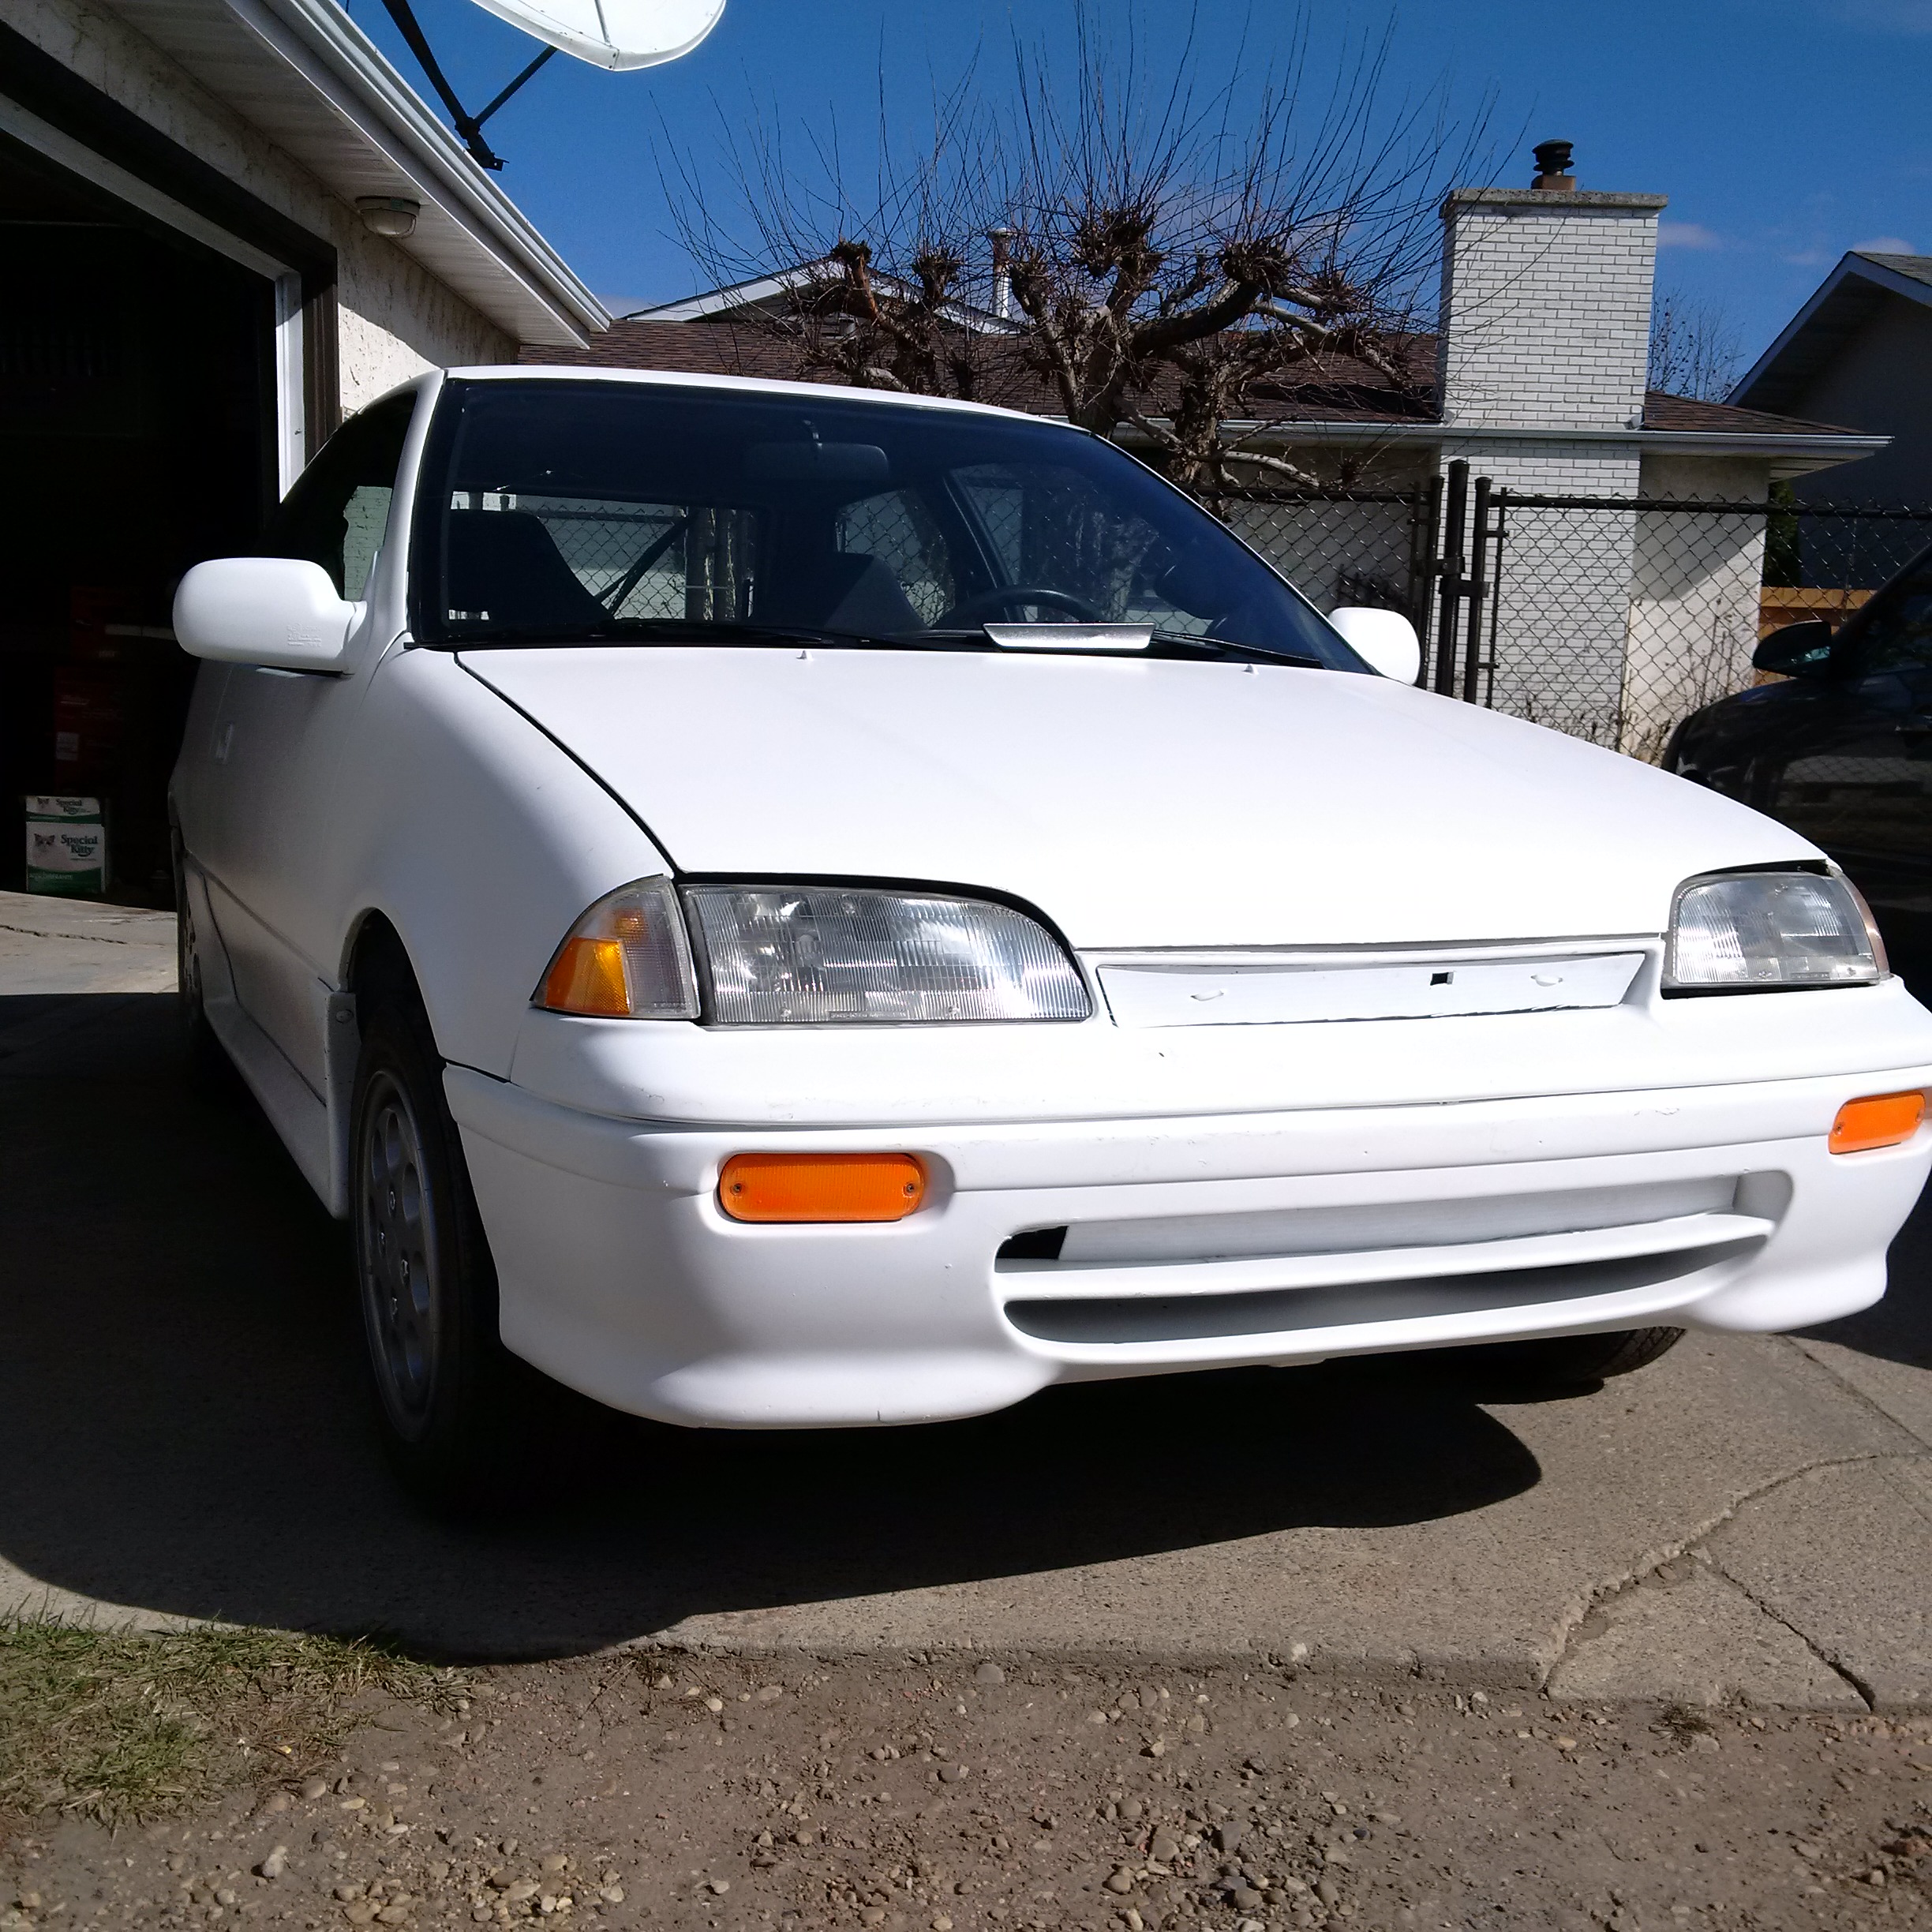
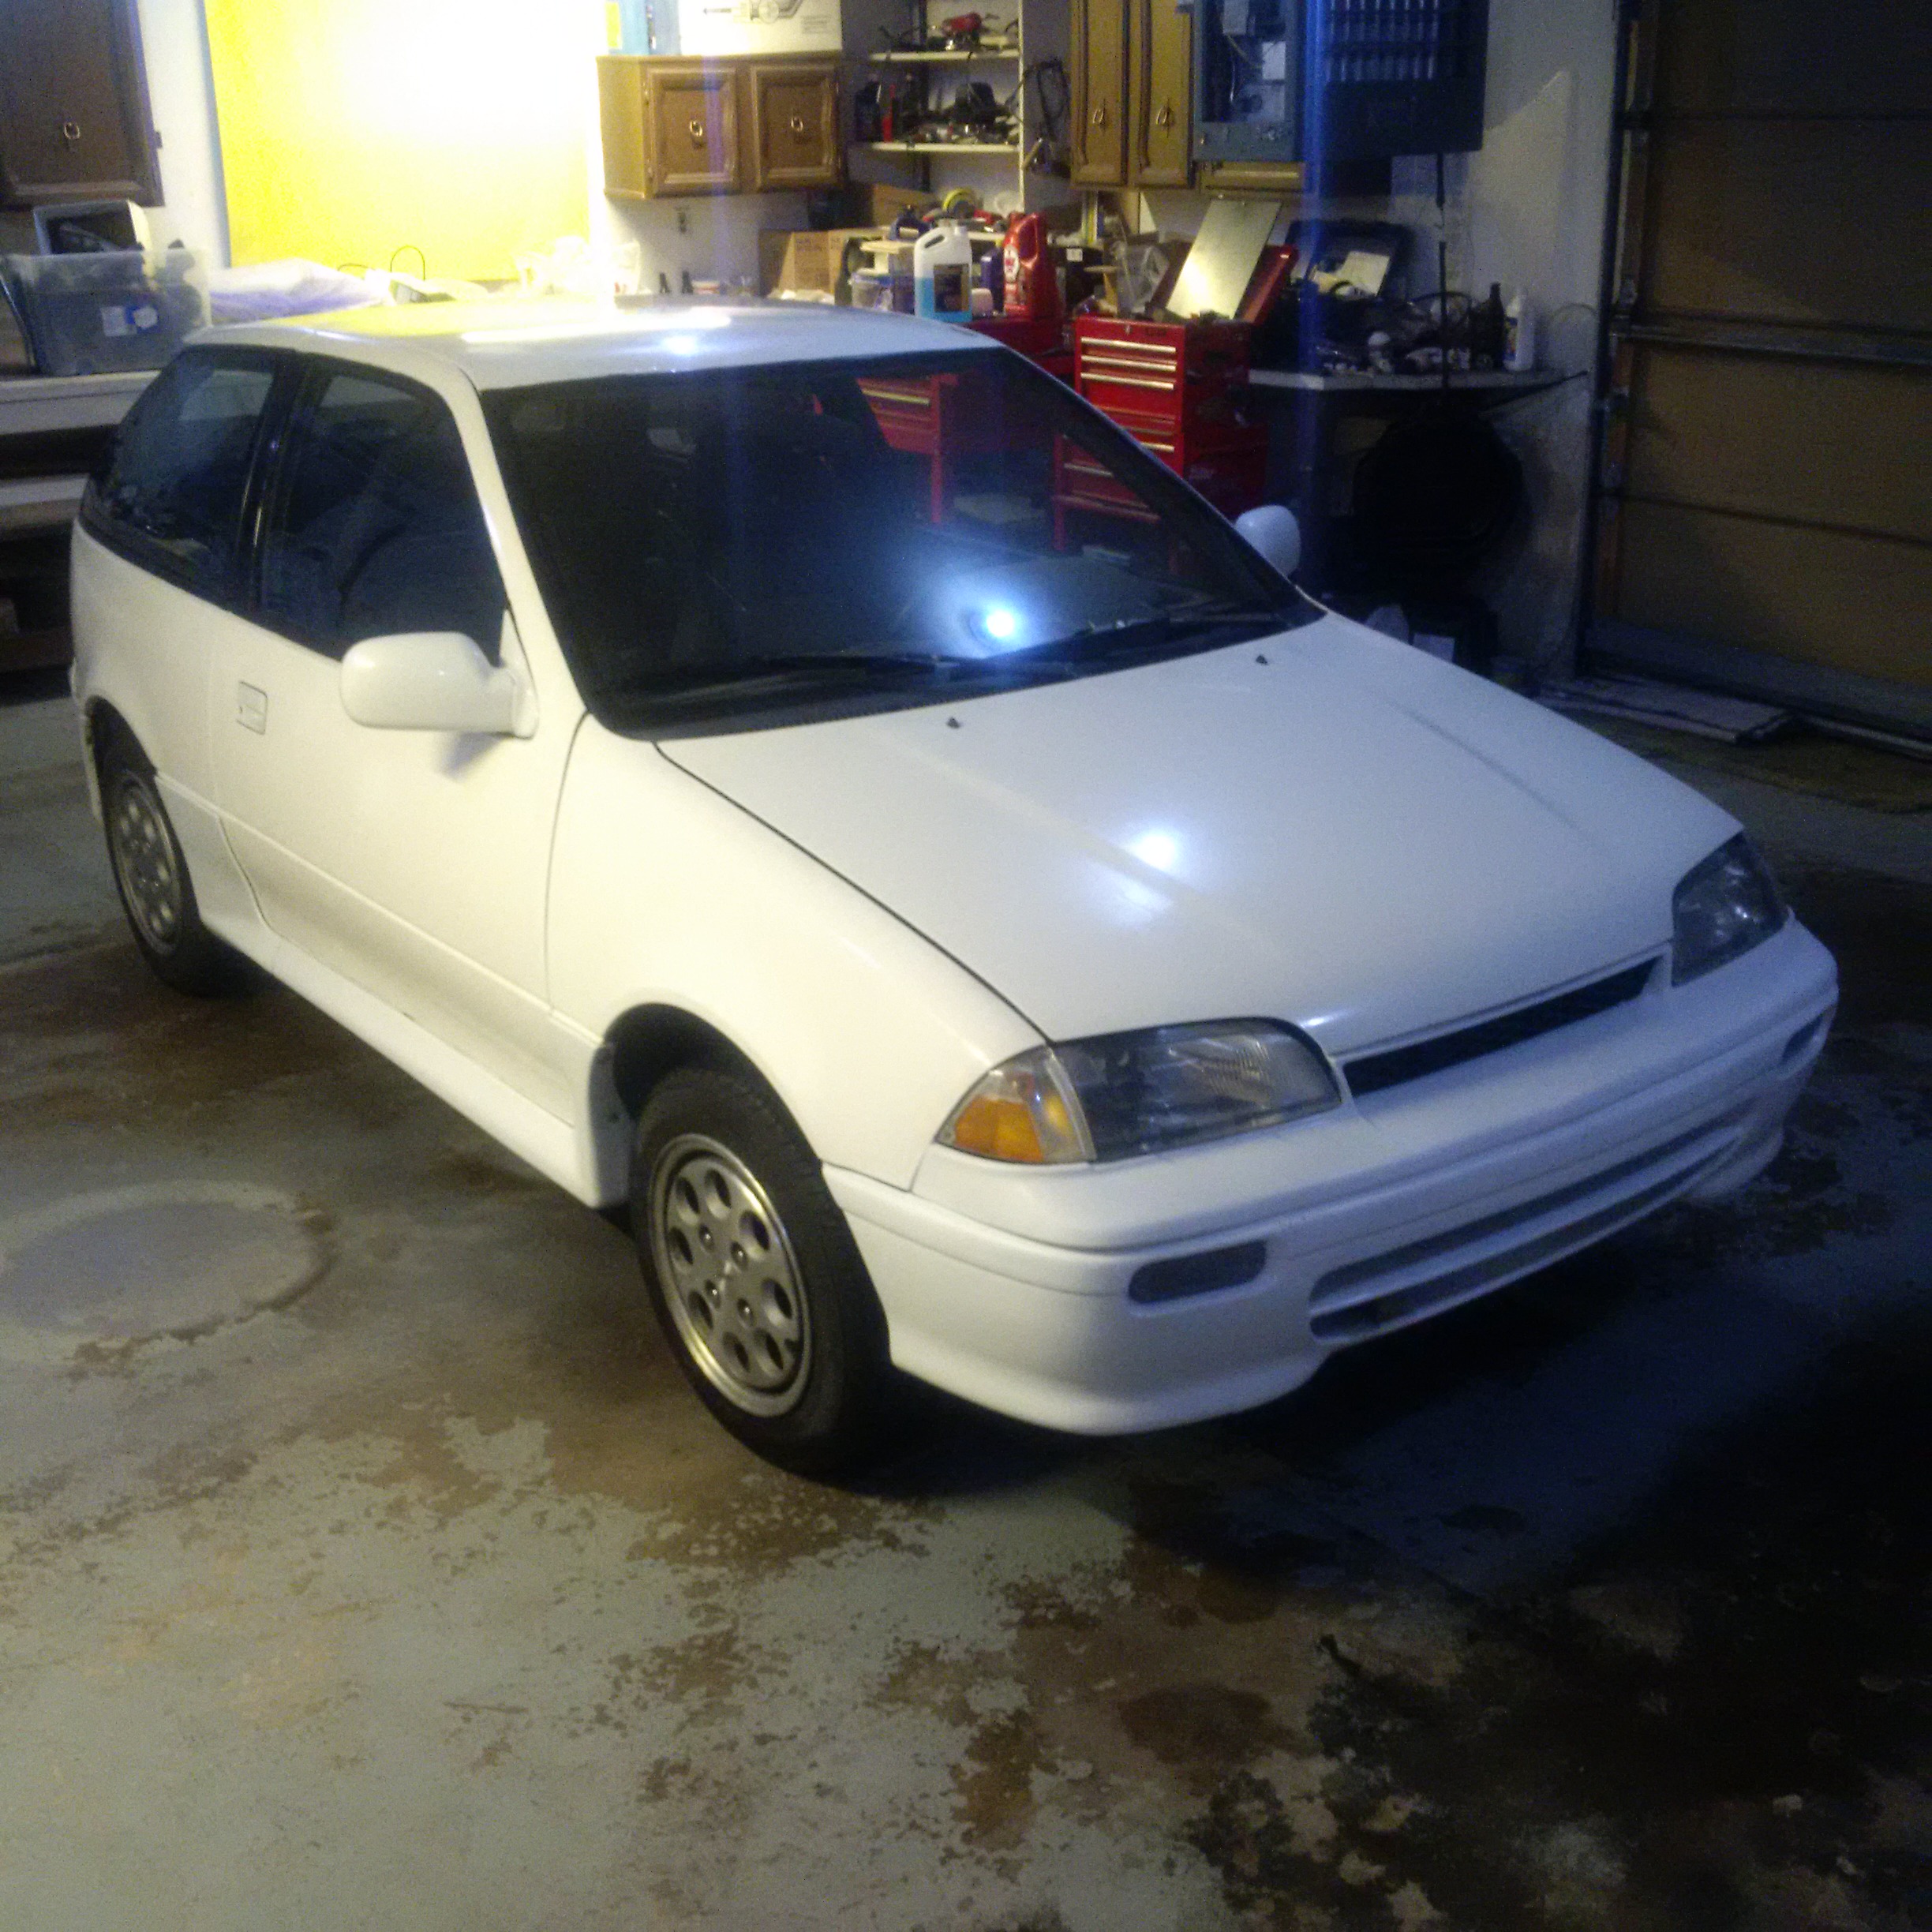
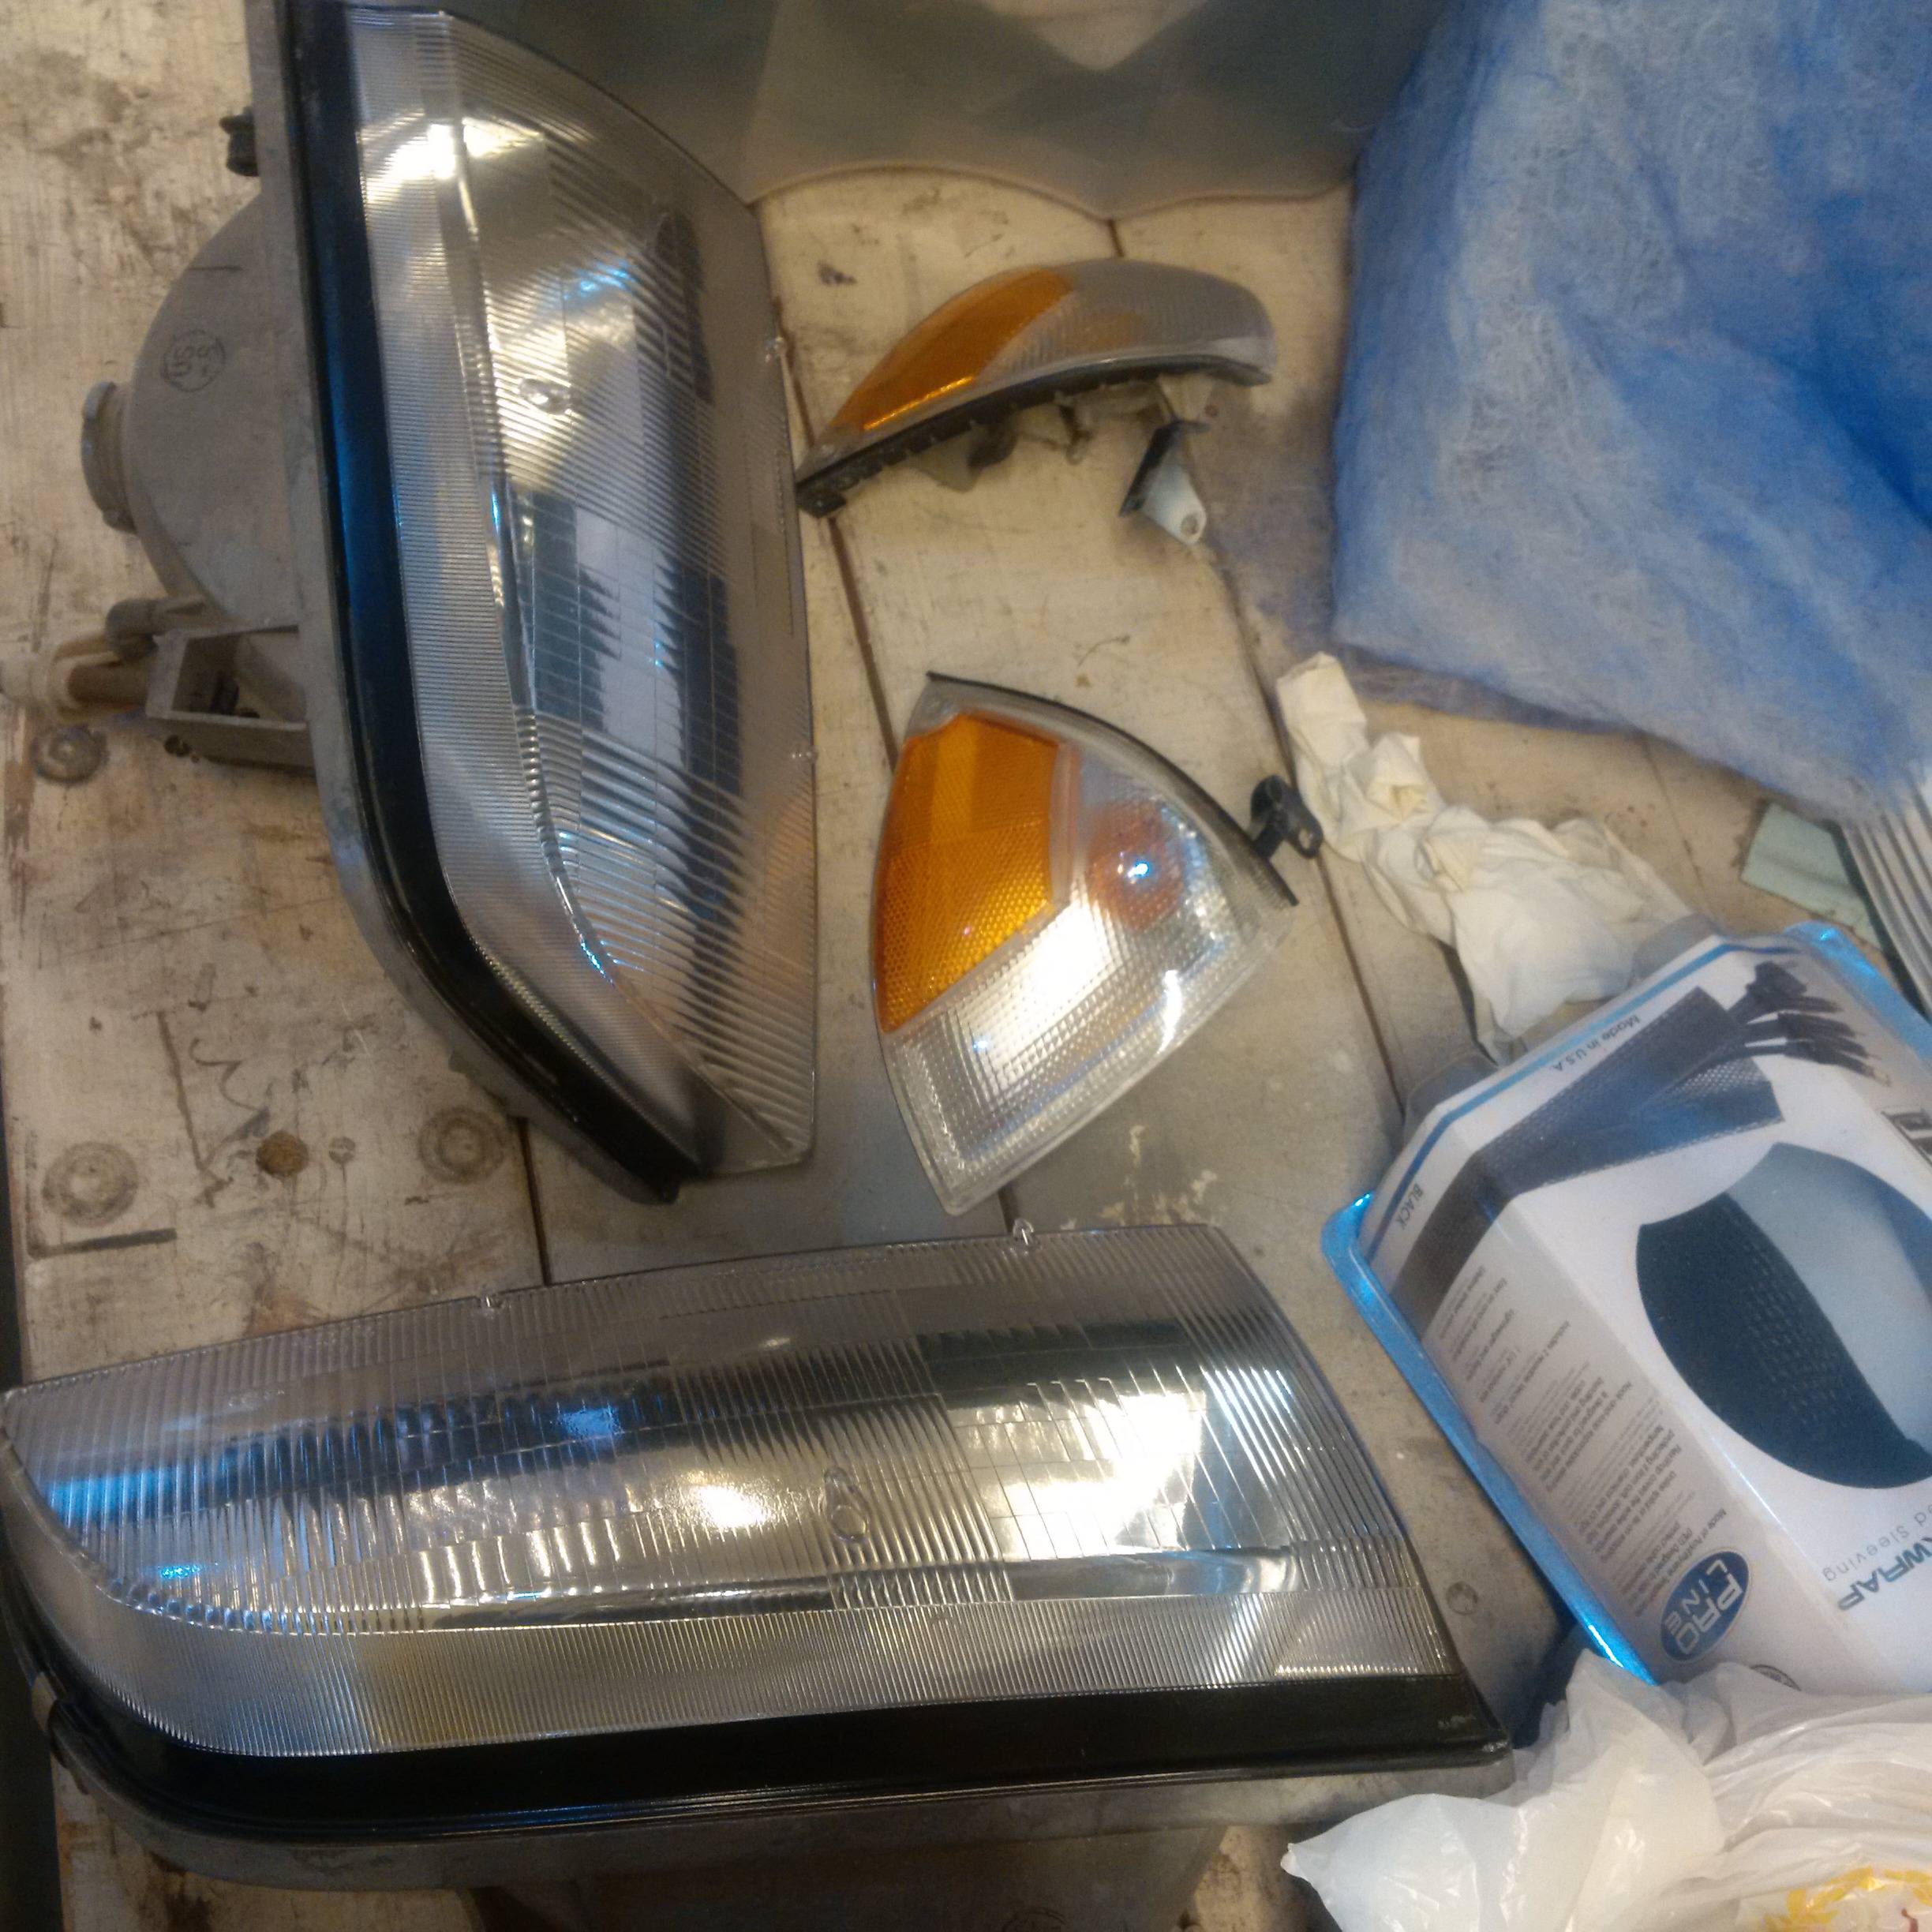
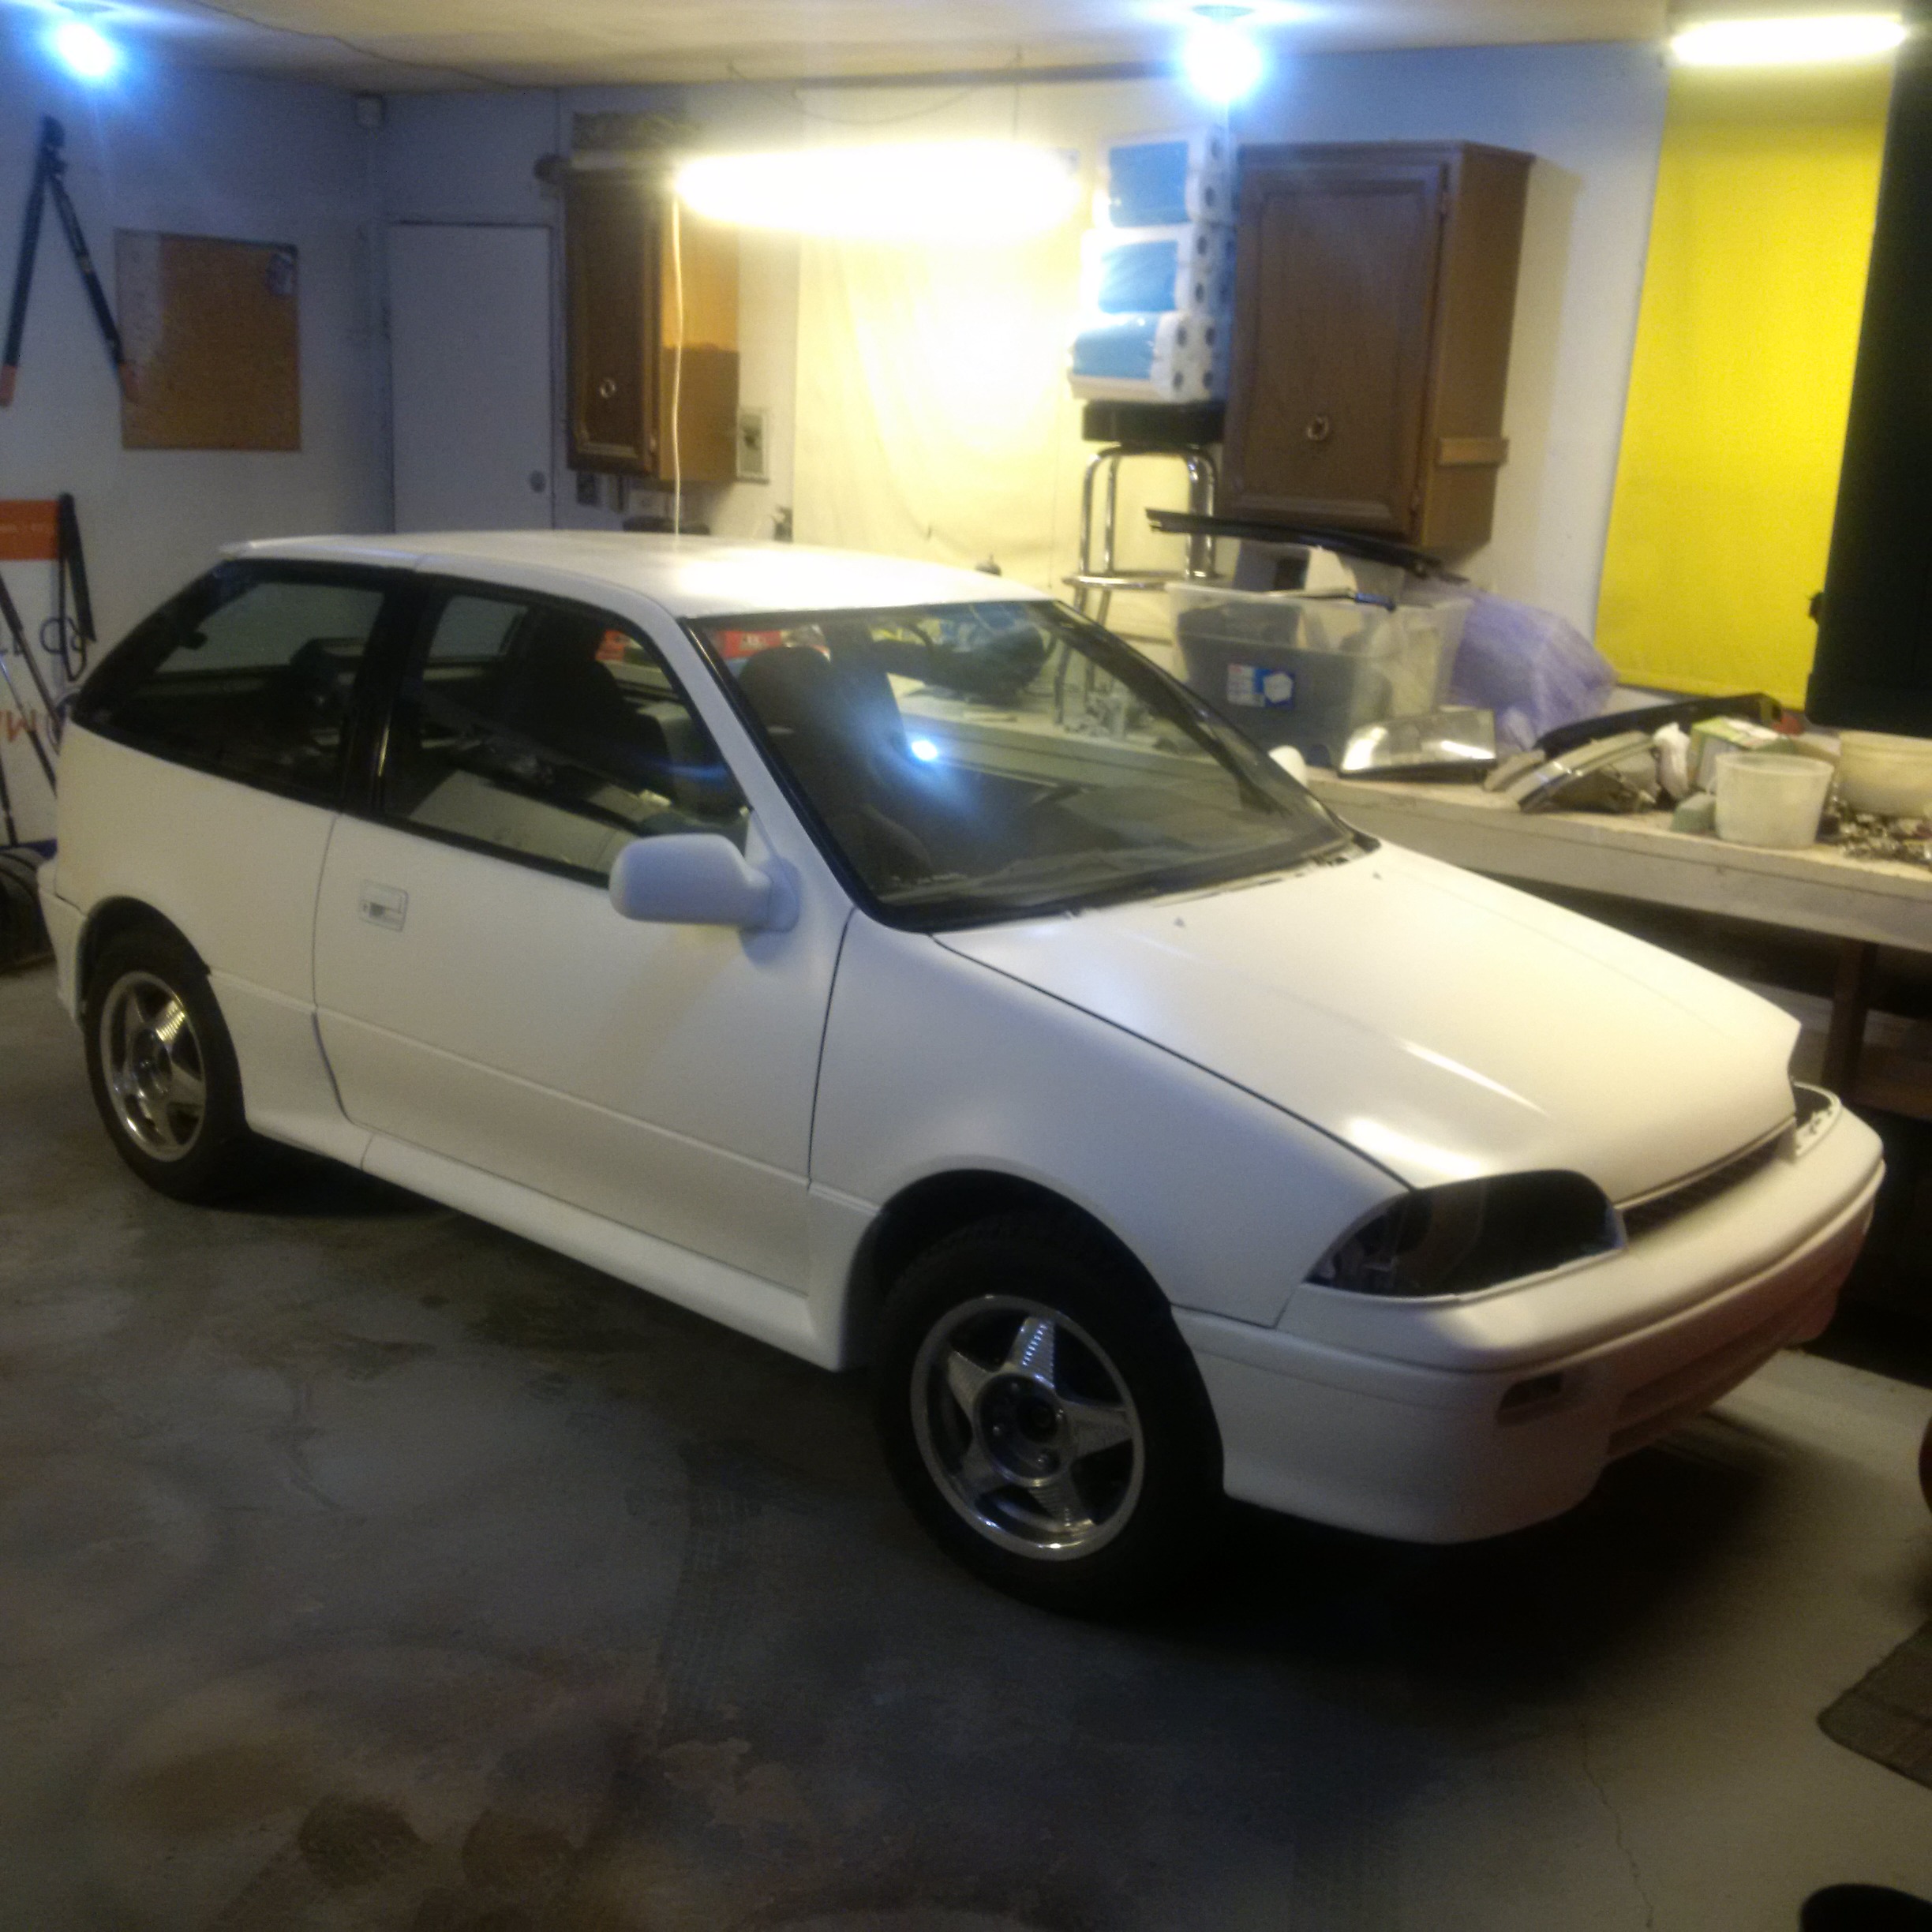
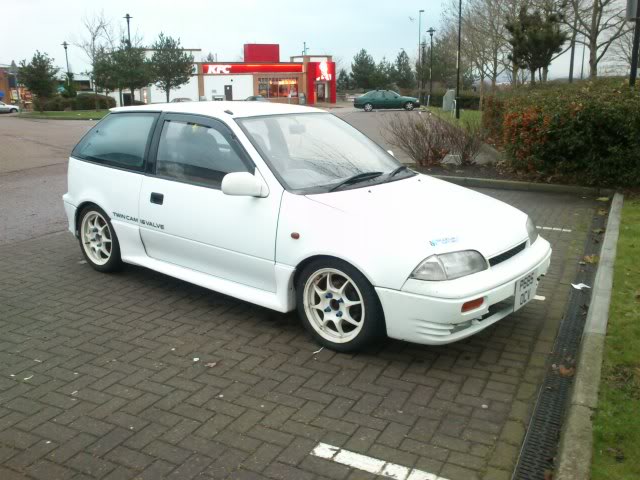
Here are some of the pictures I have to date:


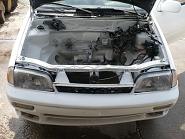
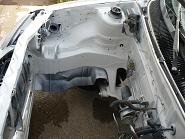
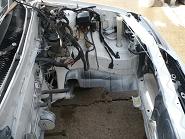

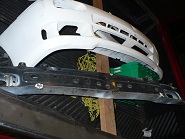
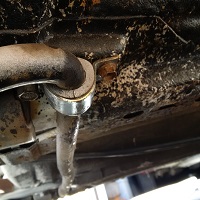
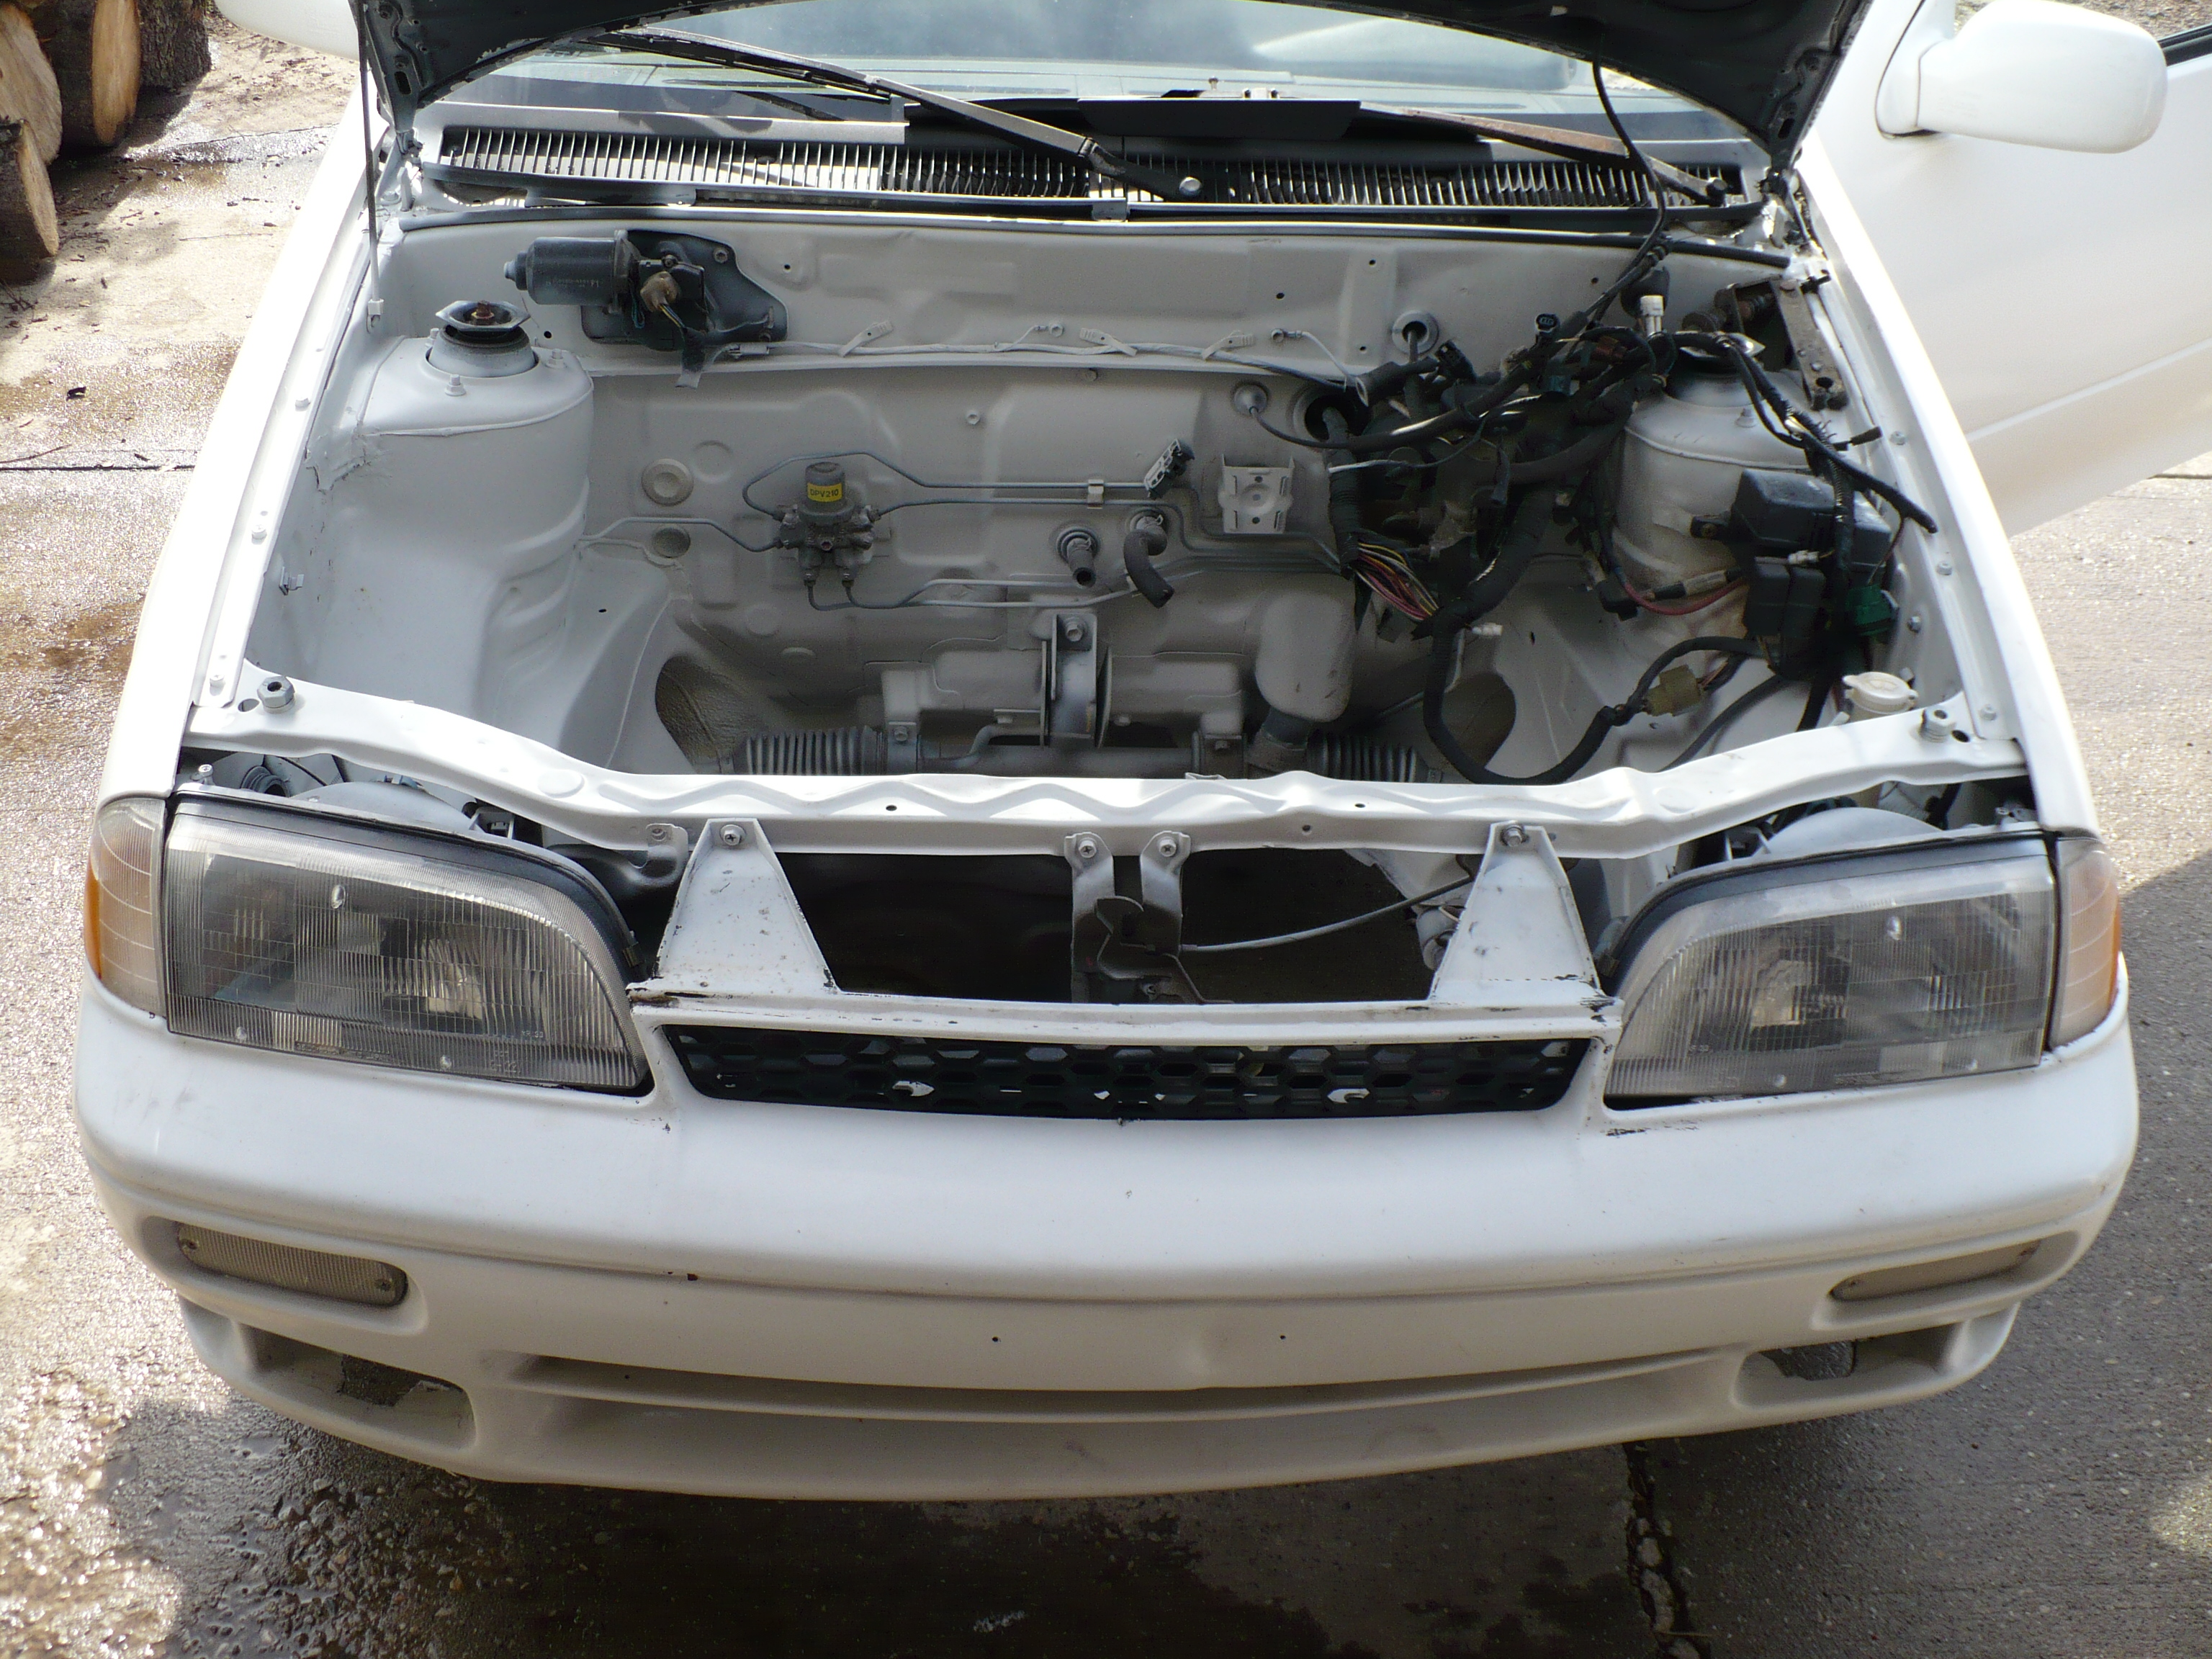
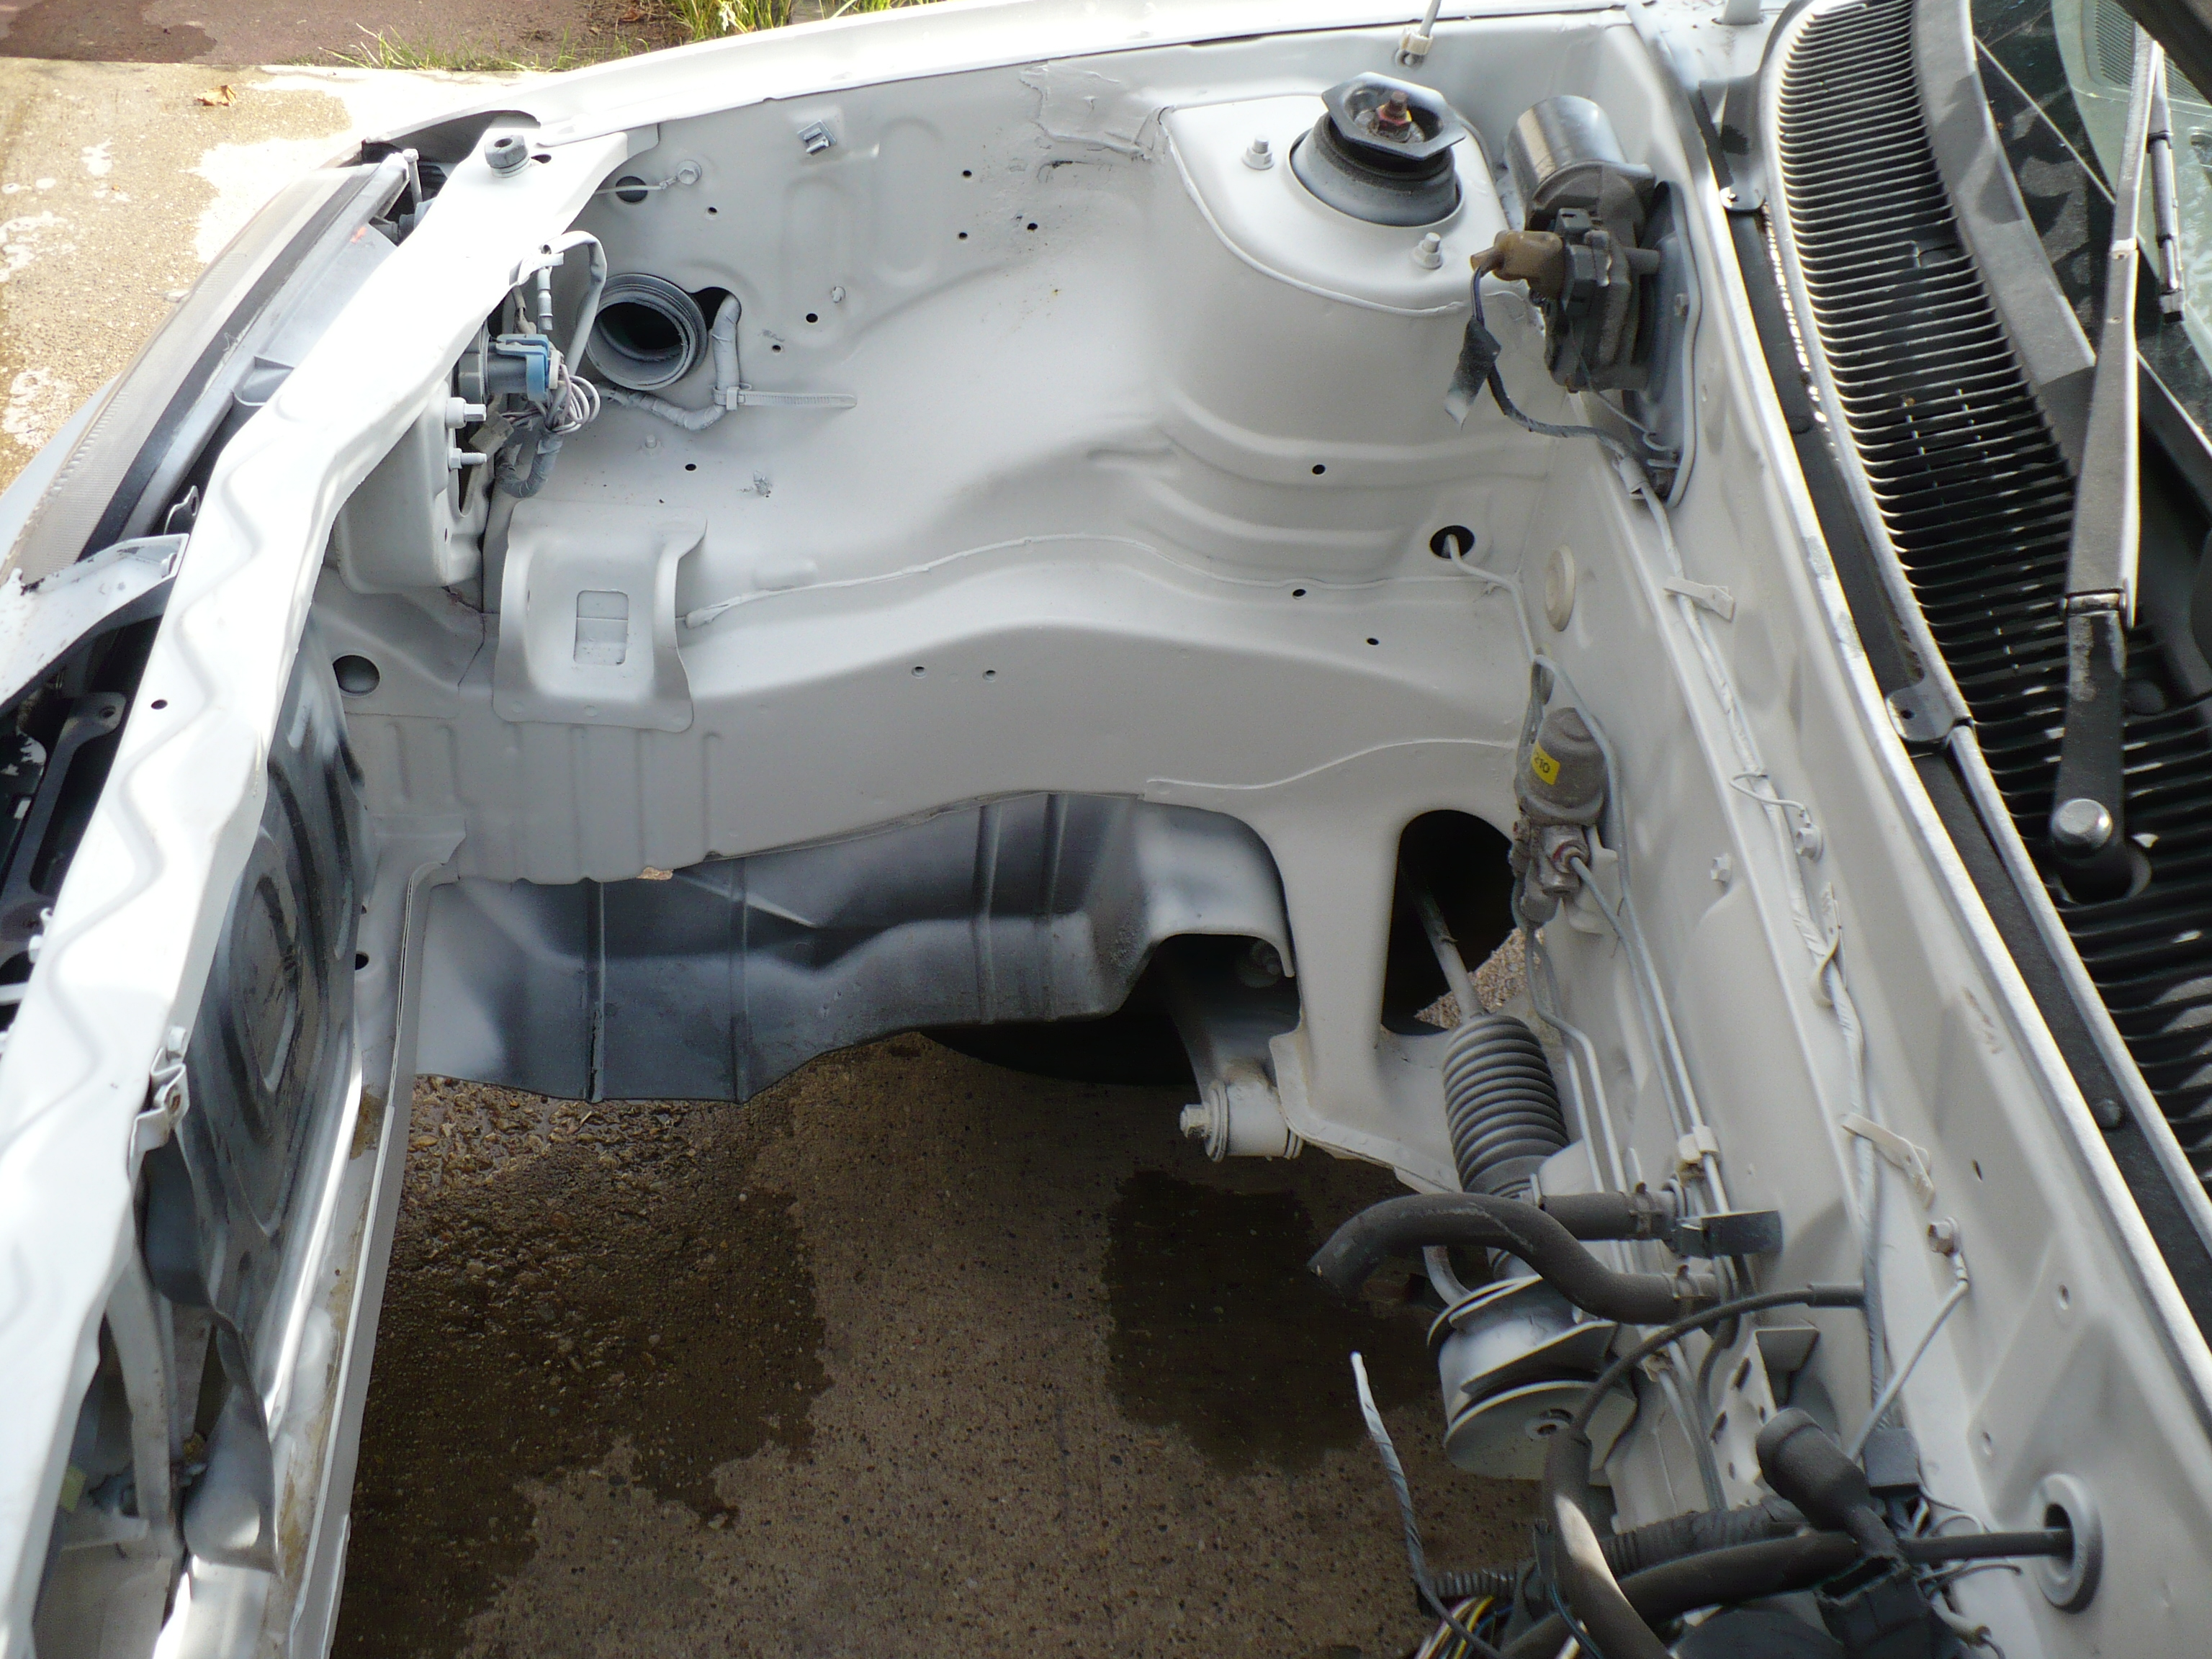
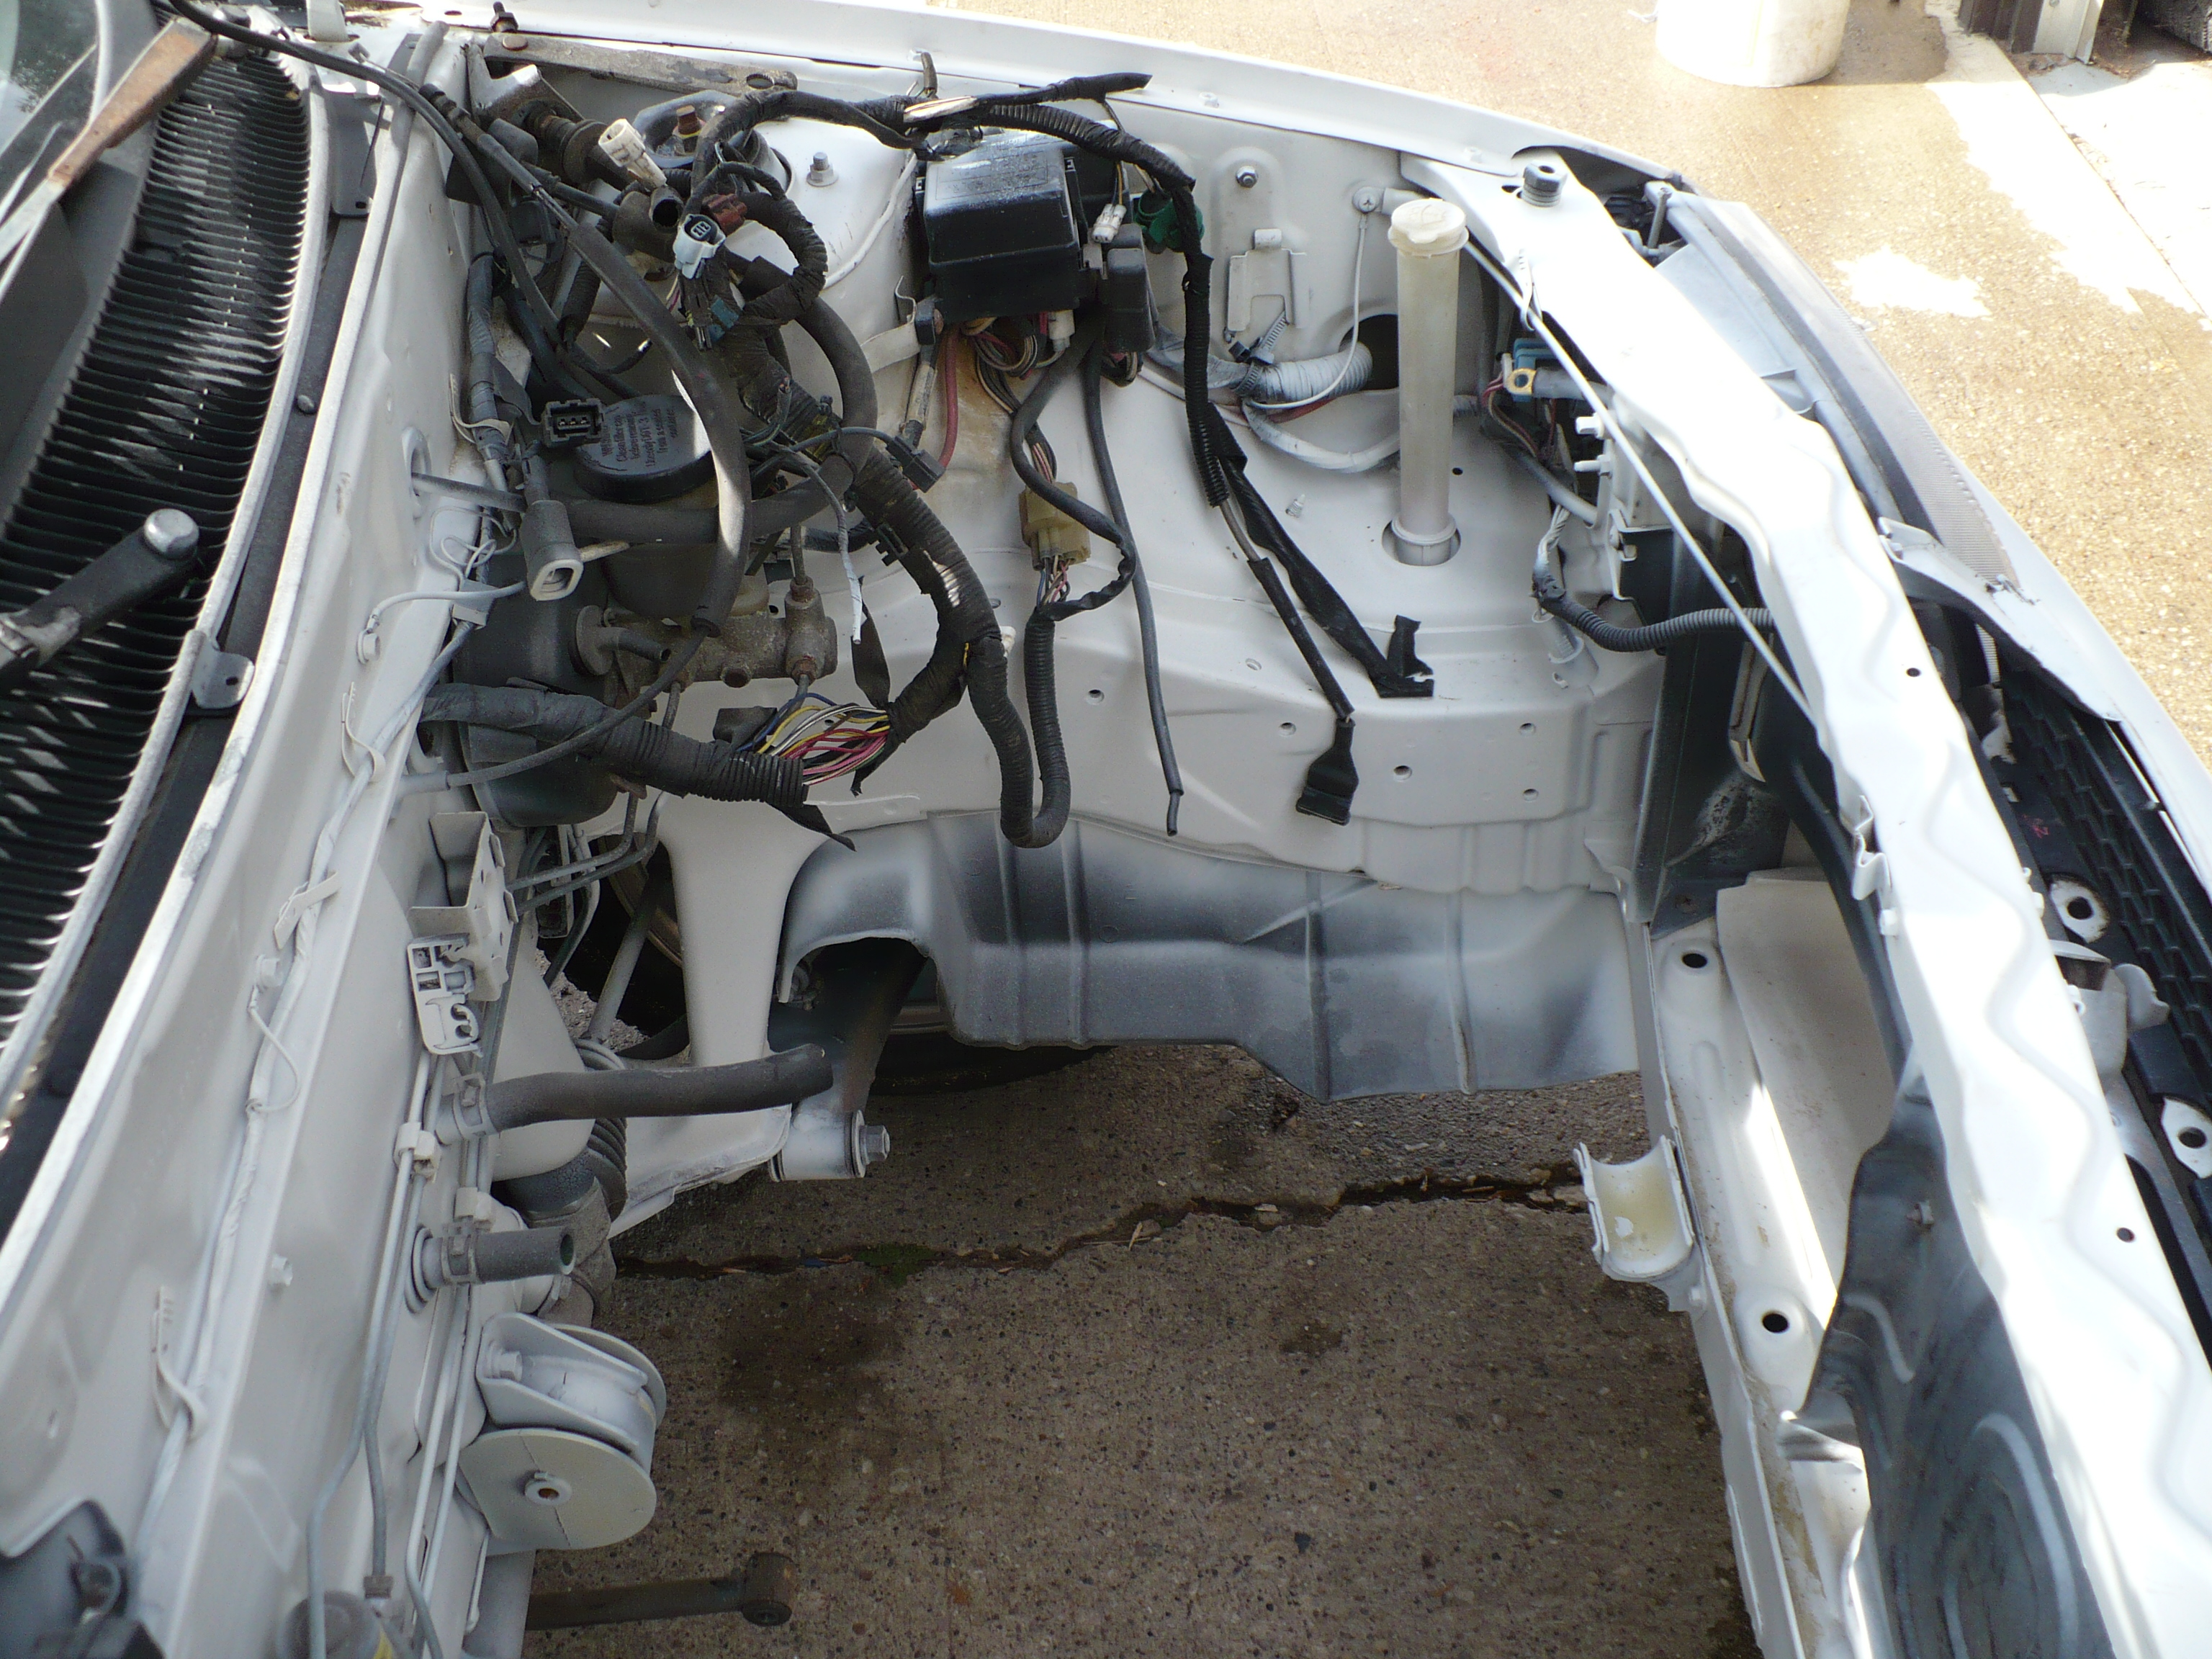
I did a bunch of stuff on it in March 2010. I pulled the radiator mount, replaced all the front end body damage with new bodywork from
a Cultus 1.6L. I also pulled out the air intake which is no longer required and the fog light wiring. The ECM and the engine
harness has been removed as well.
Bridgestone RE92's from tiretrends.com are now on the RX7 wheels and I also have a set of winter Bridgestone Blizzaks on separate wheels. I couldn't get the Nokians in
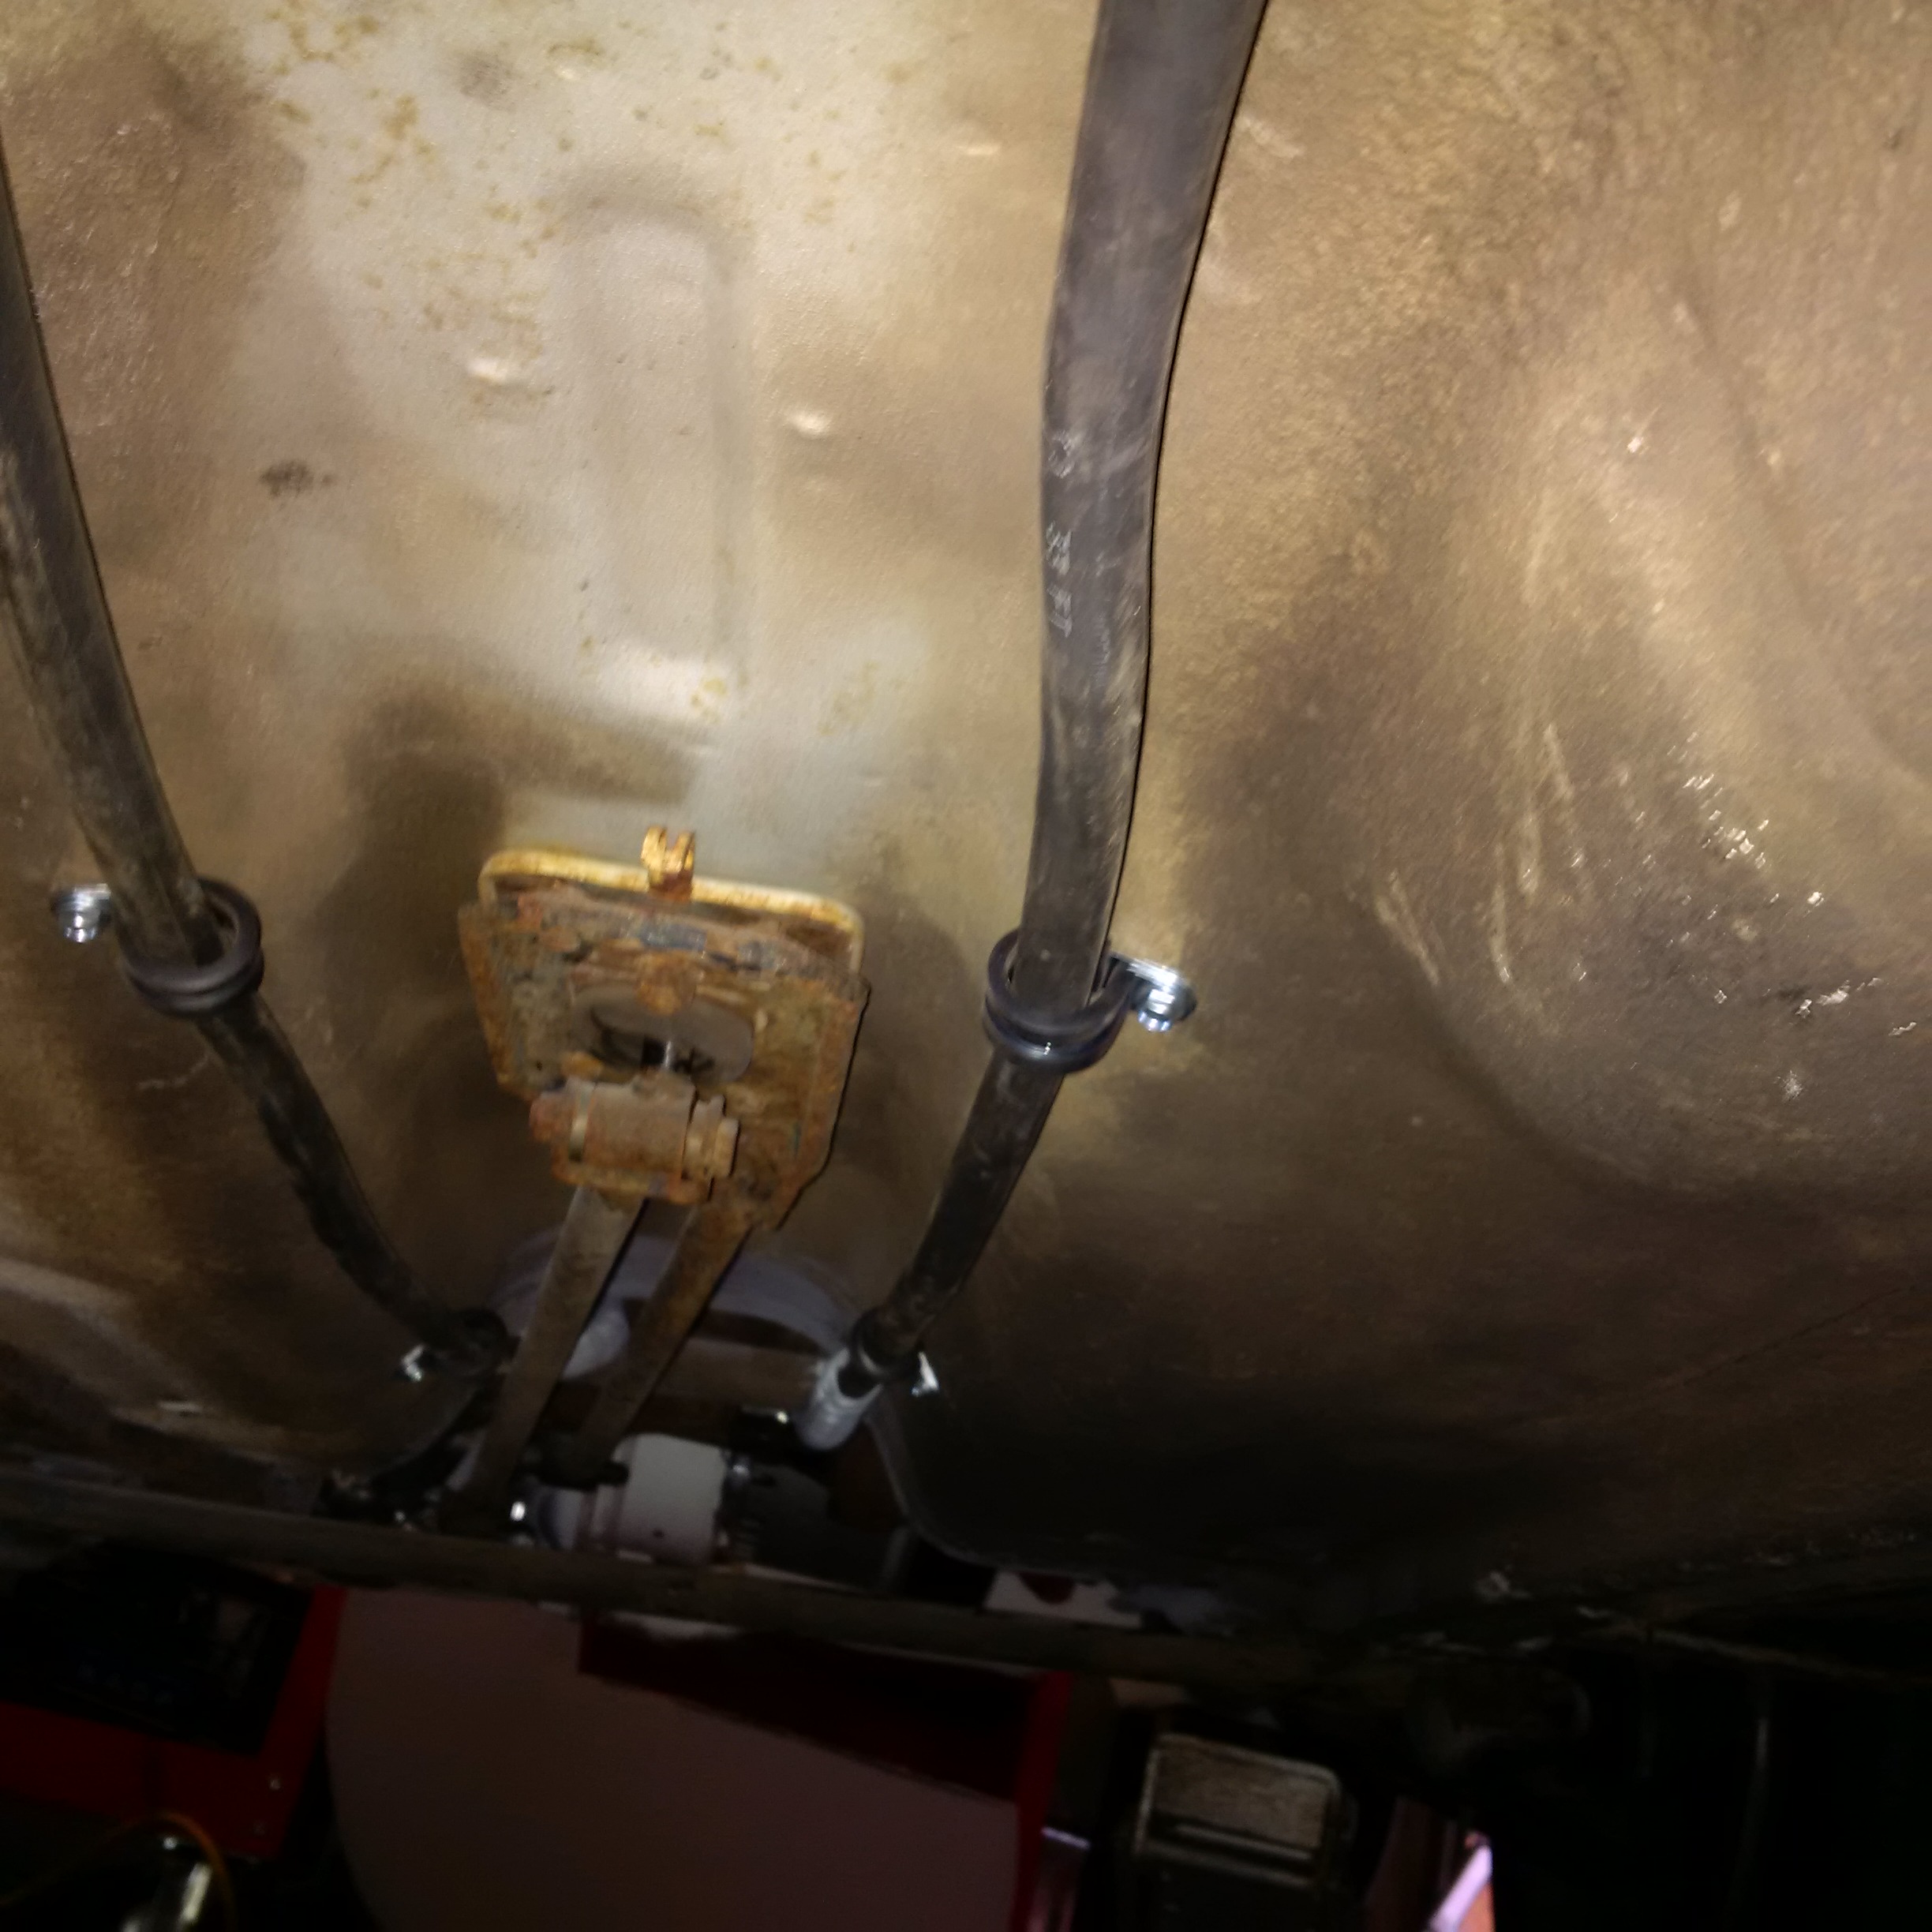
North America for the size I needed. I have new rear hubs with wheel bearings, new front cv axles, and front and rear bushing kit for ssgti.com. Front wheel bearings are in and I have new brembo rotors and
new composite/ceramic pads for all four corners - front are EBC and rears are APEX. I also have new braided stainless steel brake lines for all four corners.
I just got confirmation that my payment has been received by Wilderness Electric Vehicles and that my kit will ship next week. The
clutch disc I sent to make the compler for the electric motor is complete! I should receive my kit about a week after that.
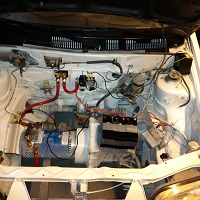
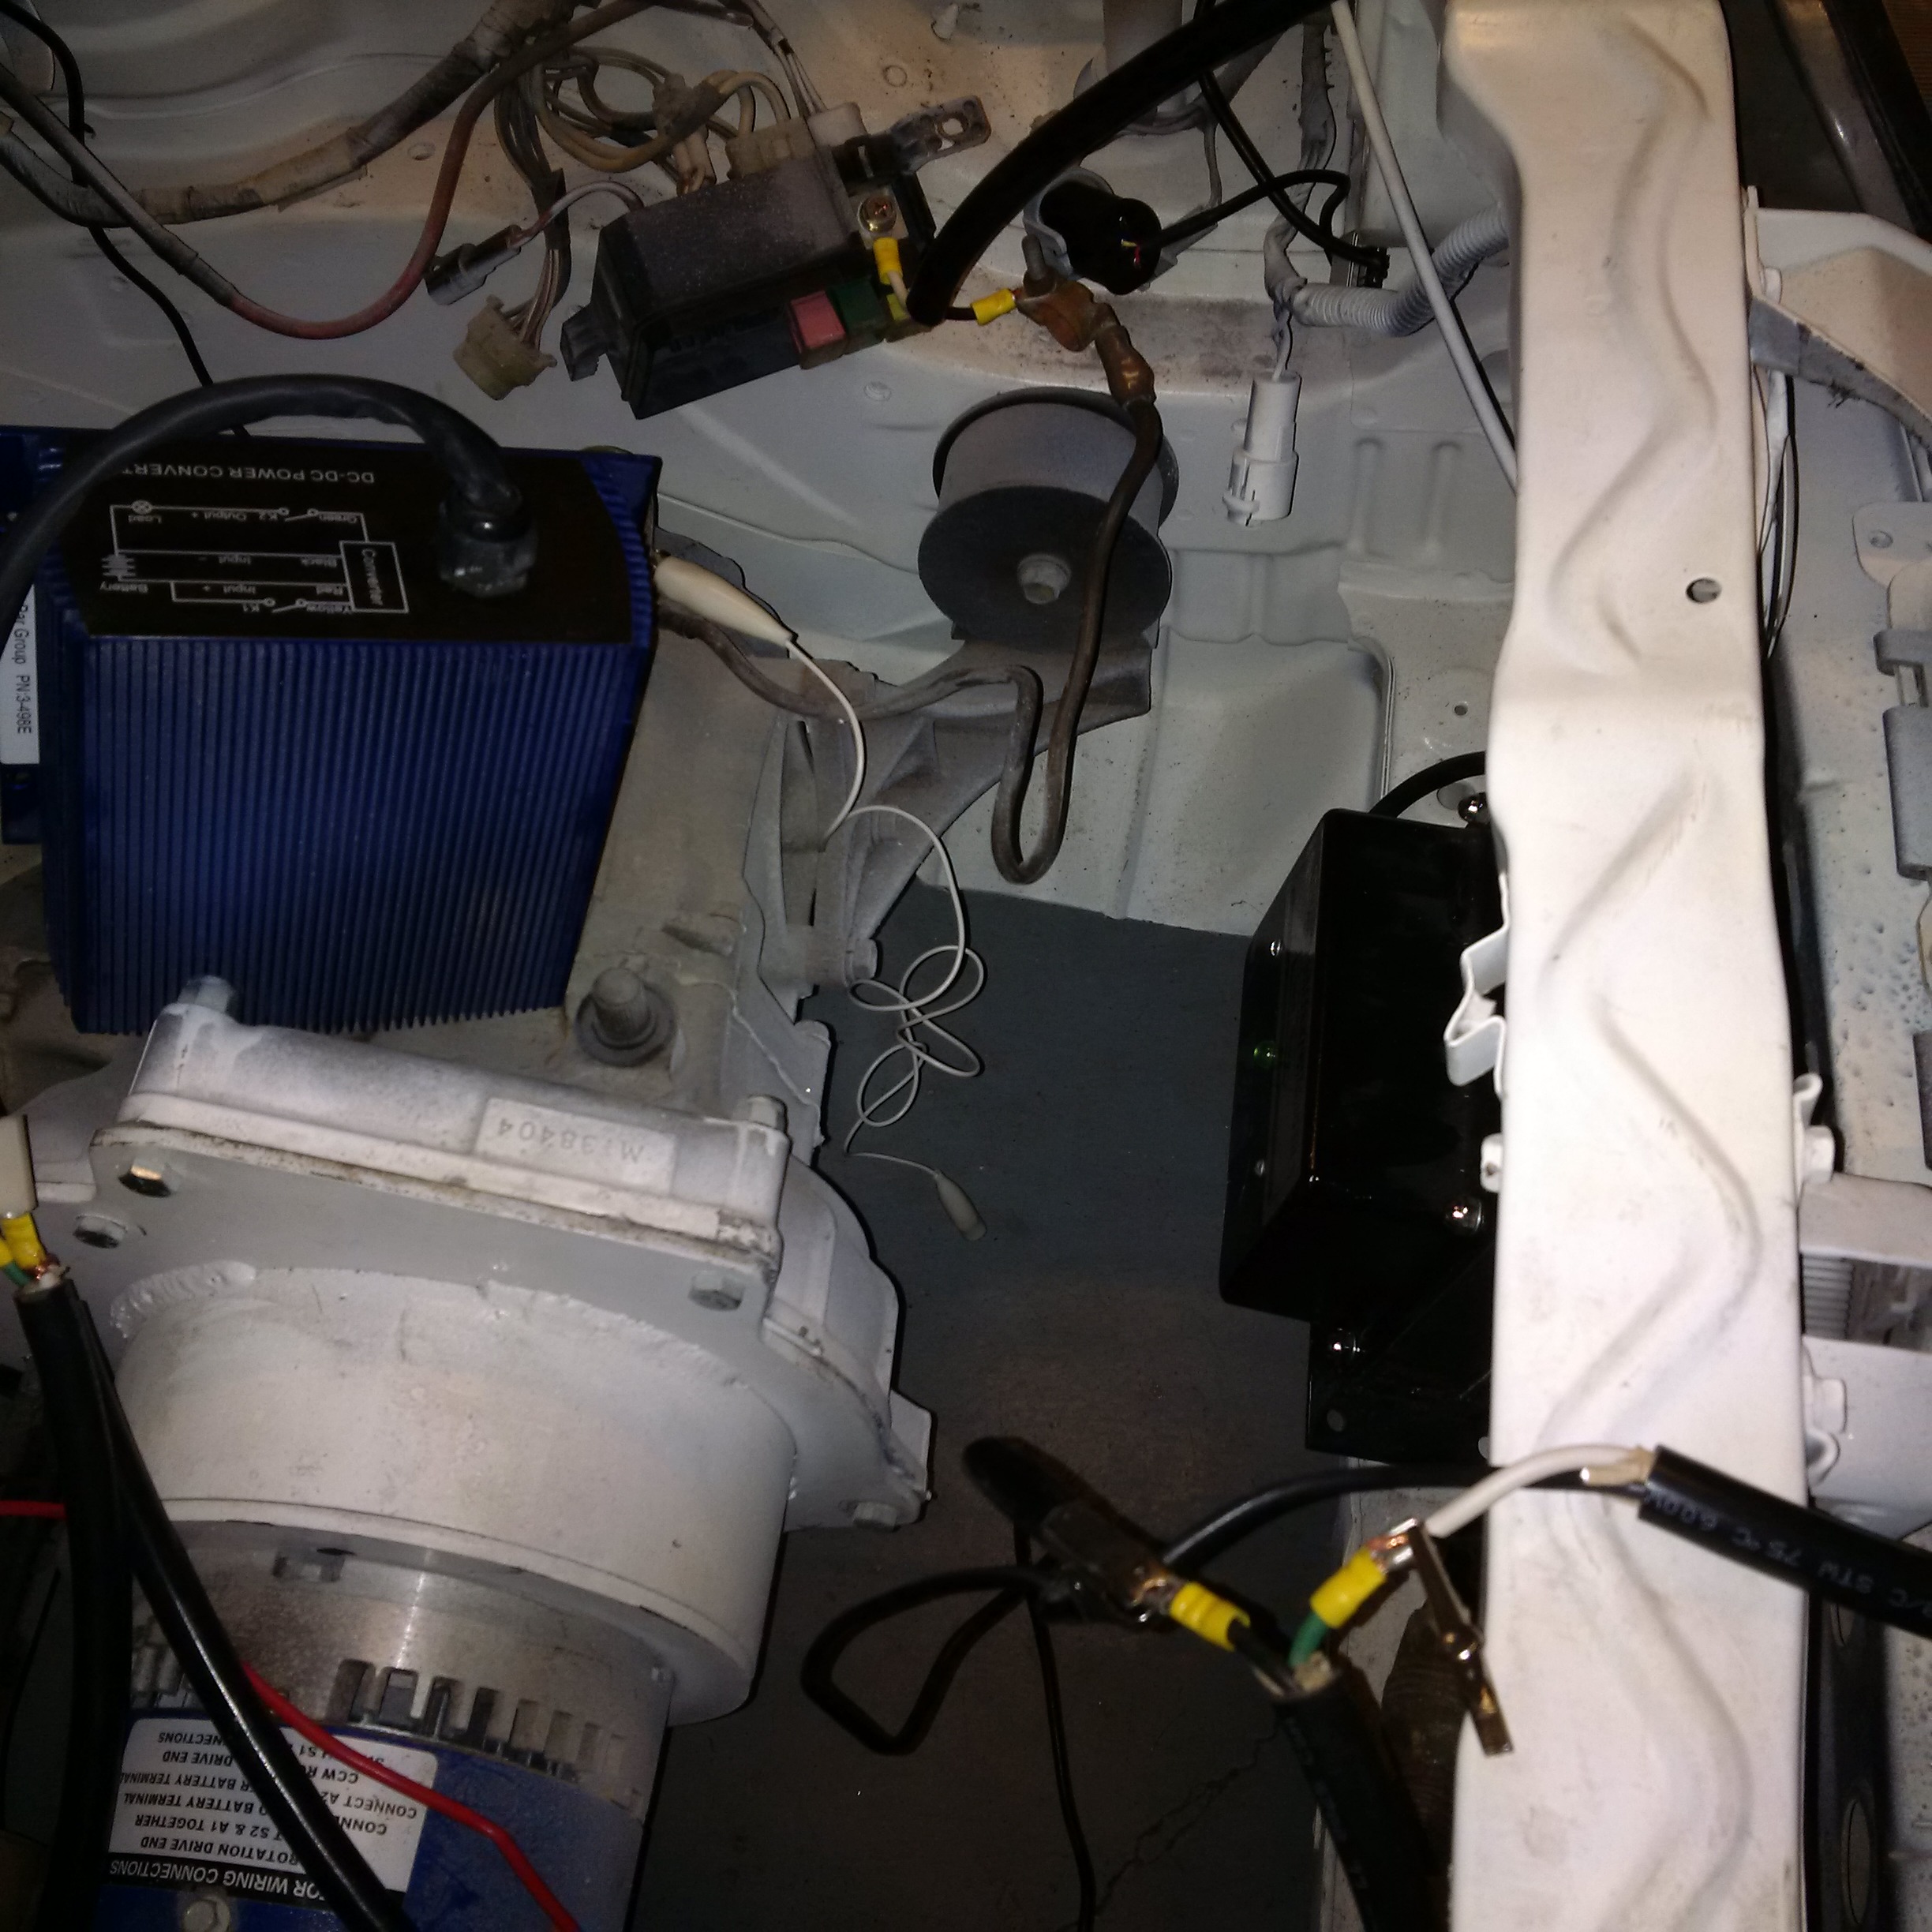
So I have my kit from Utah now with the motor and all the goodies, my yellow top truck batteries, and I've replaced the rotors all the way around with brembo's and ceramic brake pads. I also put in new stainless steel braided brake lines and new wheel bearing hub assemblies. I still have new cv axles to put in along with the transmission and then I can bolt in the transmission. Extras have been removed like the radio, antenna, and clutch disc pedal. Some of the other stuff I've already removed: engine electrical harness, engine computer, air intake resonator in the fender, radiator mounts and extra front sheet metal, fog light harnesses, fuel lines, fuel tank and filler neck, exhaust system, radiator and cooling system, stock battery bracket - to be replaced by 30A dc/dc converter, and passenger side mirror. I have the bellhousing mount for the electric motor already machined to match up to the transmission. I also have an electric golf cart quartz (more efficient than ceramic) heater that runs at 48V
I've had a really slow start on this because of breaking my thumb two years ago and then spraining it last summer. However, this has given me additional time to assess ways to make the entire car more efficient. I will definitely be fabricating a belly pan for this car and the transmission fluid I will use is Mobil Dexron VI ATF even though this is a manual (temps won't get that high just in the city). I will also pursue the possibility of removing the side view mirrors and replacing with digital cameras from the inside. I got the idea from this article. However, I've since found out this is illegal in Alberta.
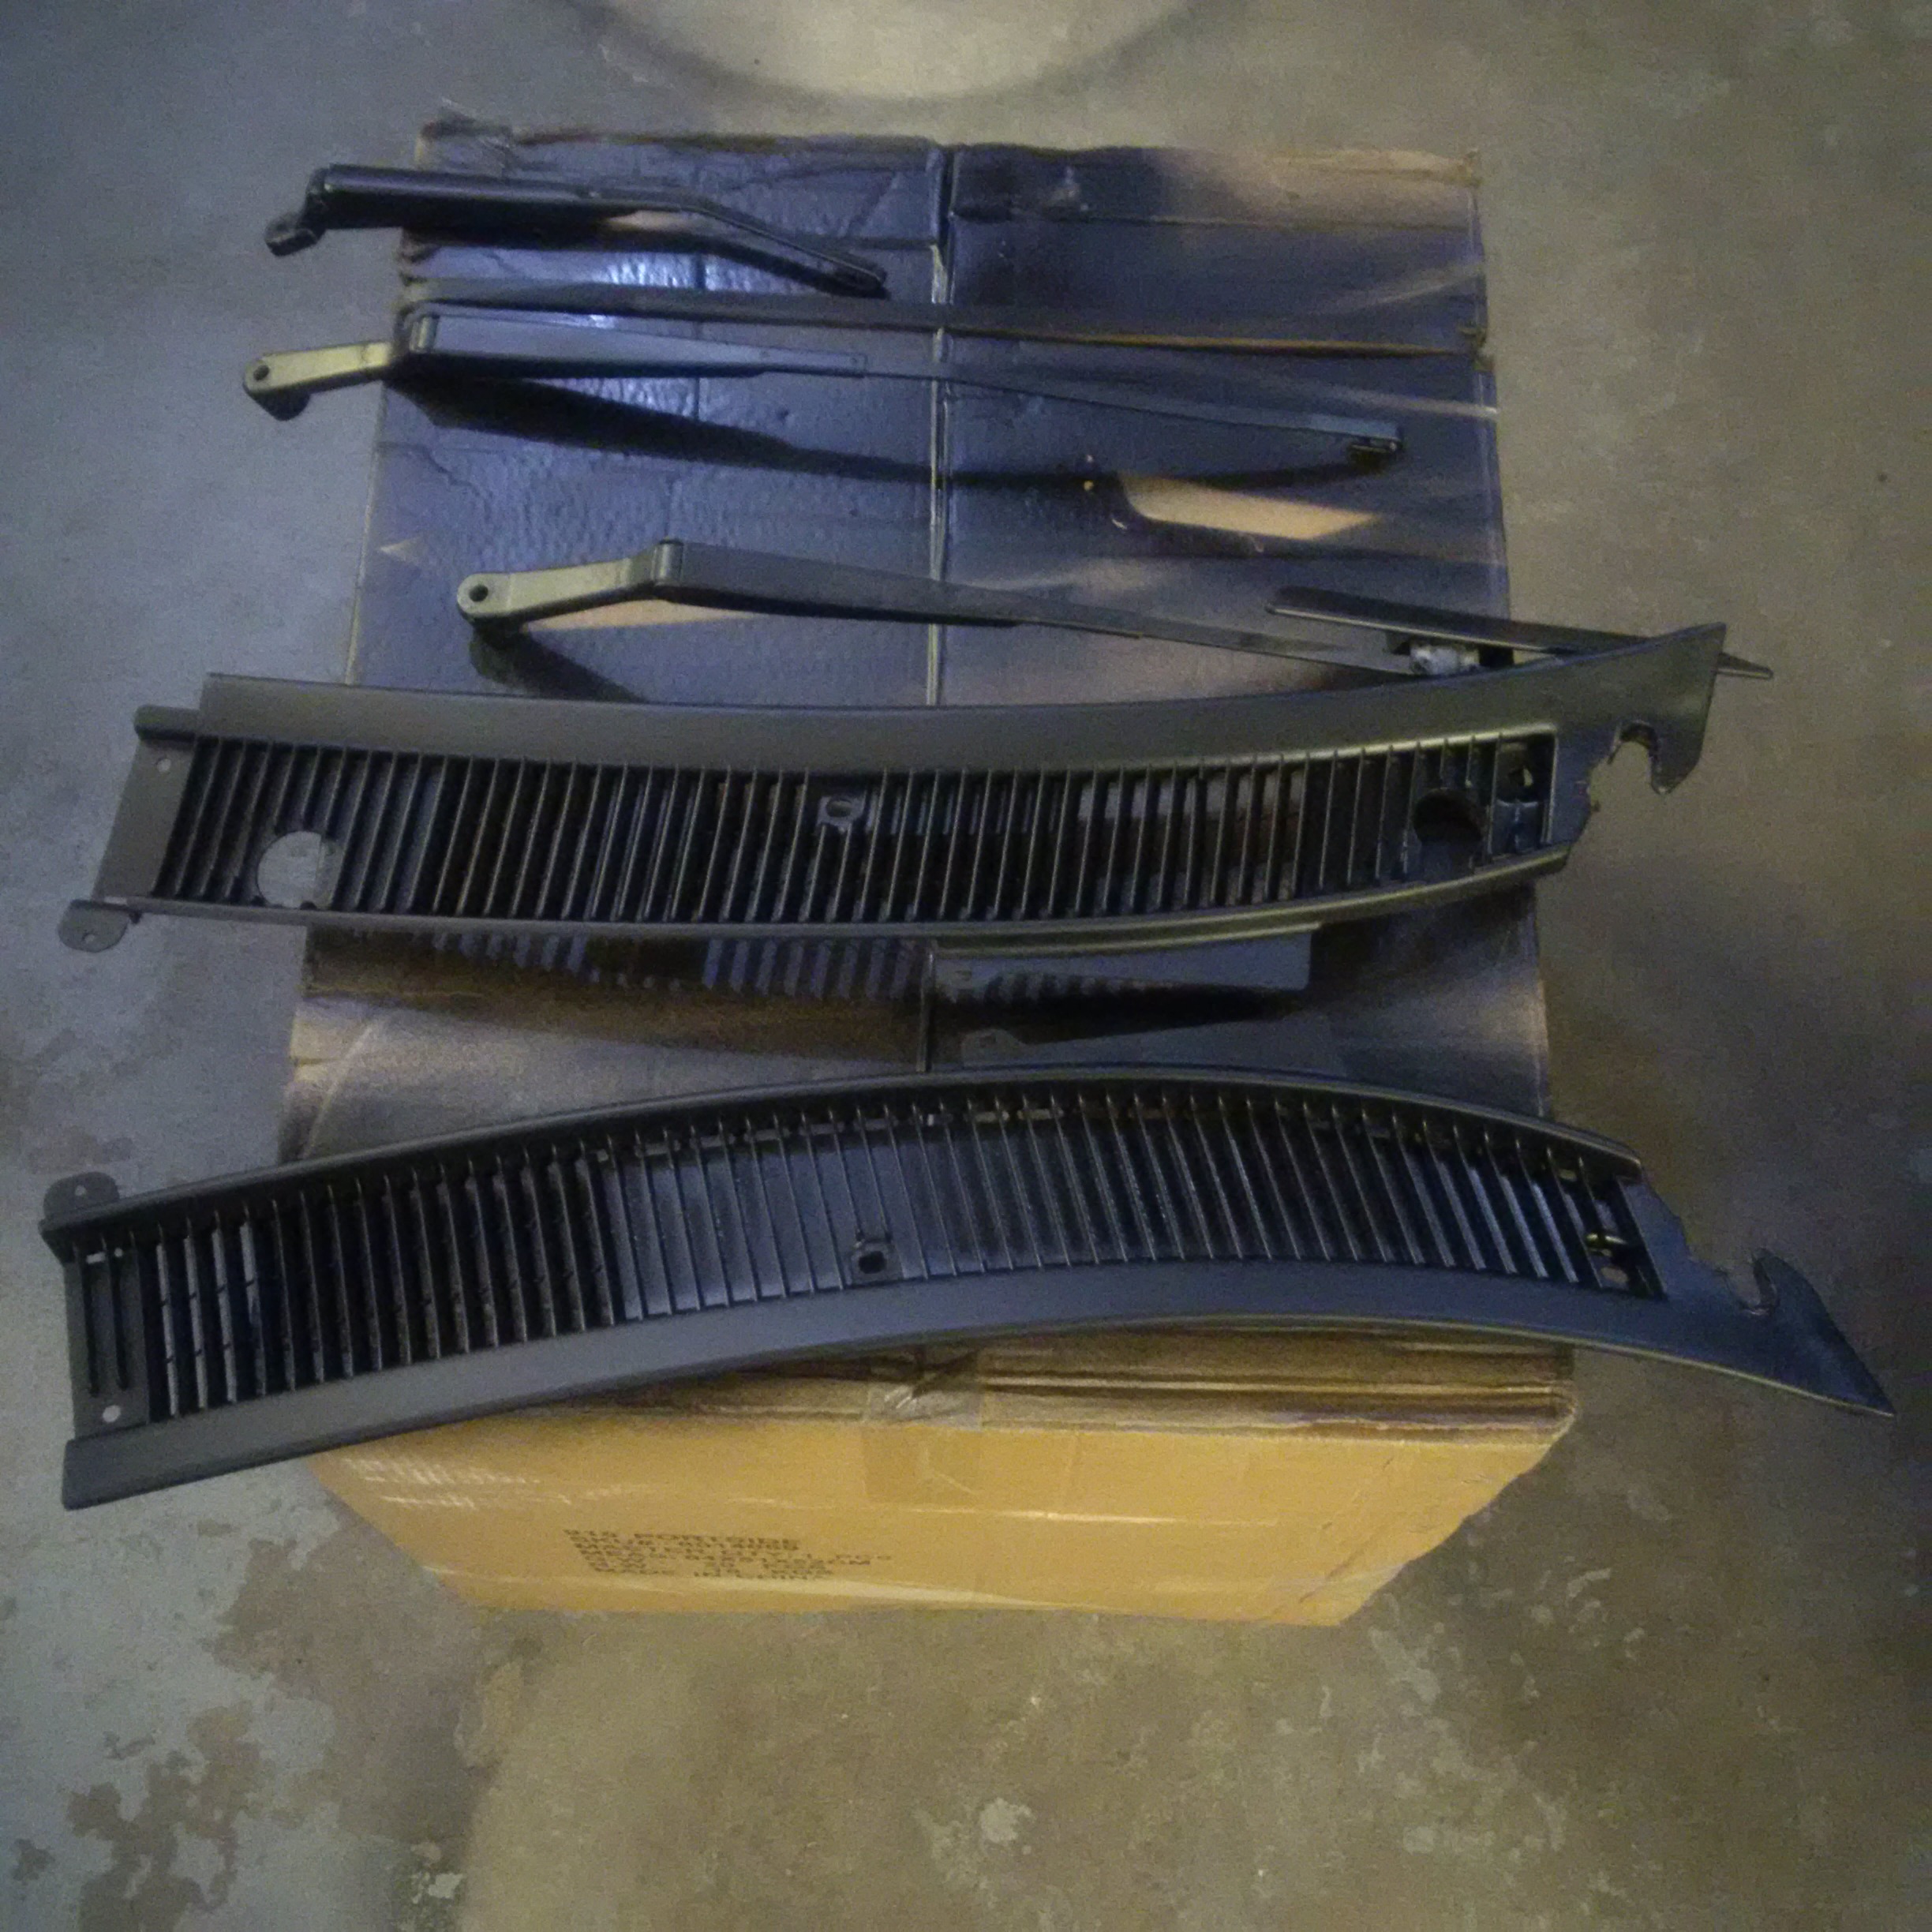
I will definitely also fabricate a front grille block by using corrugated plastic and then covering that with black vinyl and tie strapping that to the original grille which worked great on the fiance's TSX. I also plan to cut some custom pieces of clear plastic to cover the frenched front signal lights to smooth air flow on the front bumper.
Got a bunch of work done May 5, 2011. Put in the engine and the transmission. Mounted the Bridgestone RE92 Potenza's on the Mazda RX7 rims. Got the new cv axles in and got the brakes bled and working well along with the park brake.


I had to shave the original middle transmission mount because a piece went out to tie to the gas engine. I also removed an exhaust hanger that was behind the middle transmission mount. I hooked up the transmission shift linkage and the speedometer cable. With the ceramic brakes there's no hard braking effort so I'm pretty sure I can skip having an electric vacuum pump to run the brake booster. I am really impressed with how the sidewall doesn't bulge out on the RE92 tires on the RX7 rims. I'm betting the rolling resistance of the wheel assembly is much improved. The heater core is out for weight reduction.
I have also been experimenting with aerodynamics on my 2005 Malibu LS which I have some threads on other forums:
Aerodynamics Thread
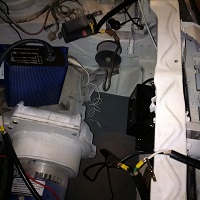
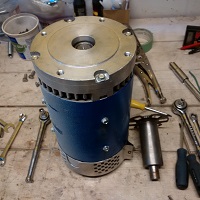
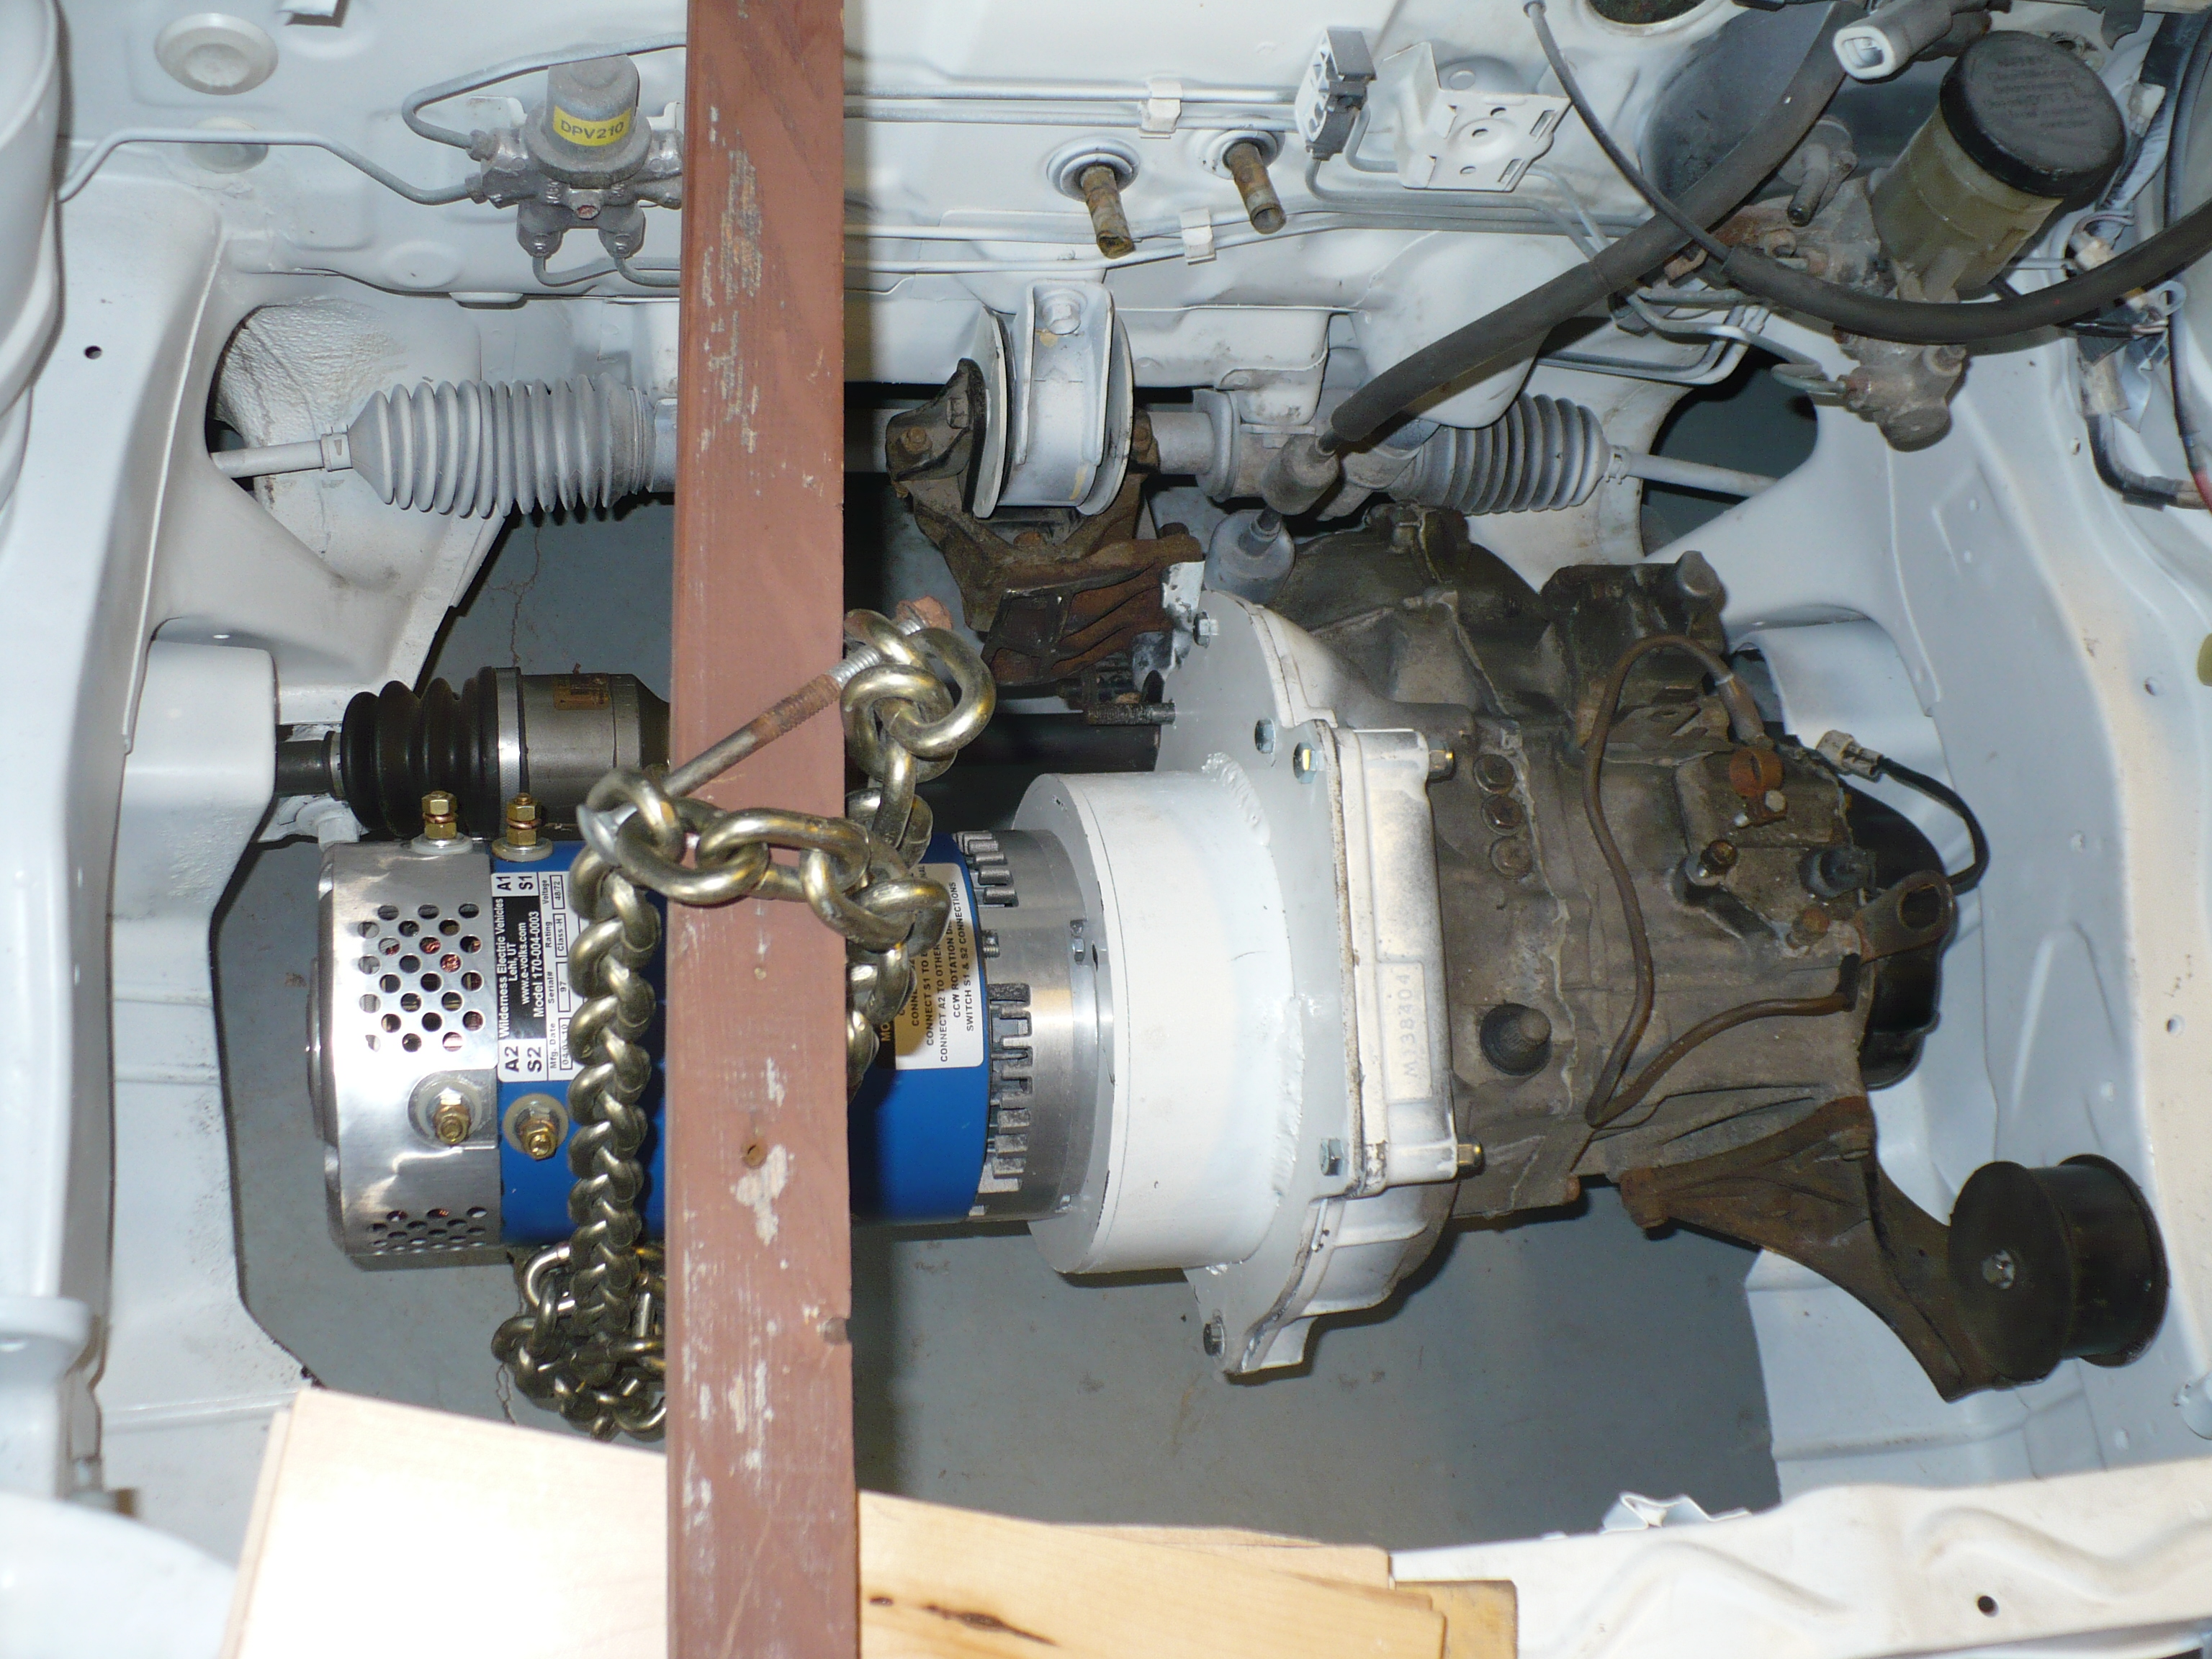
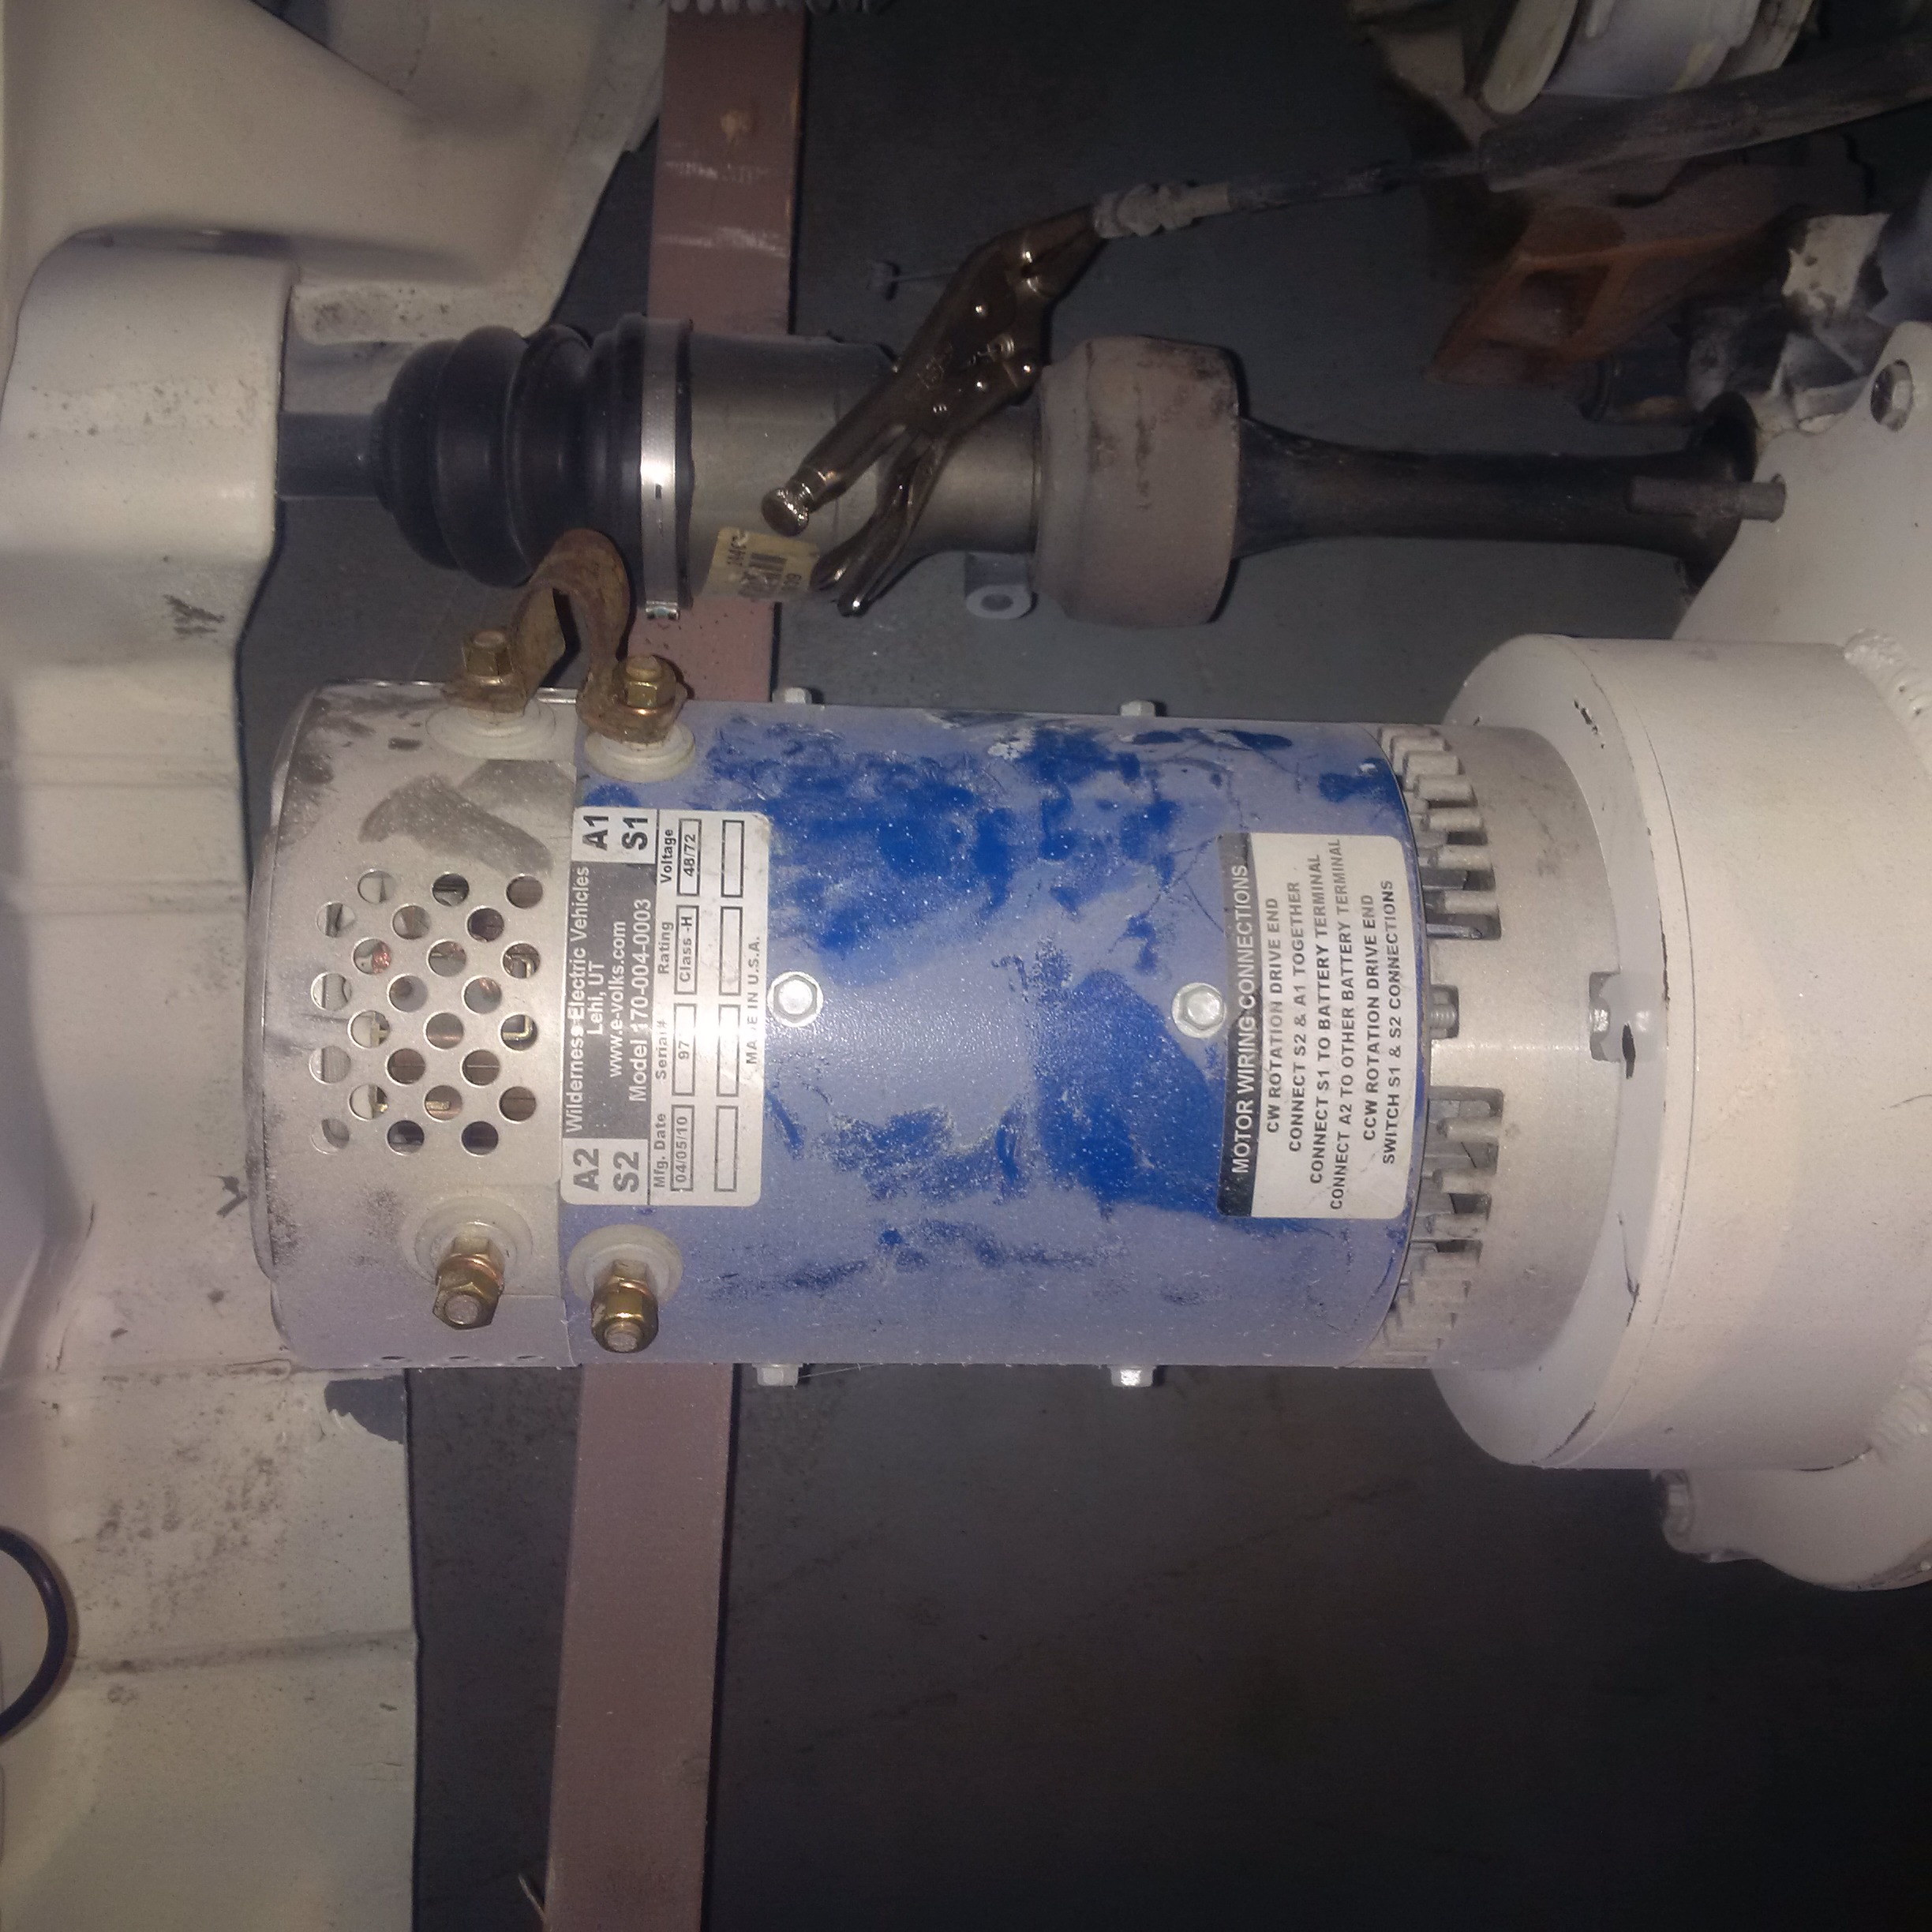
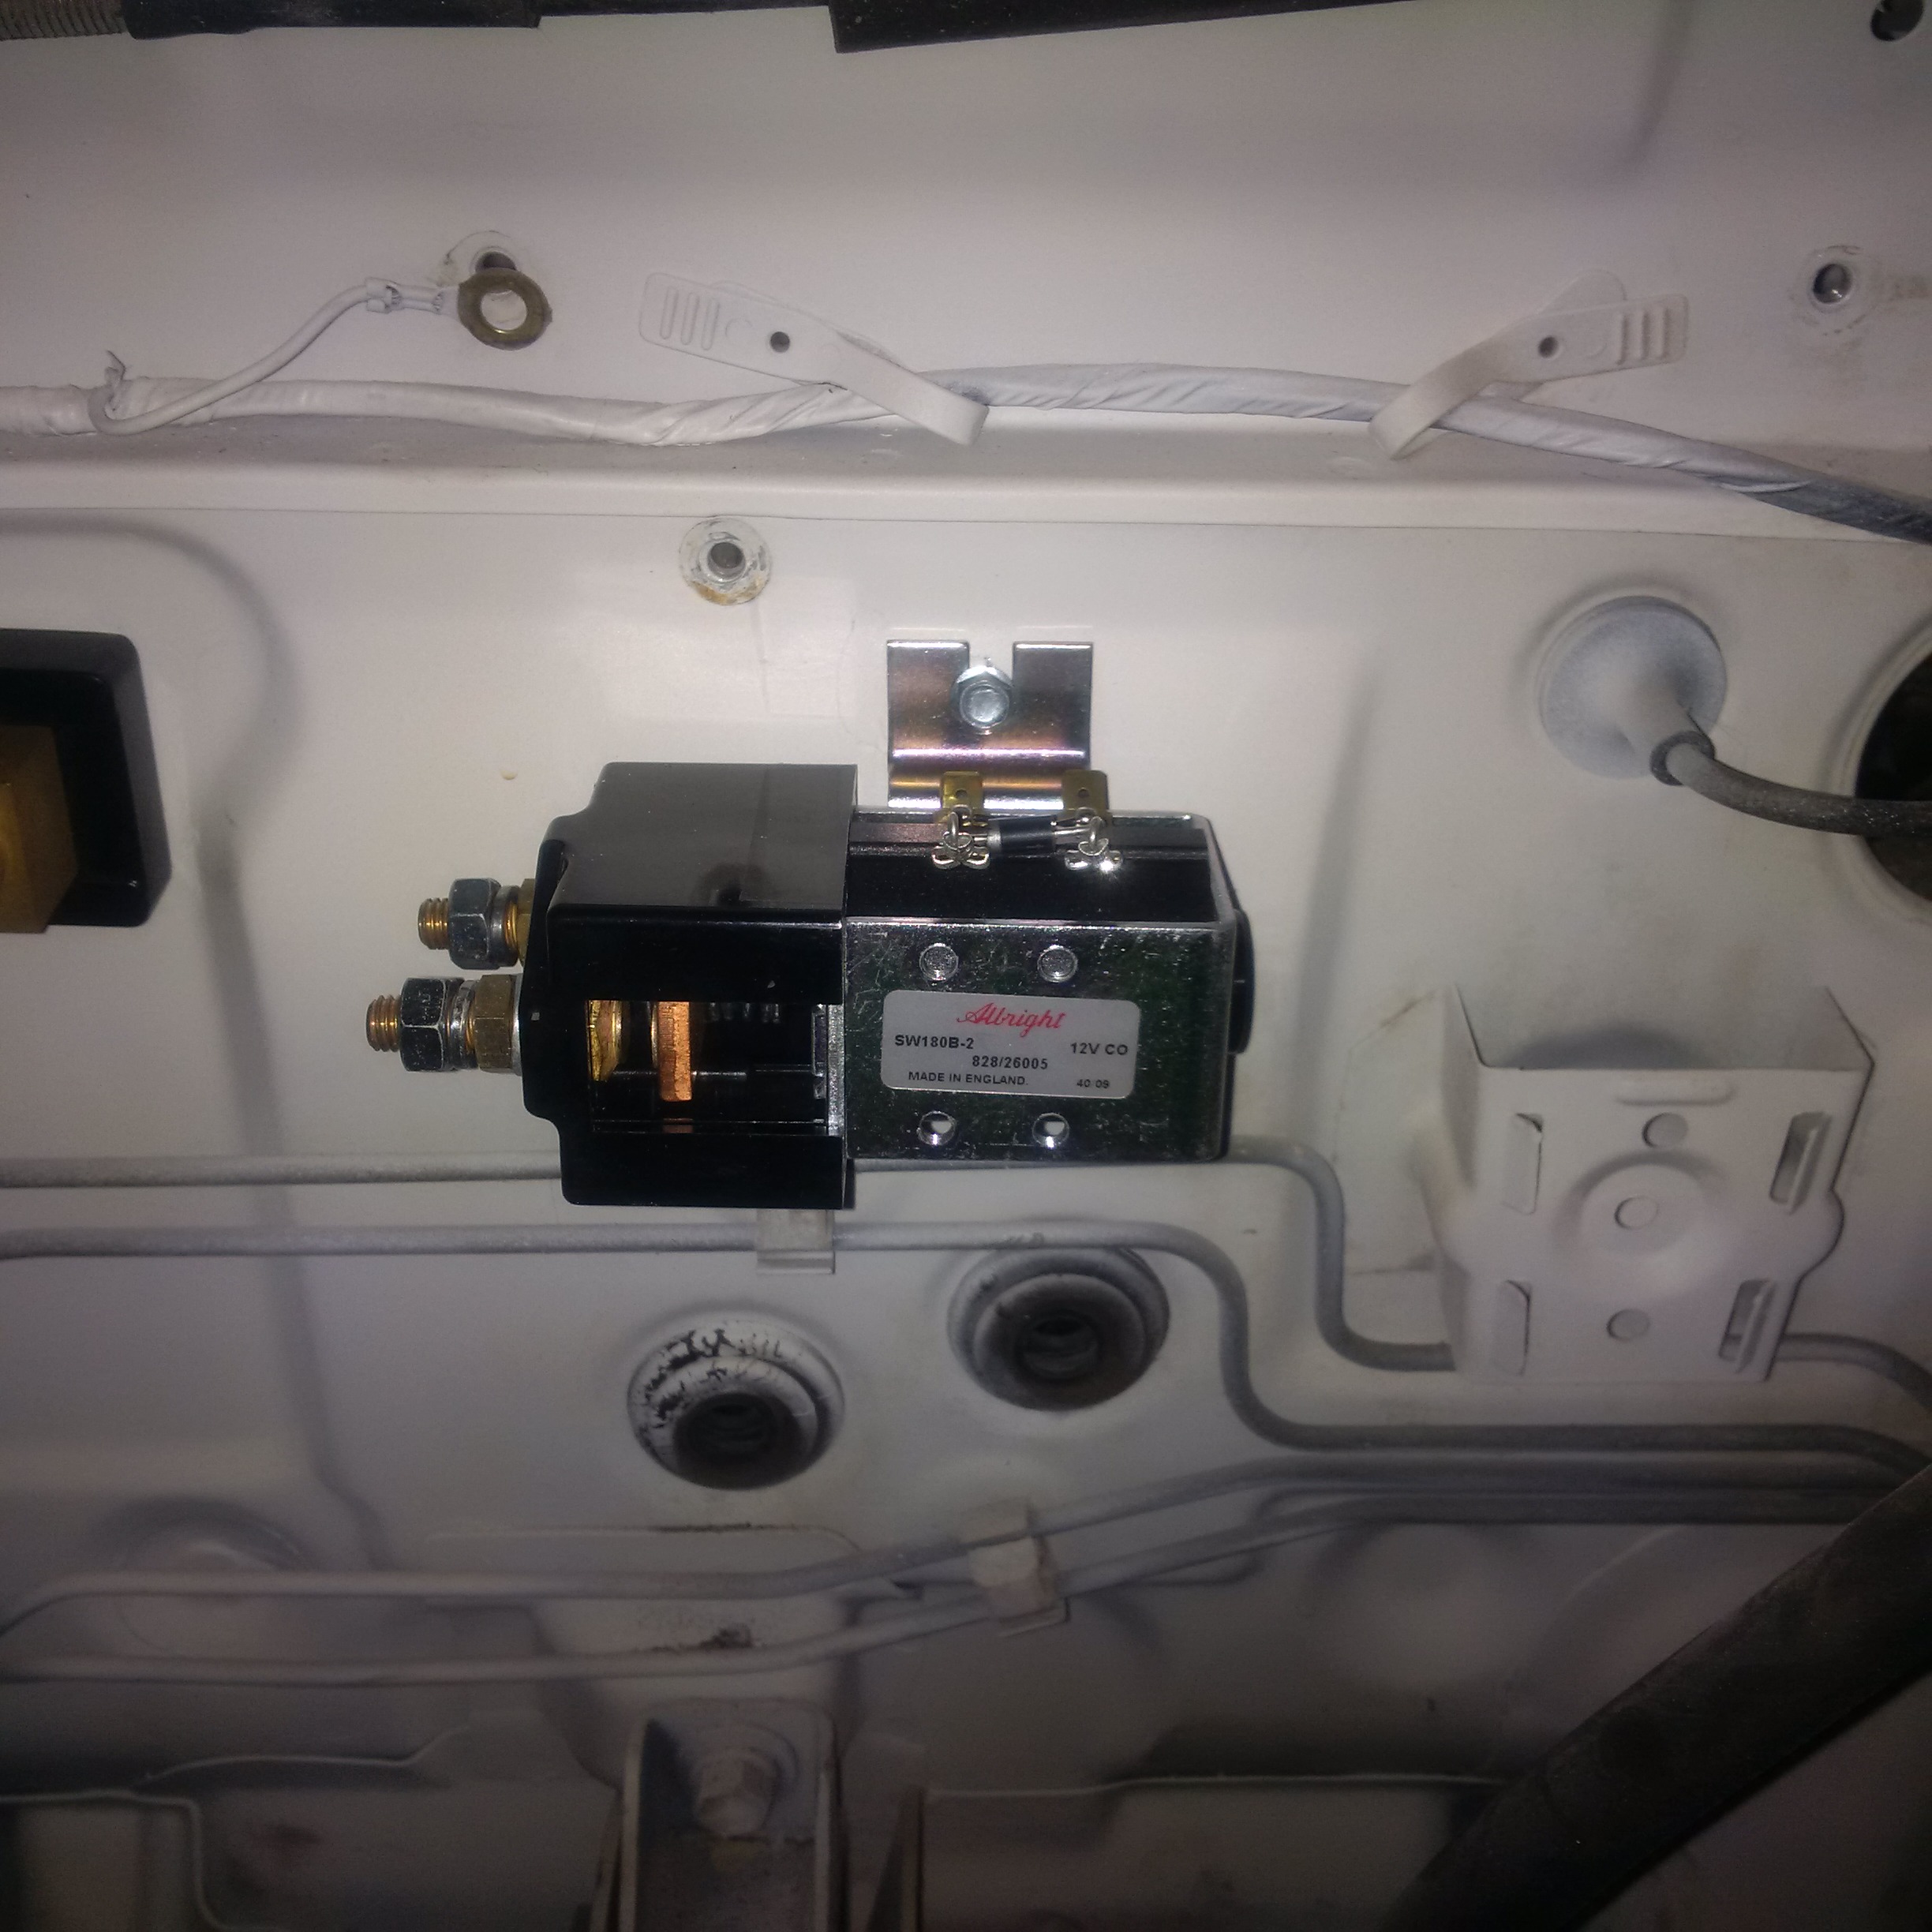
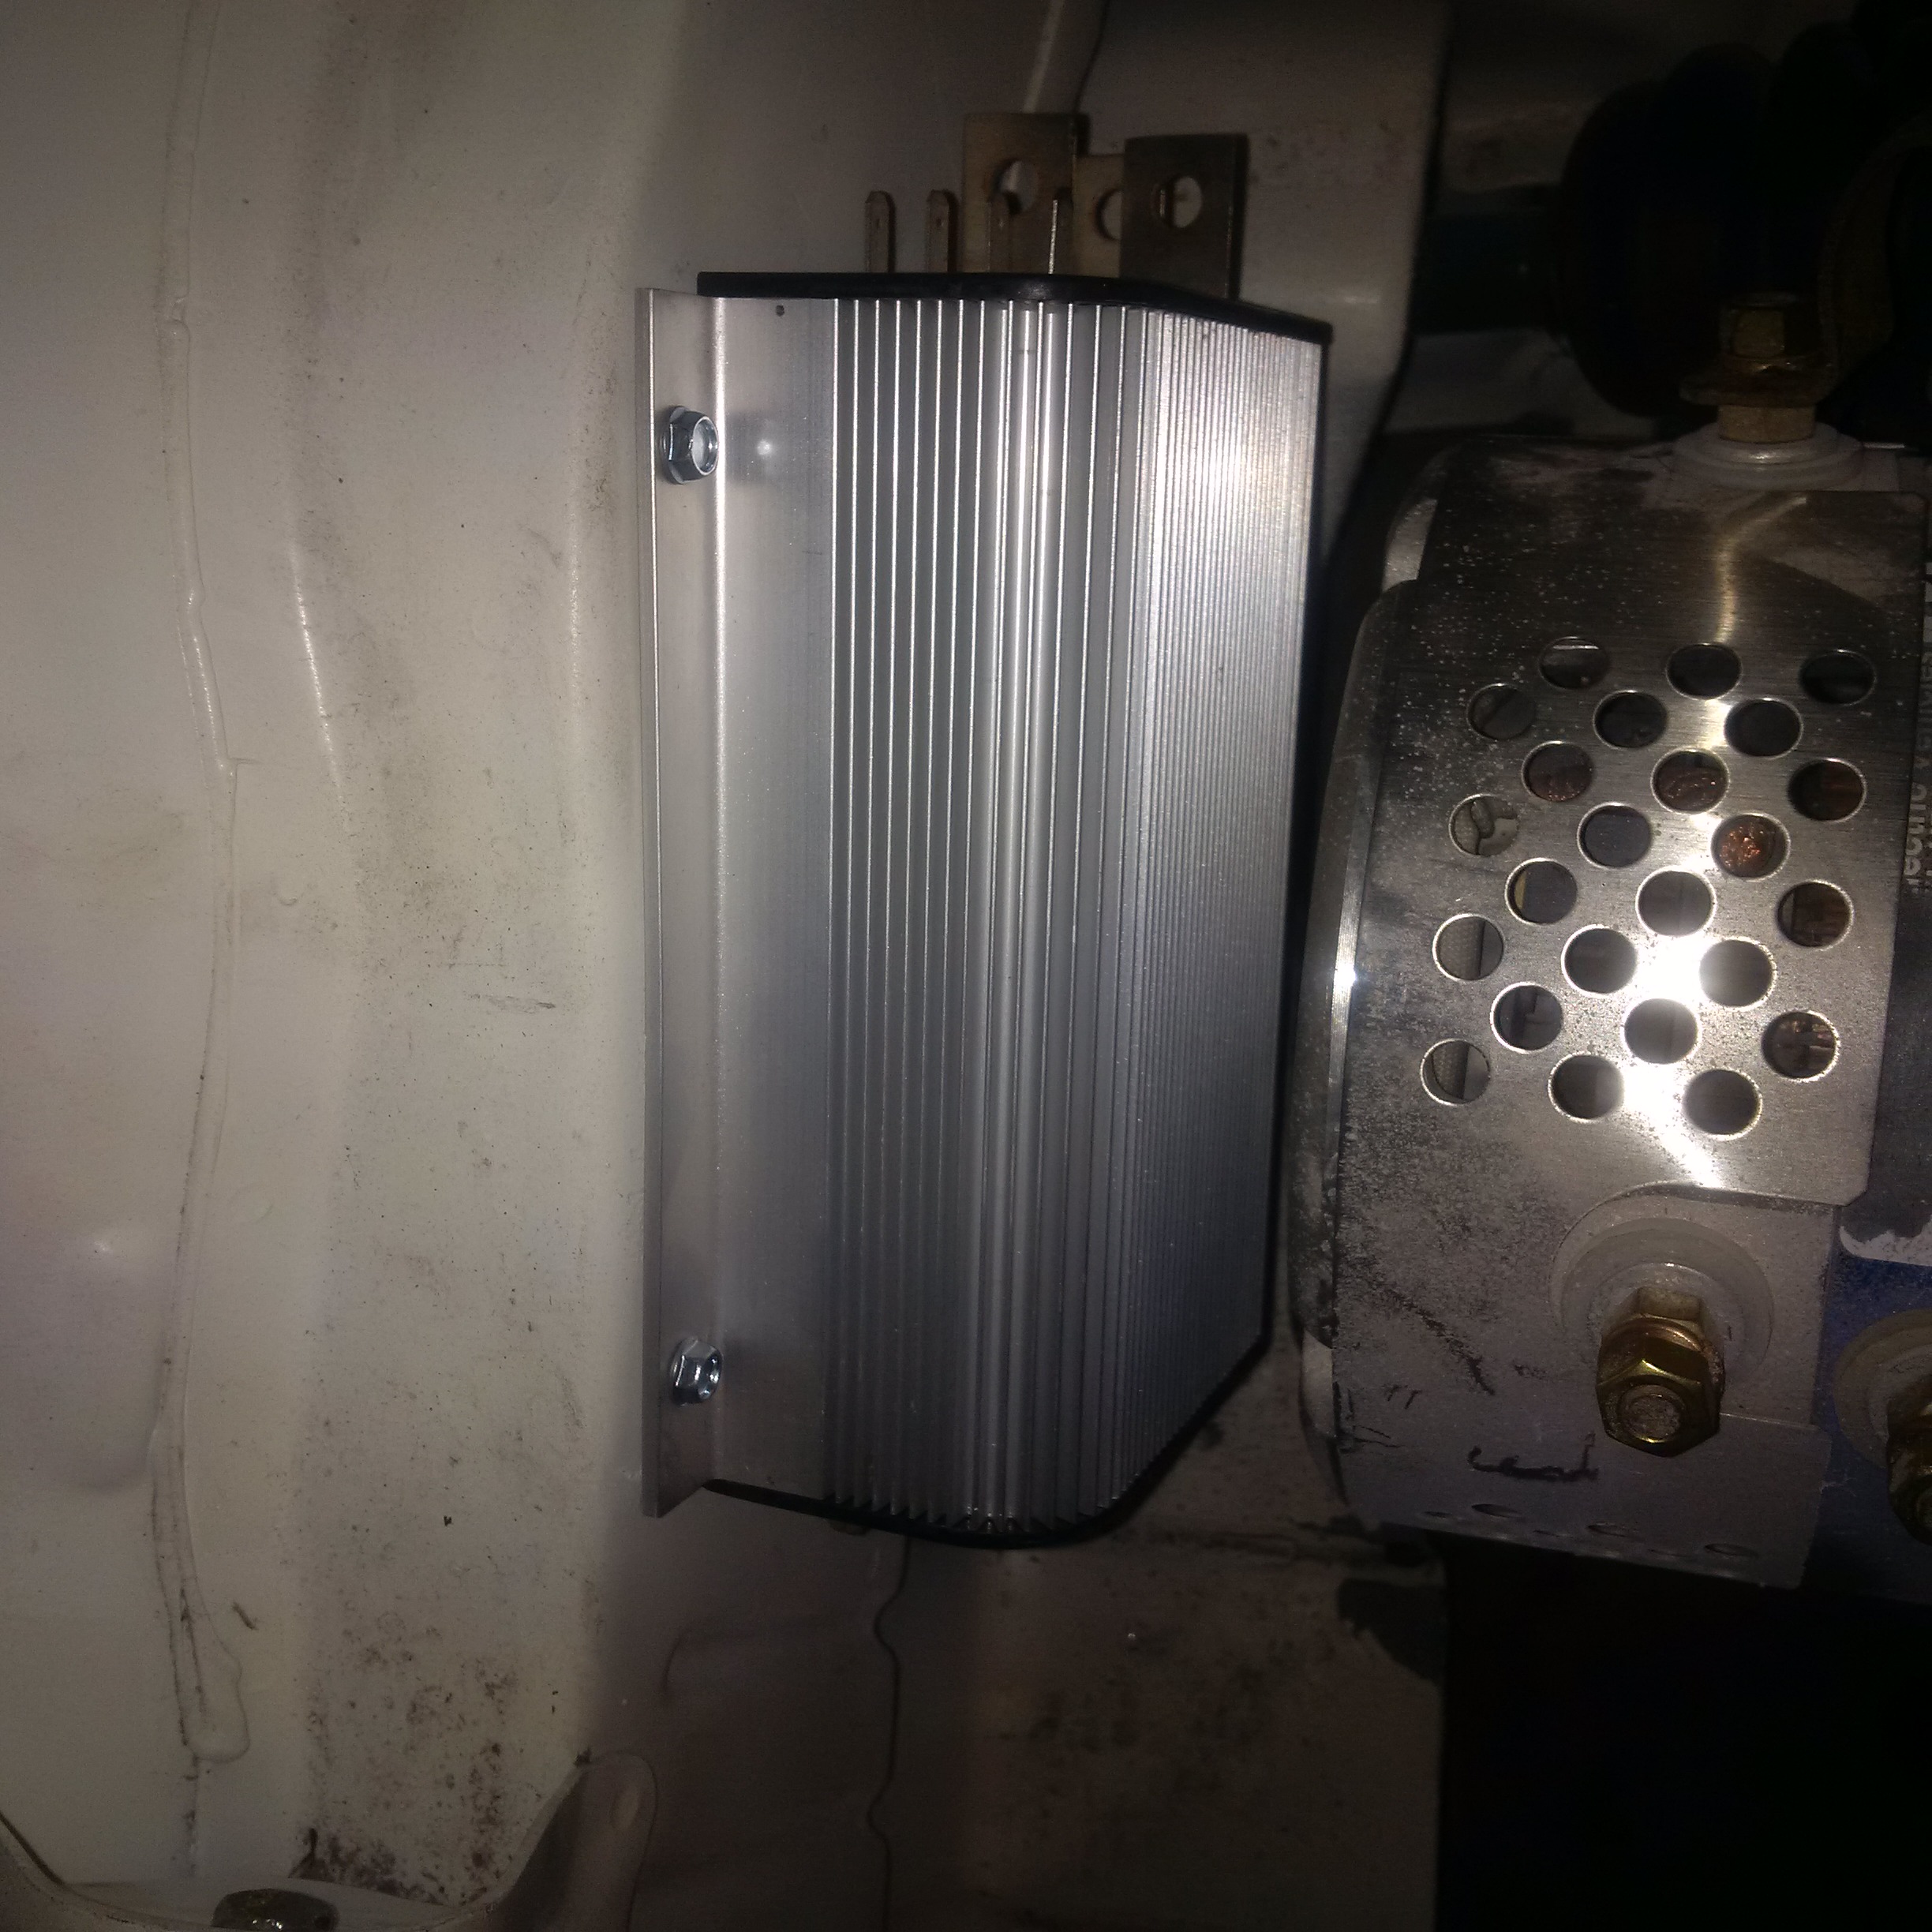
Some new progress as of Feb 3, 2016 is that the motor has now been powered up for the first time while attached to the transmission. Here are some pictures of the motor, contactor, controller, throttle box and shunt, and the tungsten disulfide sprayed into the brushes. I found by experimenting with an electric lawnmower that it freed up so much energy by spraying the brushes with ws2 that it actually burnt the strip fuse for the safety brake because it was more than the fuse could handle (30A strip fuse).
Here's a good video of what I plan to follow to make the cables
Another thing I plan to do is press apart the wheel bearings like this video to press the tapered bearing out and then clean it and put in NMF and tungsten disulfide. This has worked really well on my mountain bike and road bike for the bearings in the wheels, bottom bracket and jockey wheels.
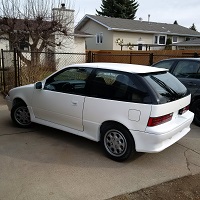
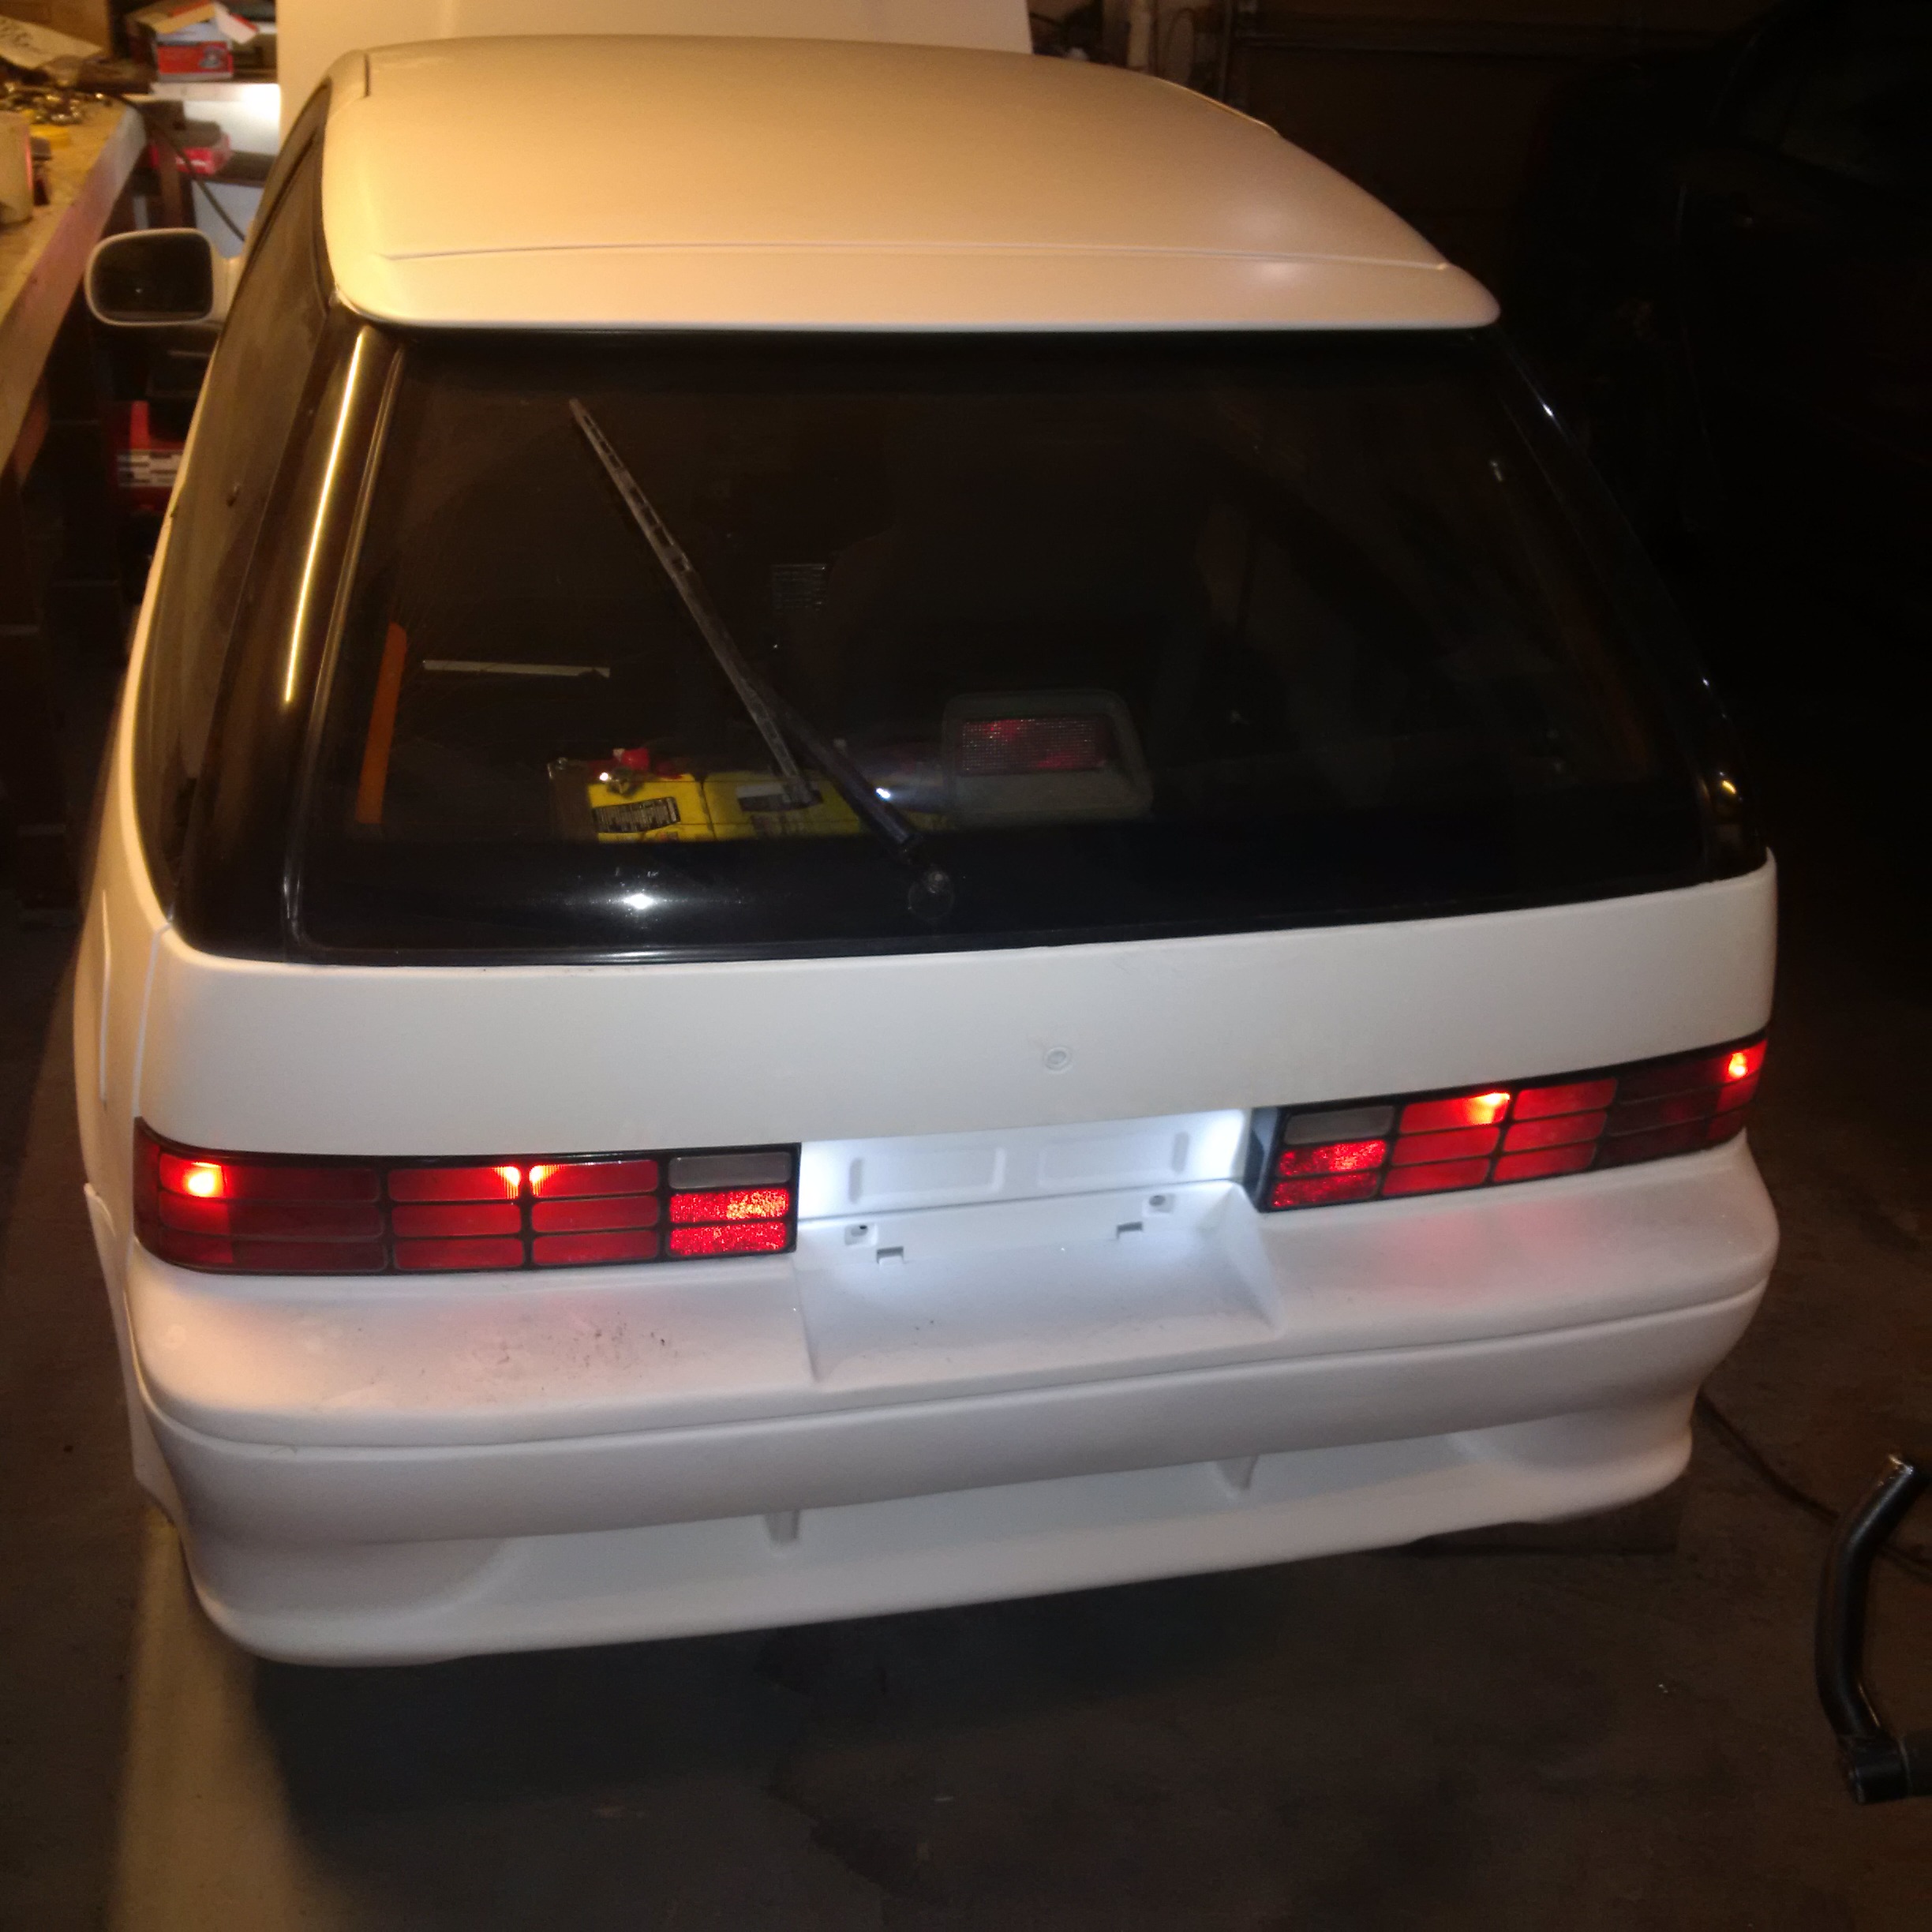
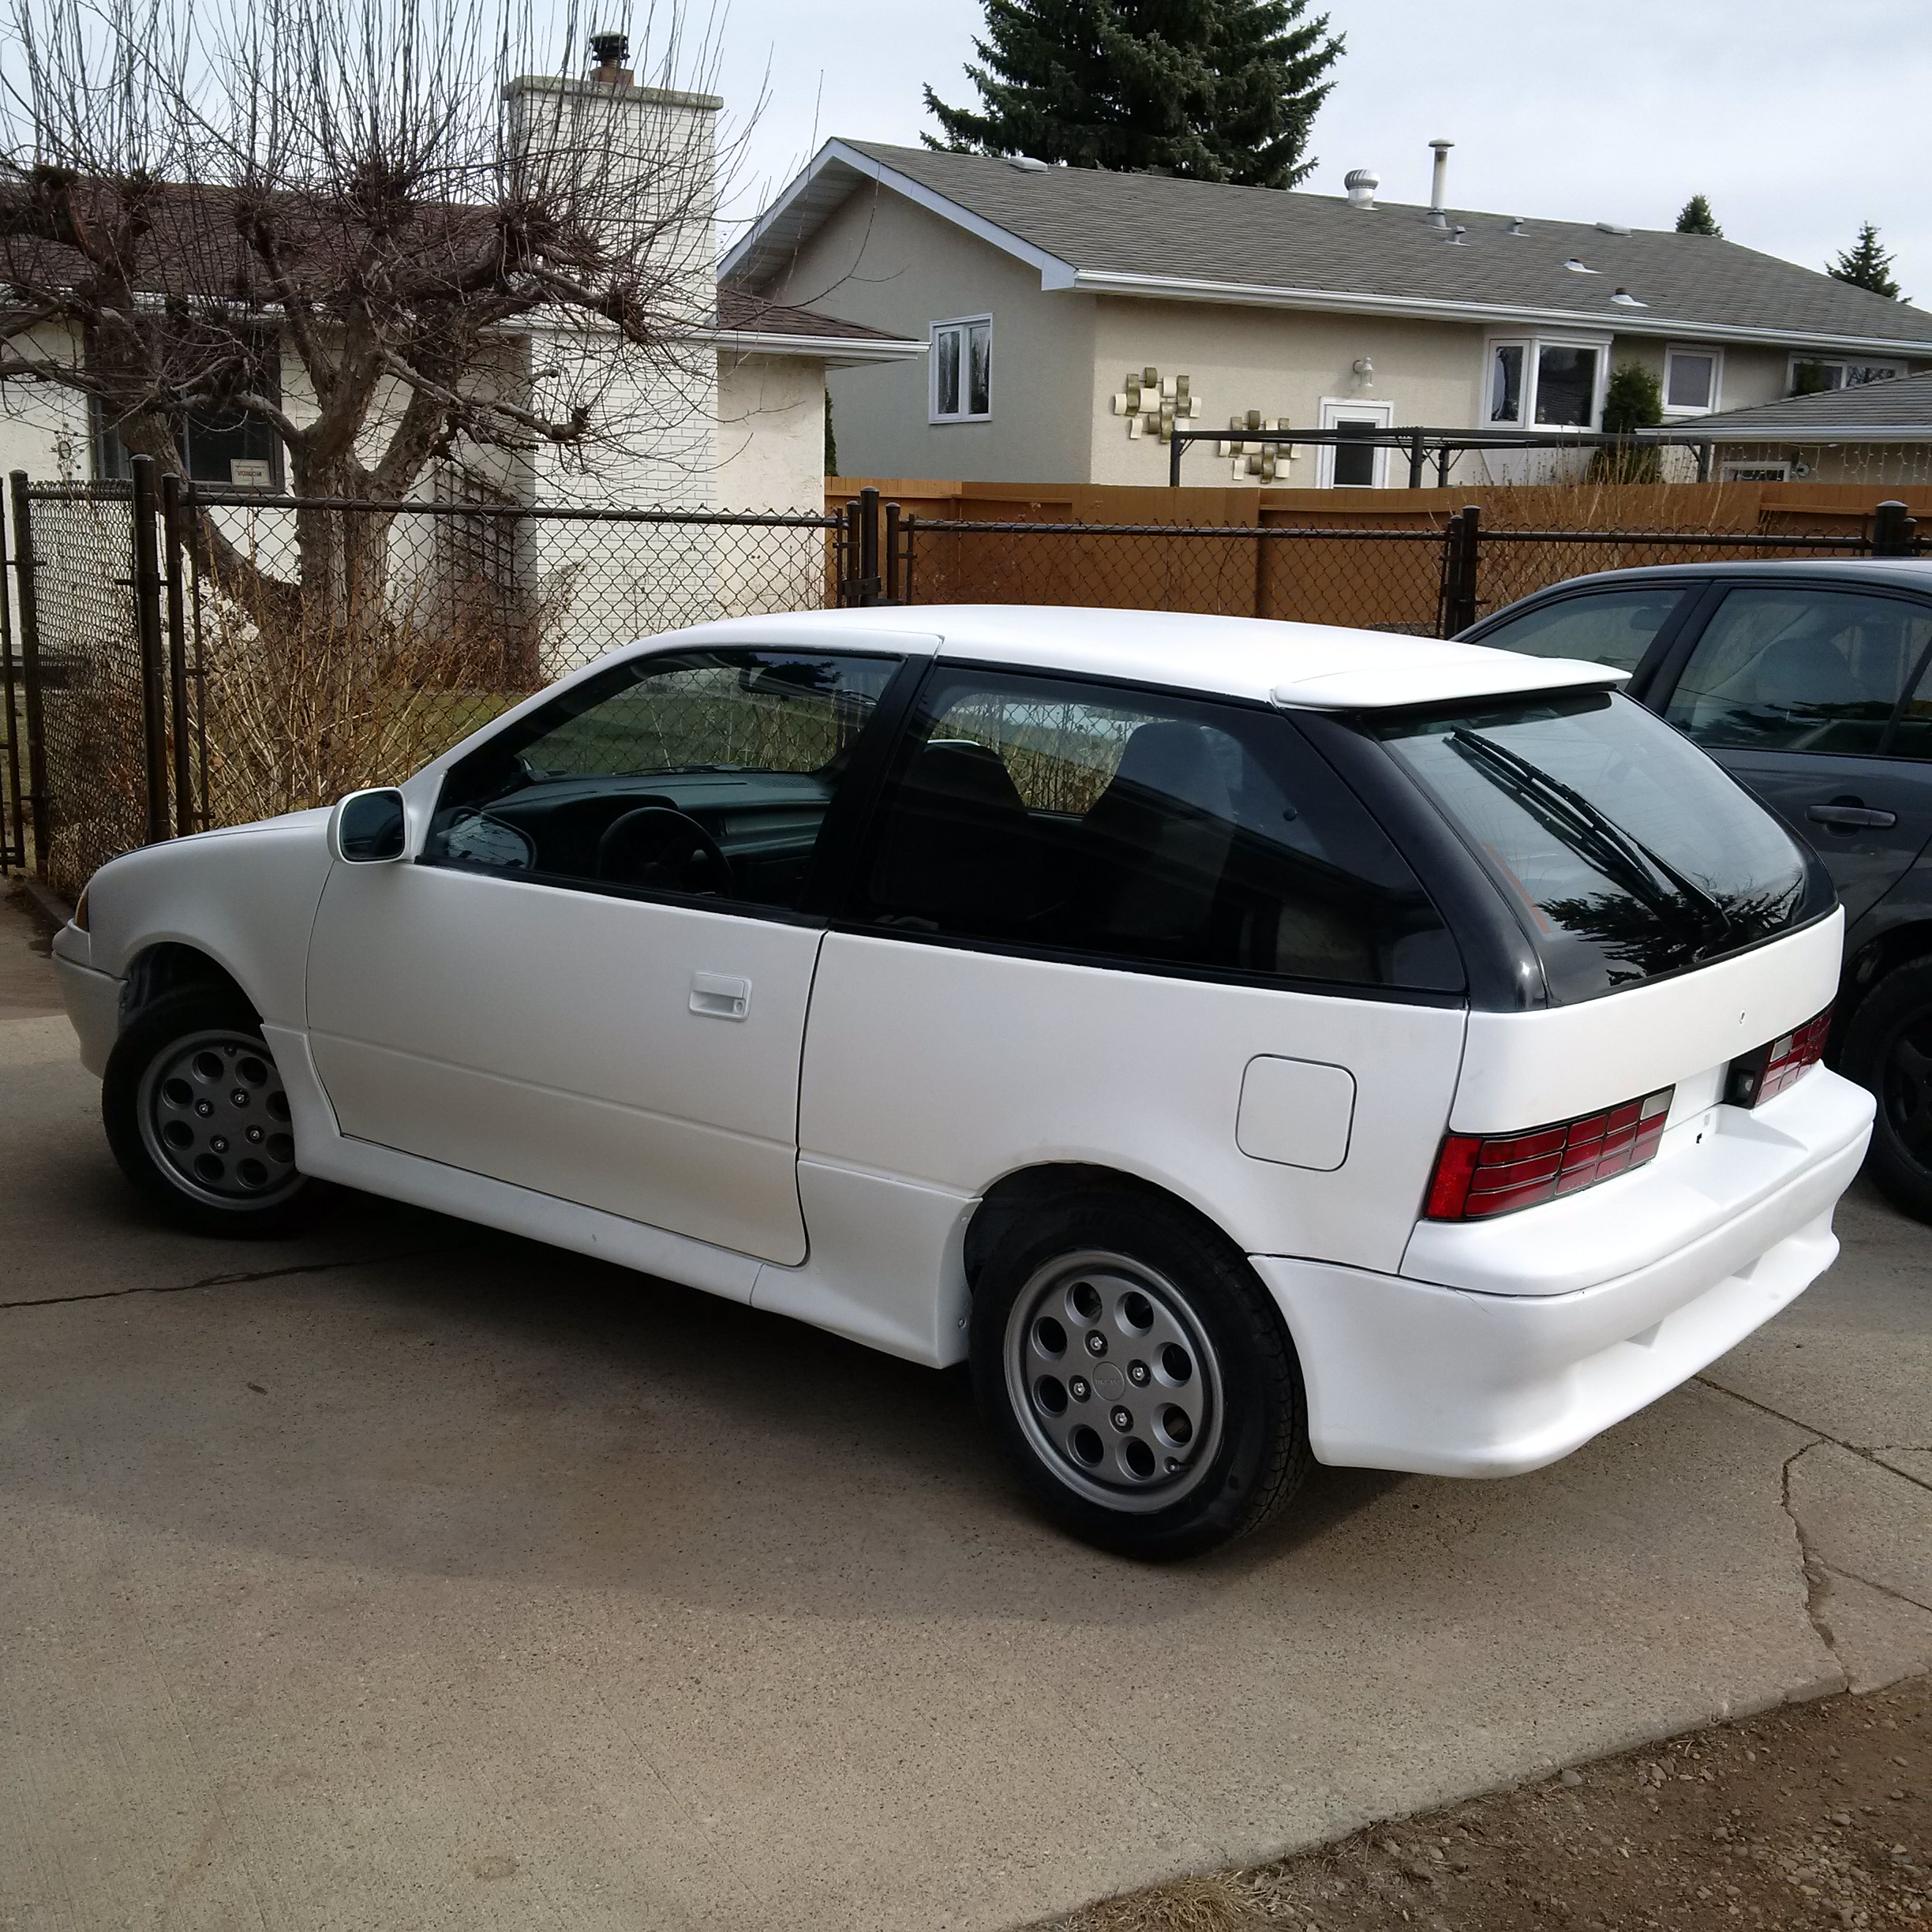
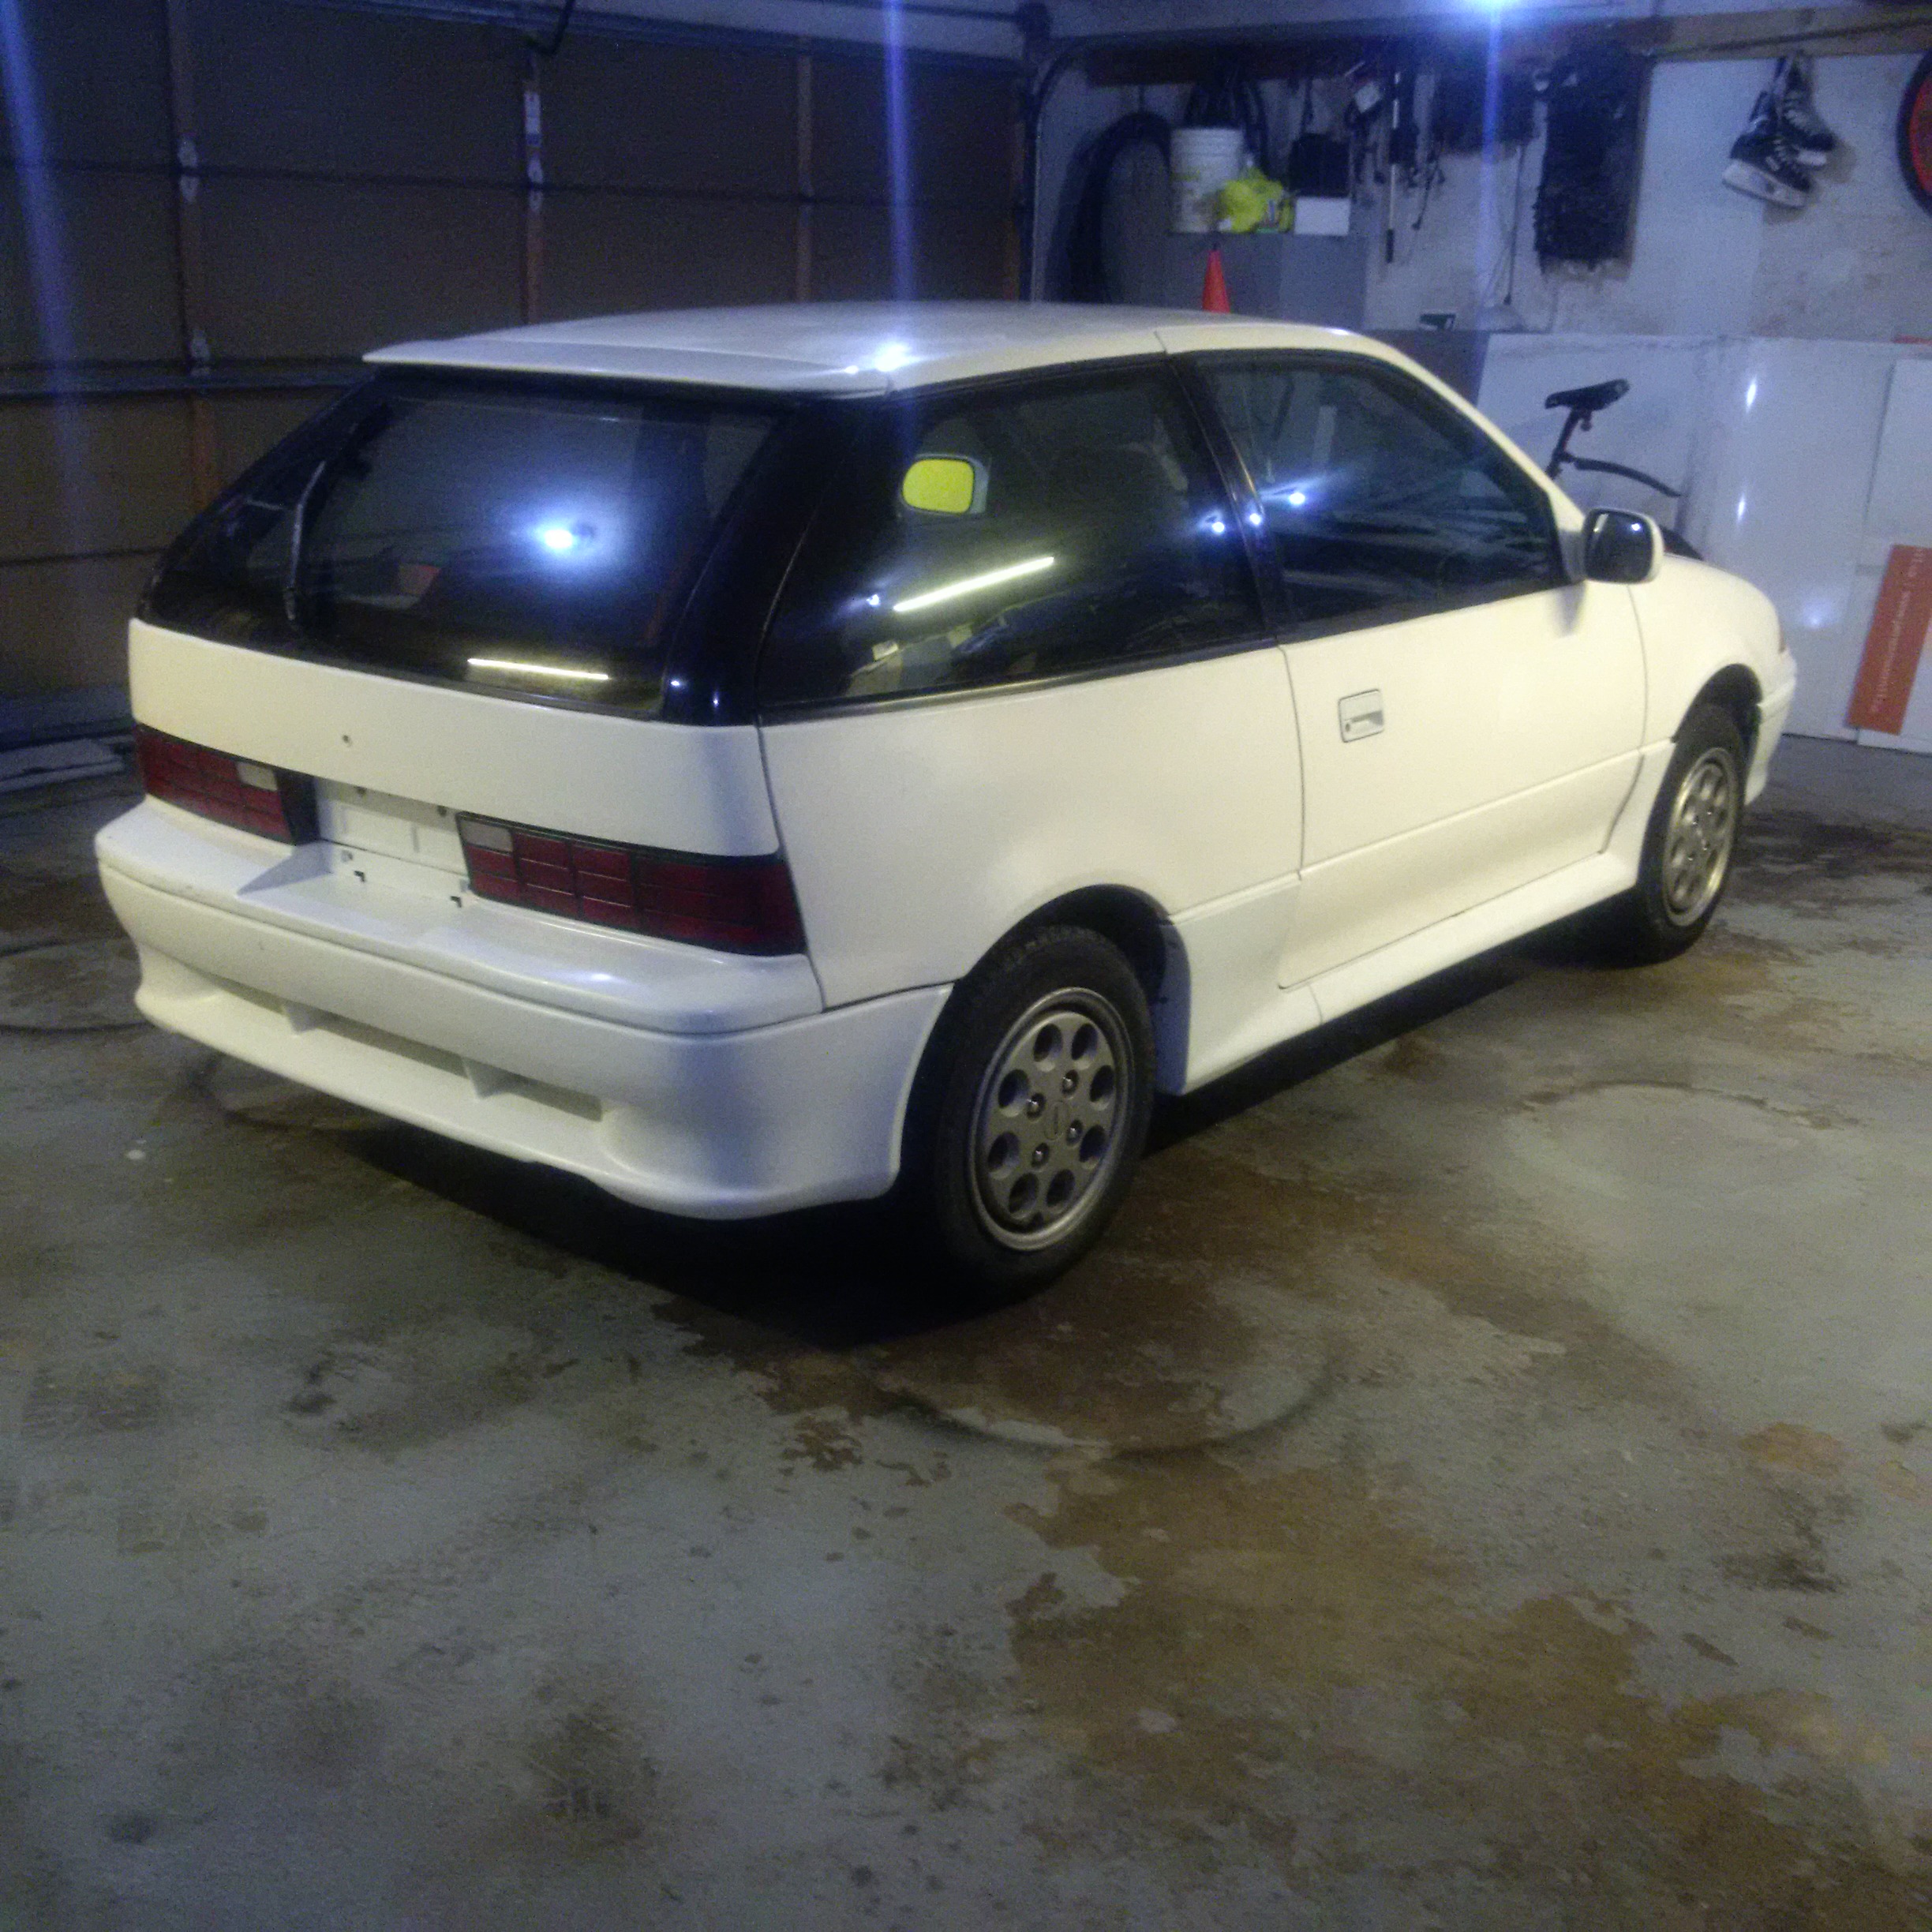
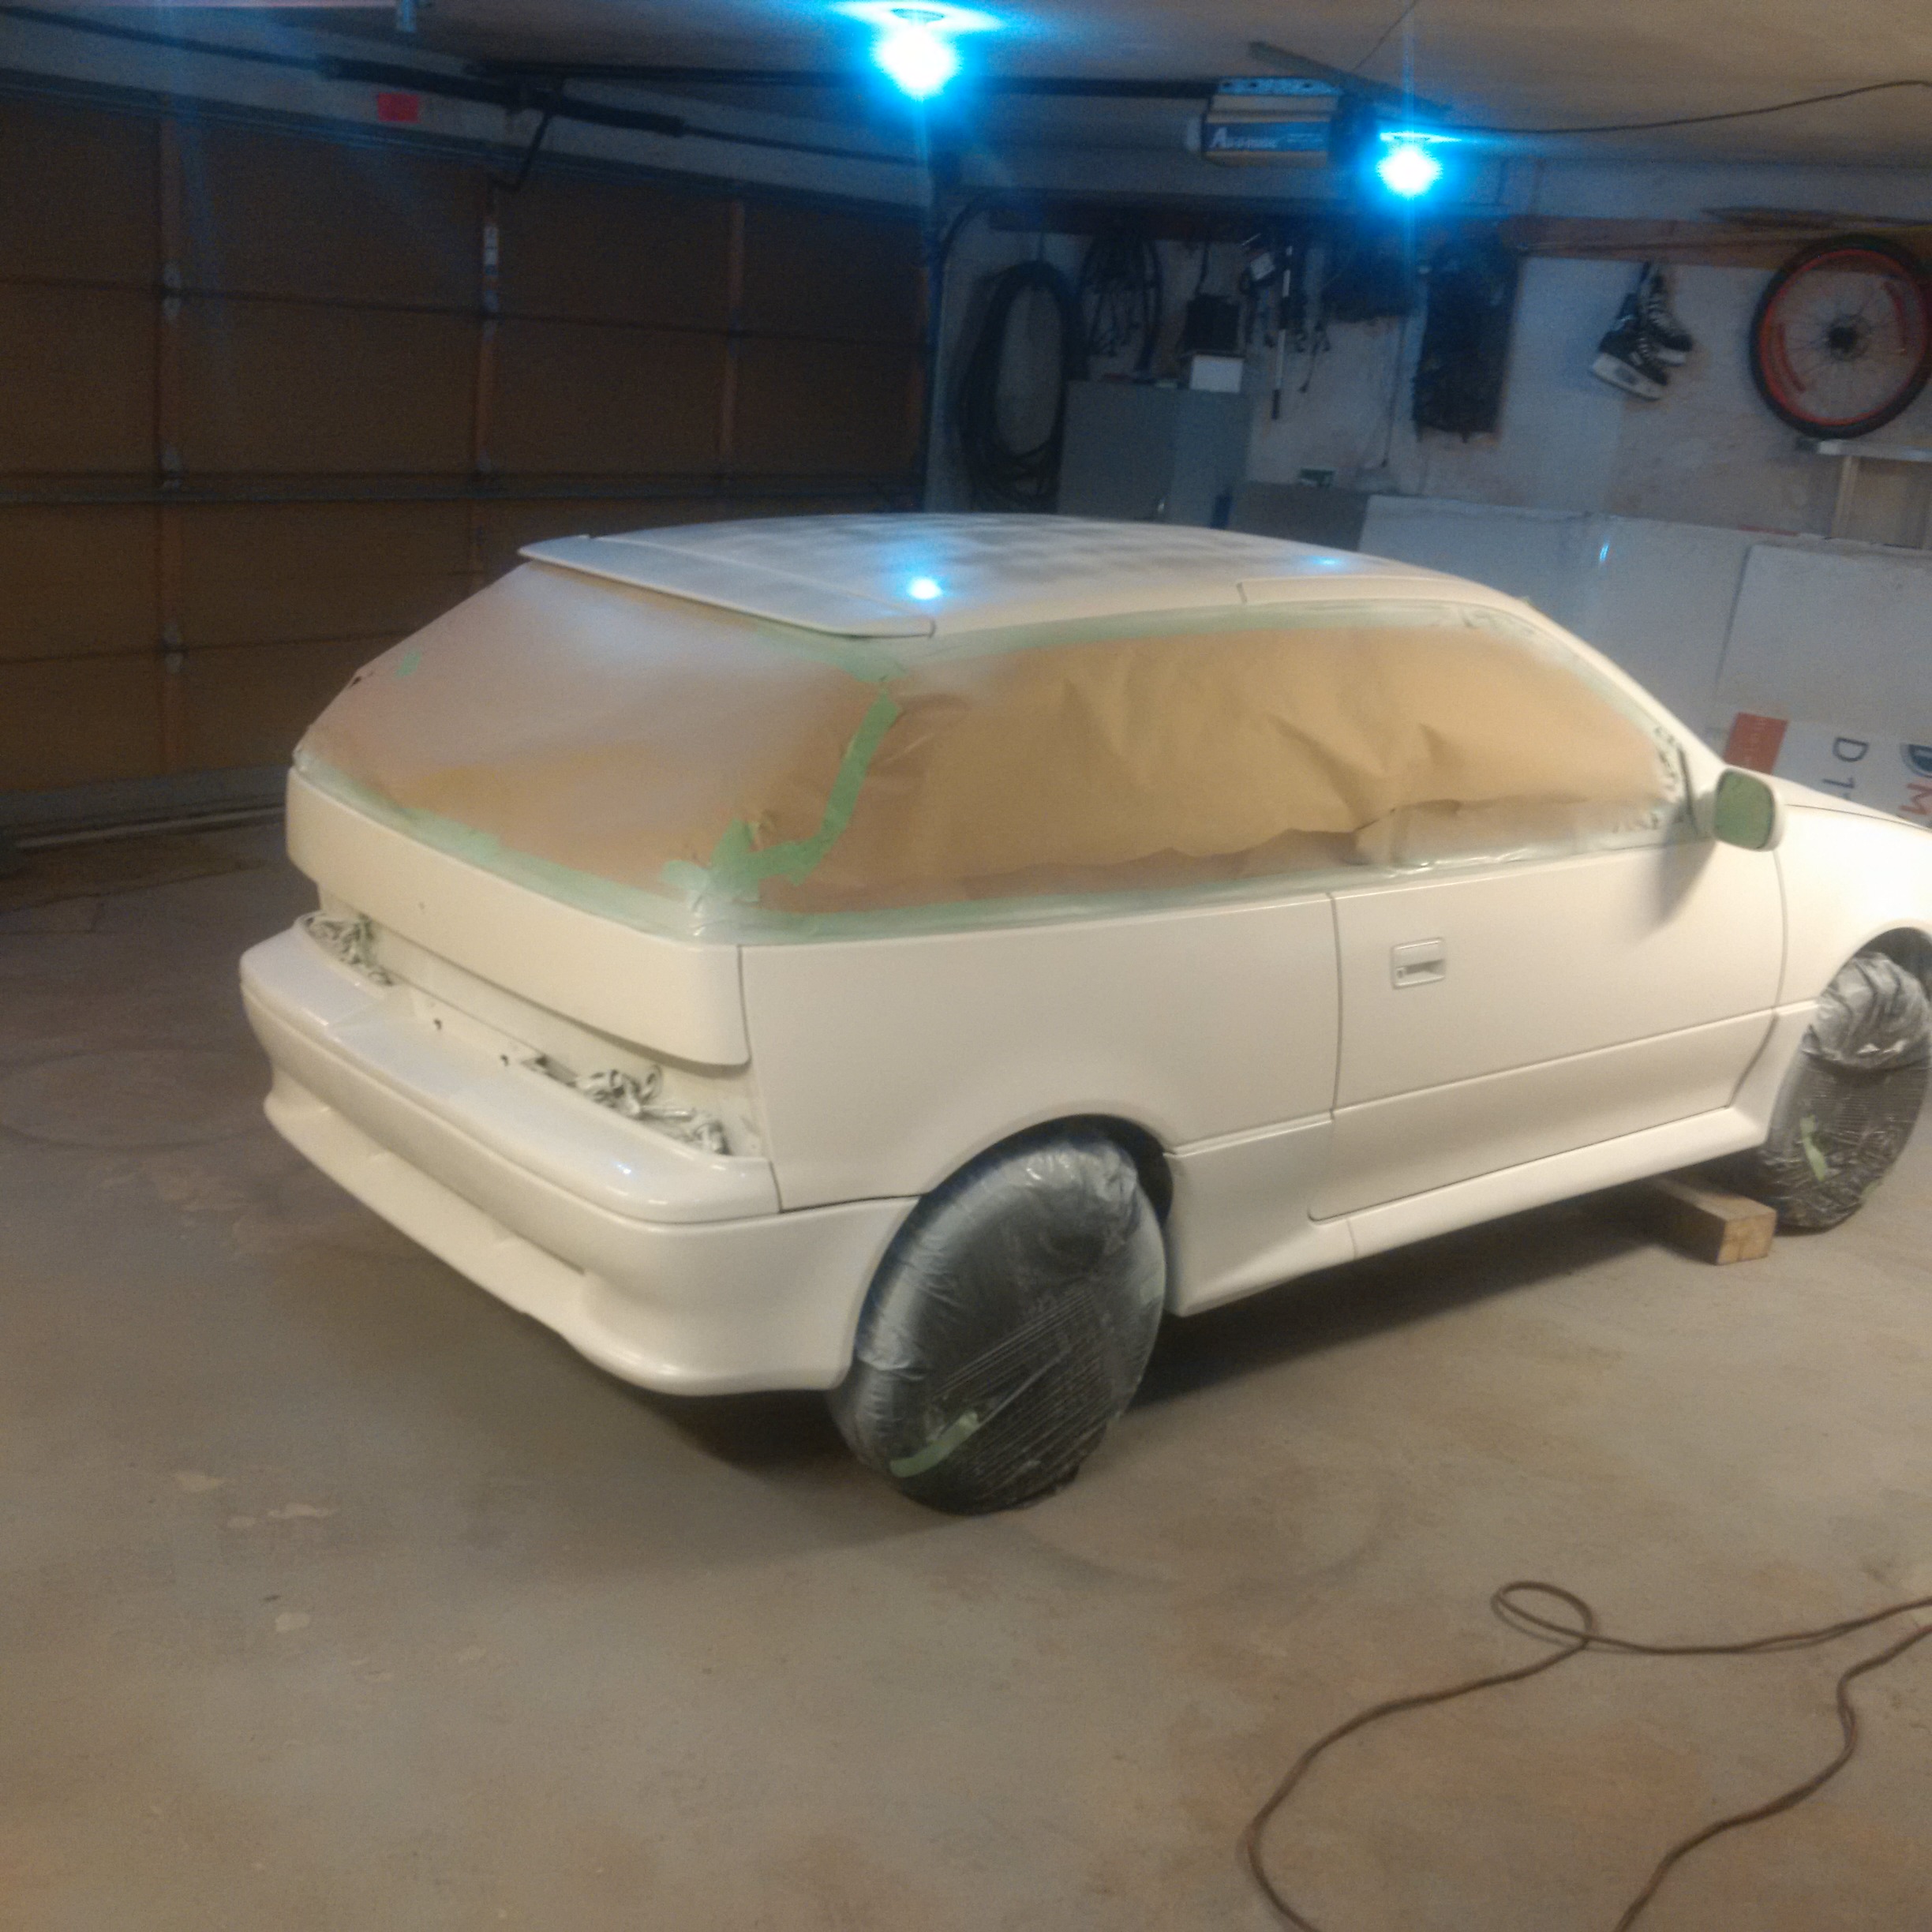
Here are a bunch of pictures for the quick paint job with plasti dip that was done just before Christmas of 2015
The car before paint
Another pic of the car before paint
Spraying the car
Spraying the lenses with clear coat plast dip glossifier
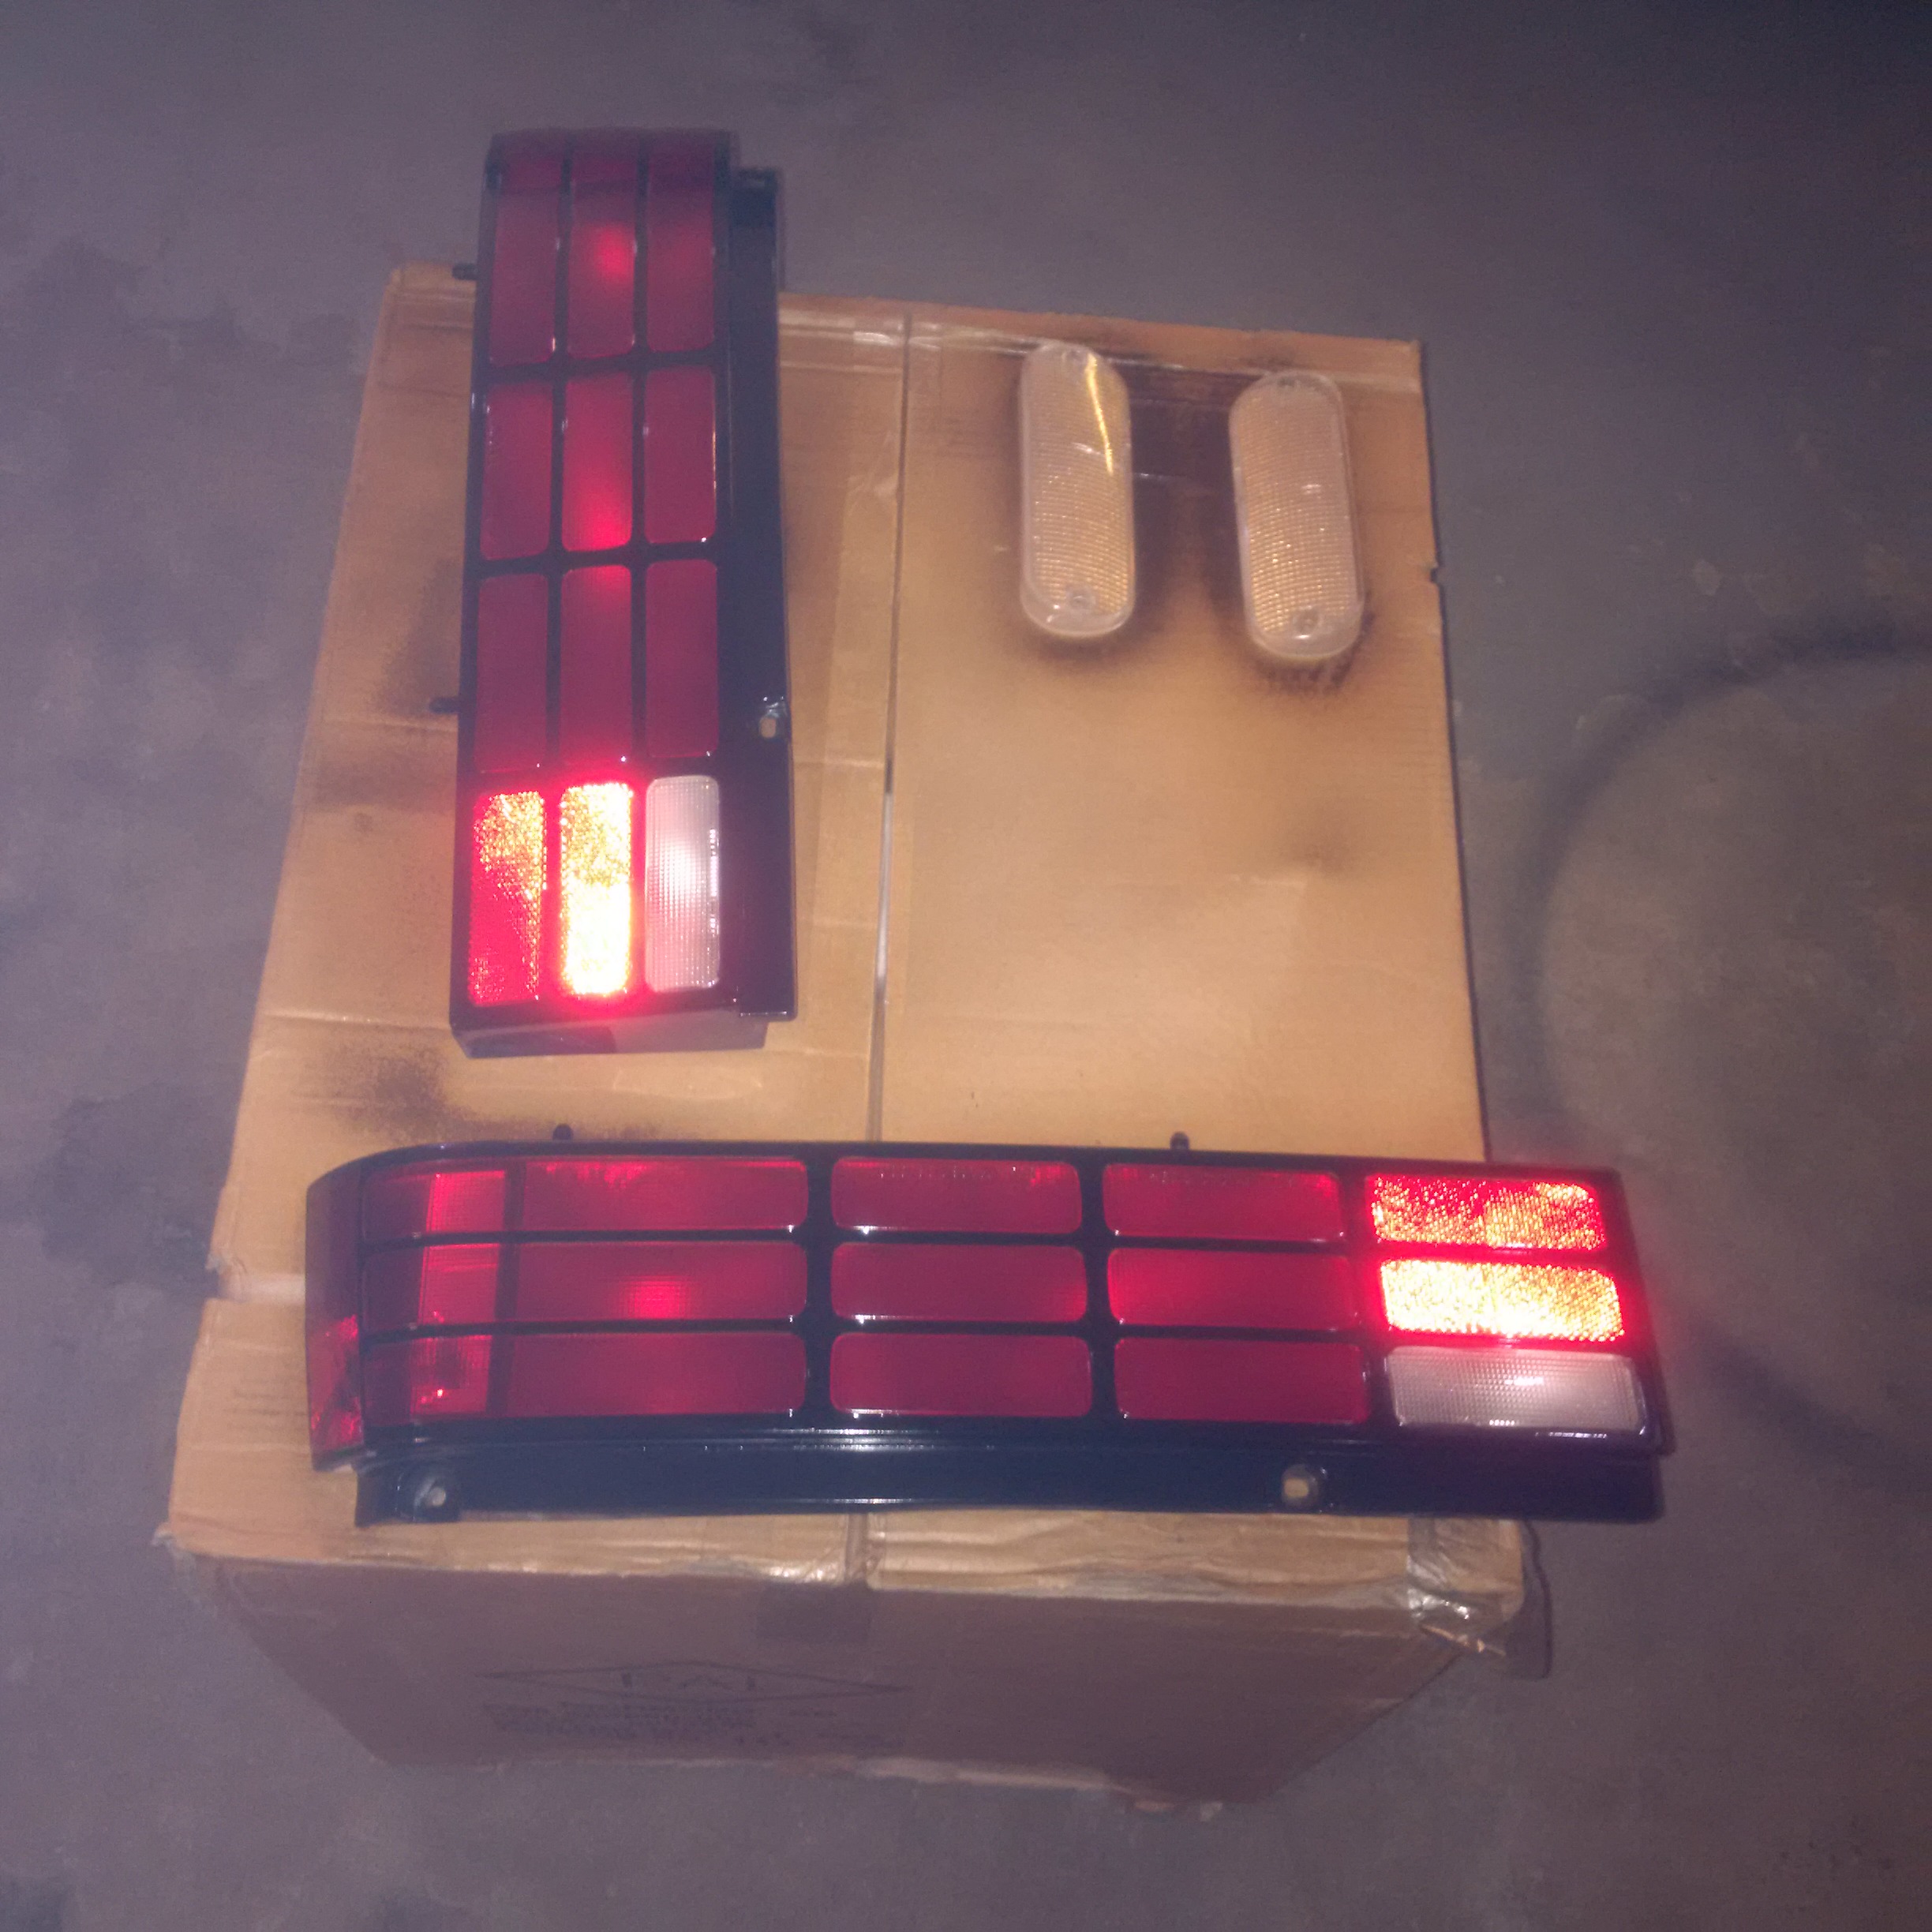
Tail lenses and front markers sprayed with plasti dip glossifer
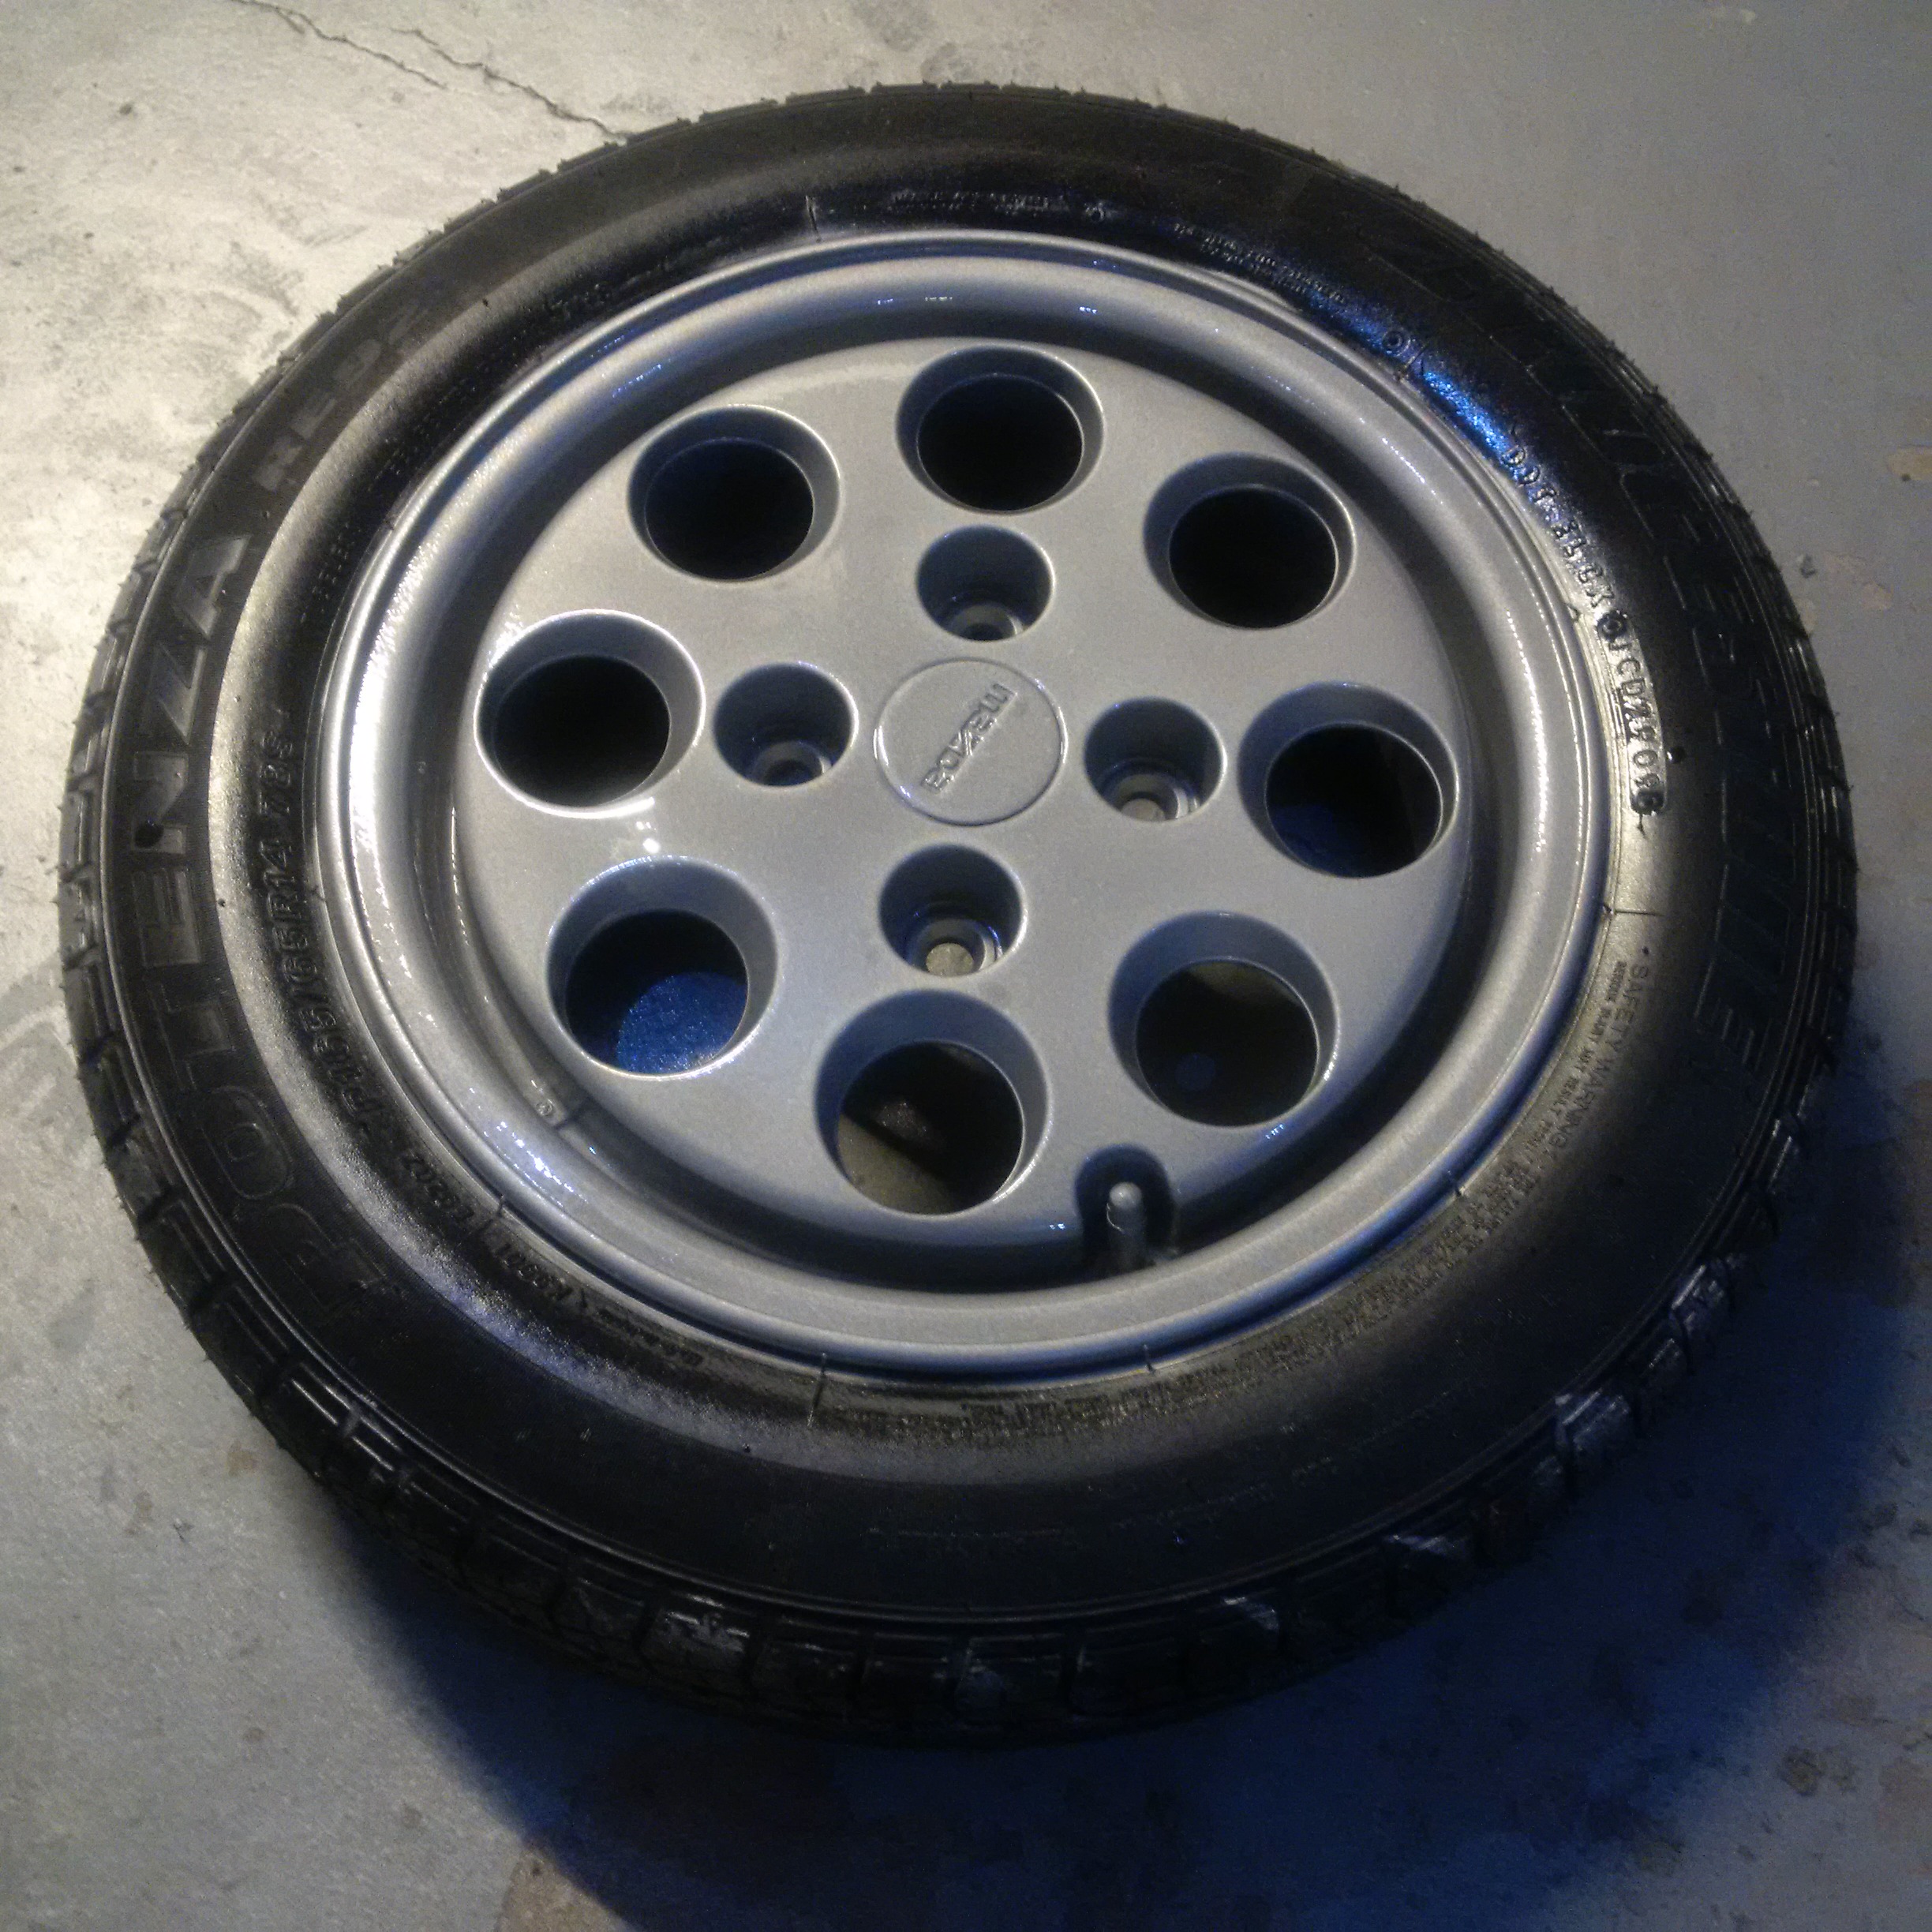
The wheels sprayed with aluminum plasti dip and then with glossifier
Some of the black pieces sprayed with black plasti dip and then glossifier
The sprayed car unmasked wearing the winter wheels
A list of things yet to do include
- - replace the interior door panels since they were cut and modified by the previous owner
- - put nmf in the 5 speed transmission with the lowest viscosity dexron VI from Mobil
- - install polyurethane suspension bushings
- - finish fabricating the engine support and passenger axle shaft support on the passenger side with 3/4" boxbar aluminum and strapping over top to tie it down
- - cut the springs to drop the ride height - especially for the front
- - construct a full belly pan under the car to make it perfectly flat
- - construct wheel well liners to reduce the volume of air in the wheel wells to reduce turbulence
- - create an air duct from corrugated plastic that takes the air from the front lower grille opening and compresses it and runs over the controller for cooling
- - create a grille block for the upper grille opening
- - get the 48v quartz heater figured out for winter operation
- - replace the cracked windshield
- - test it all out - around the block
- - spray the final clear coat over another coat of white and mix in the blue pearls
- - get it inspected by Roman so I can get insurance and registration on it
- - thinking of the possibility of making a frunk since there's a lot of space up there unused
- - spray the hubs of the rotors and the brakes with high temp black paint
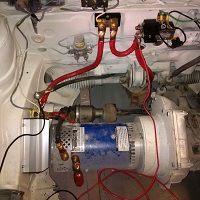
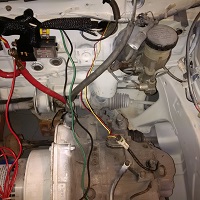
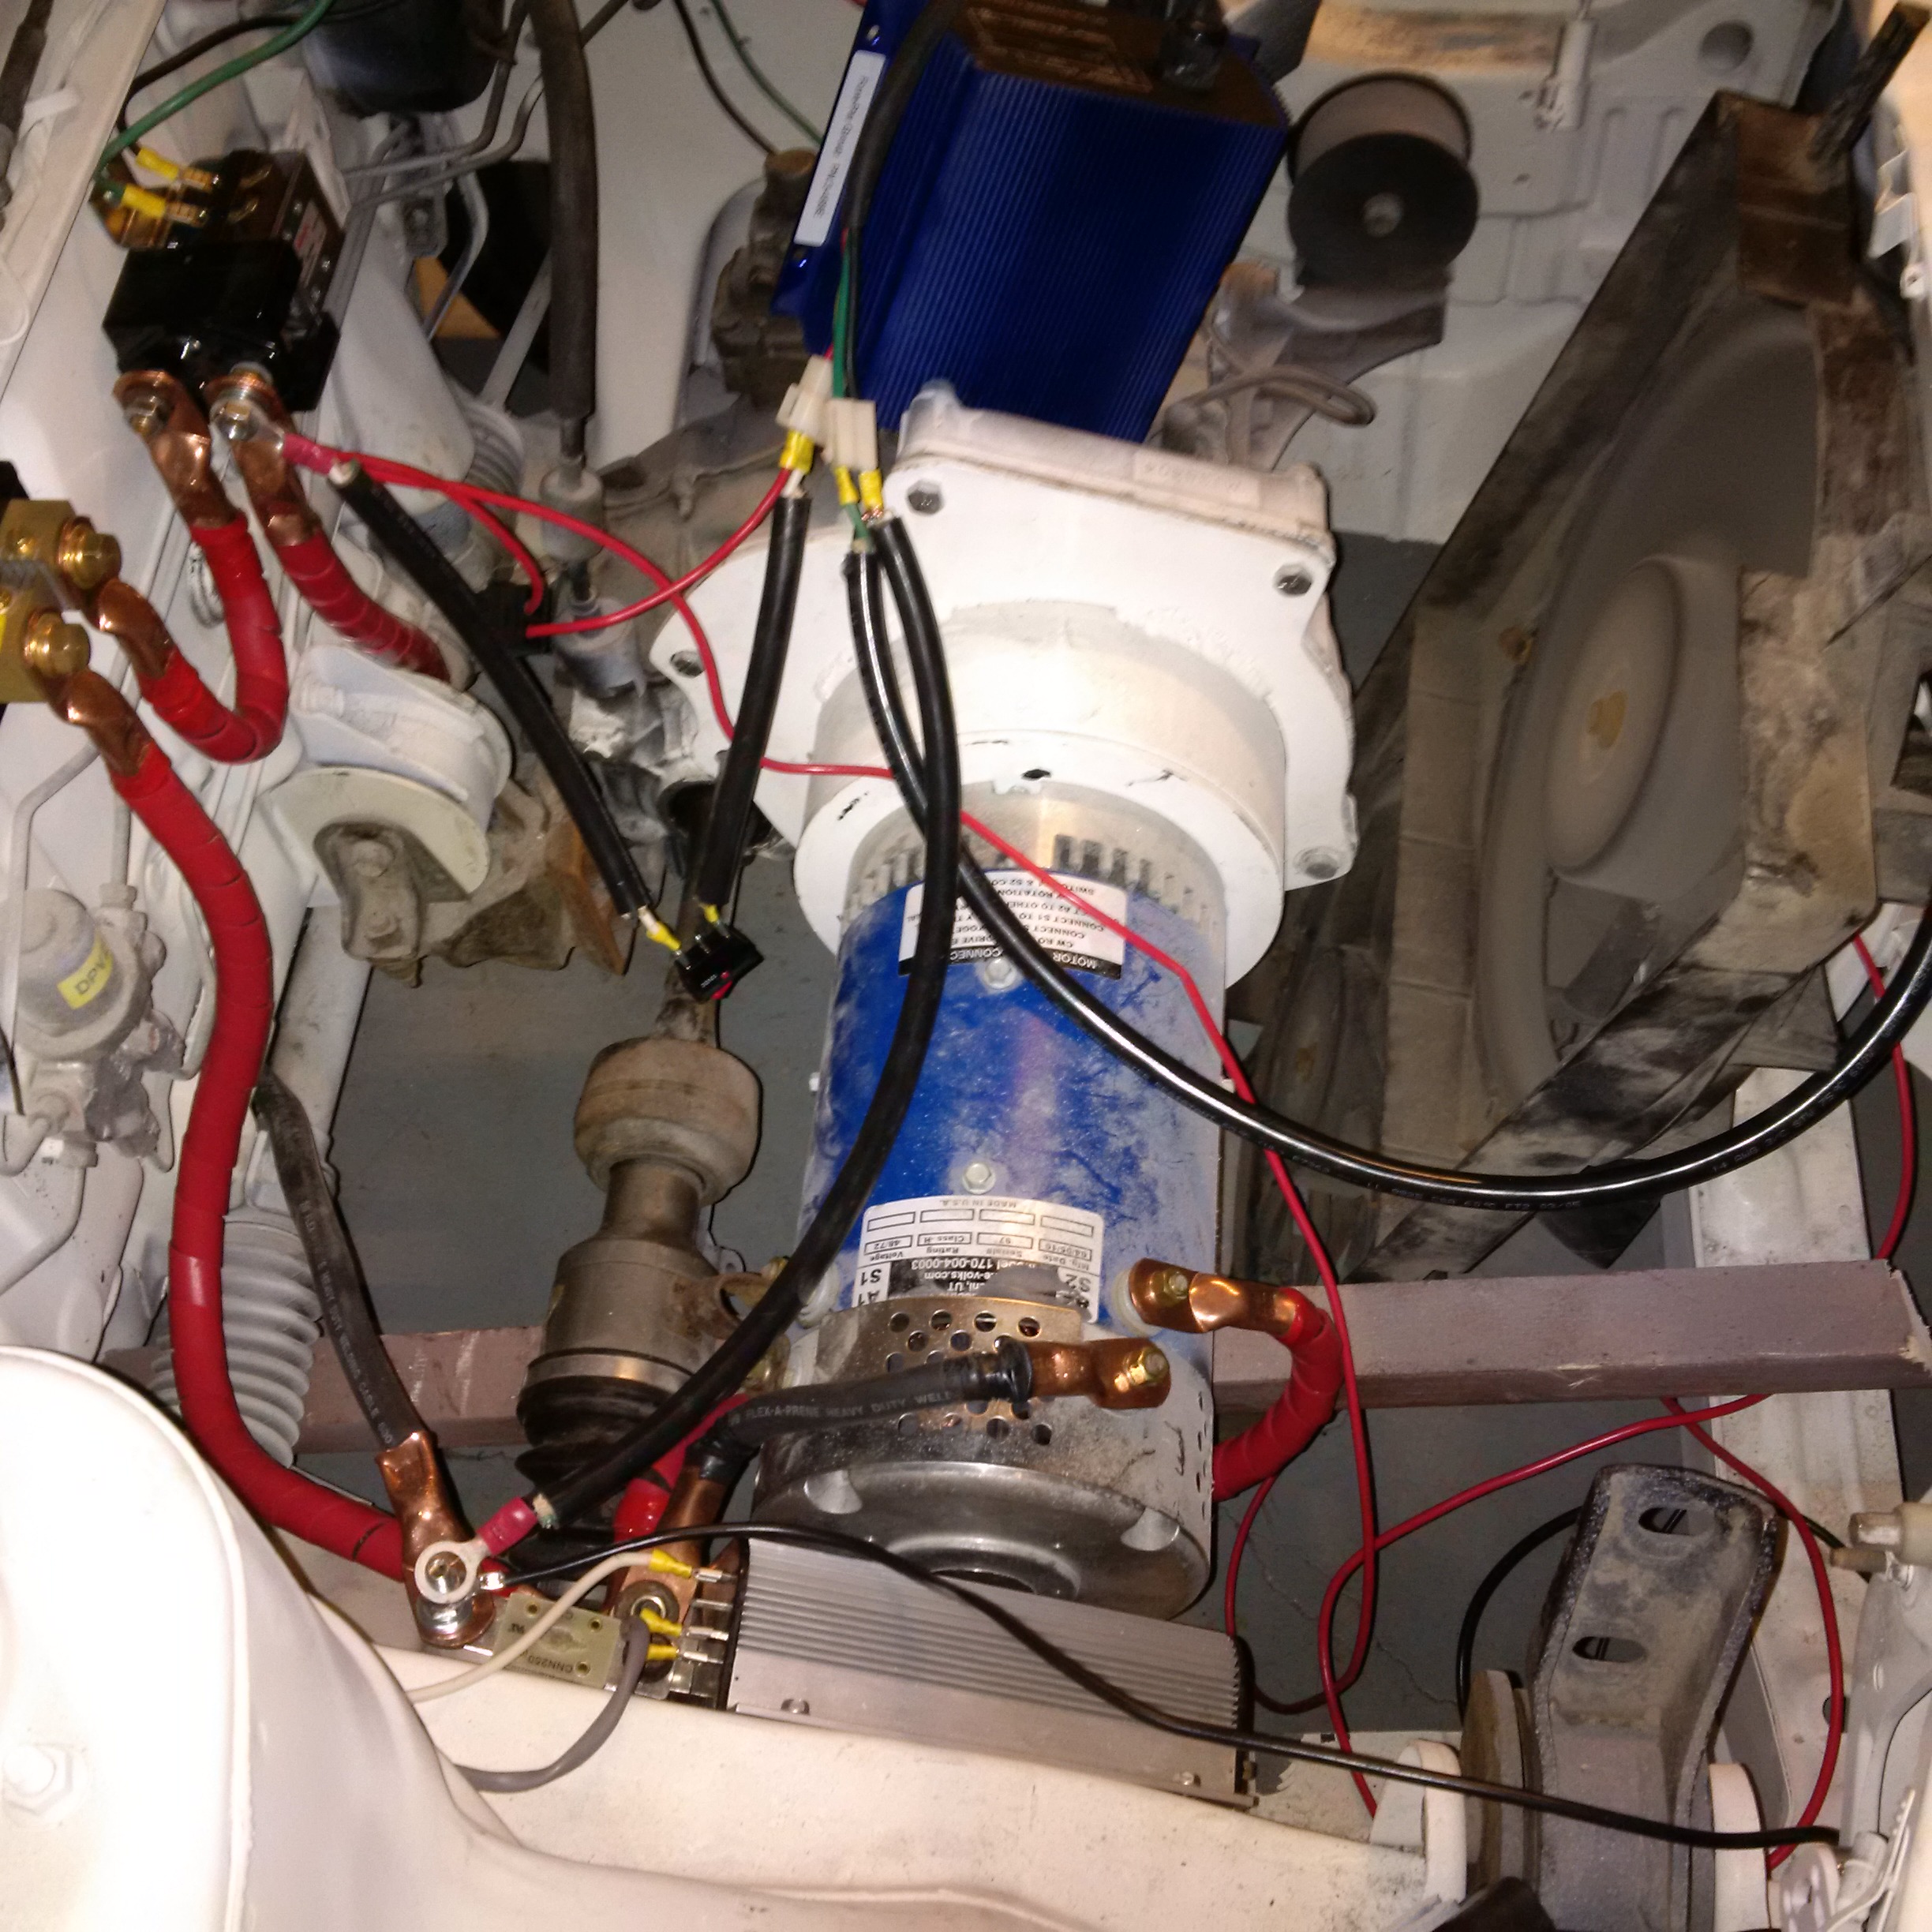
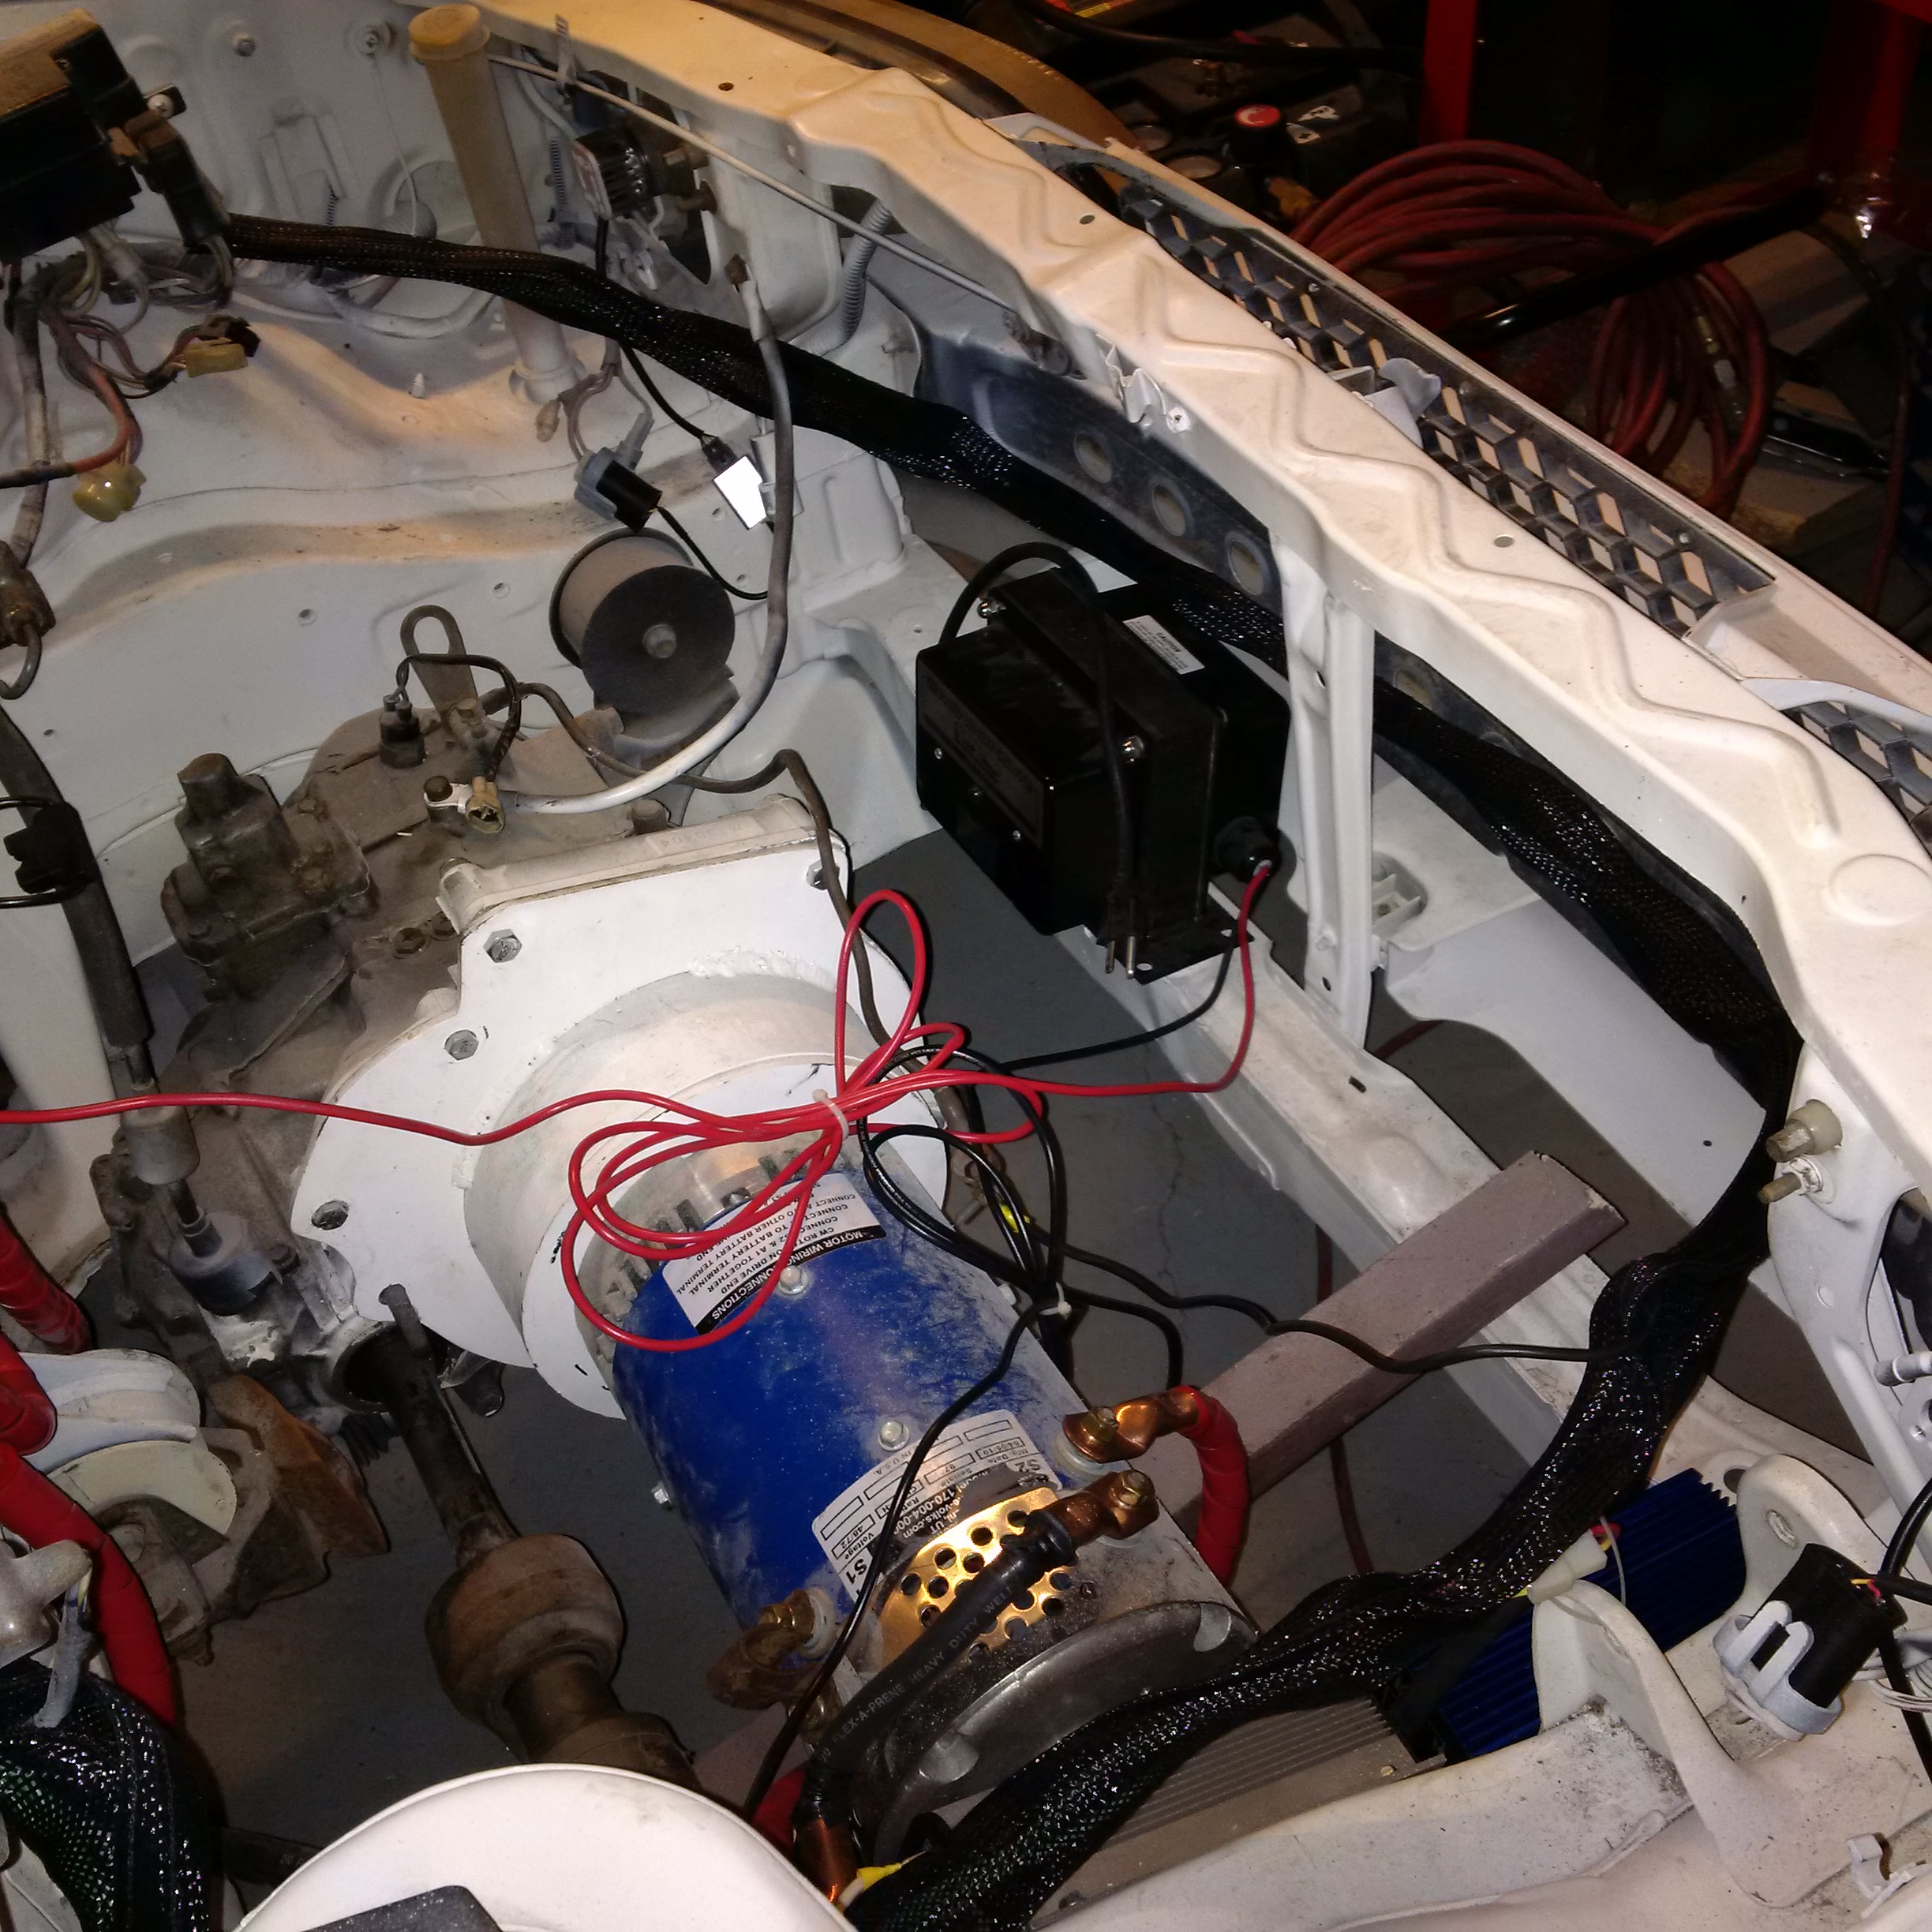
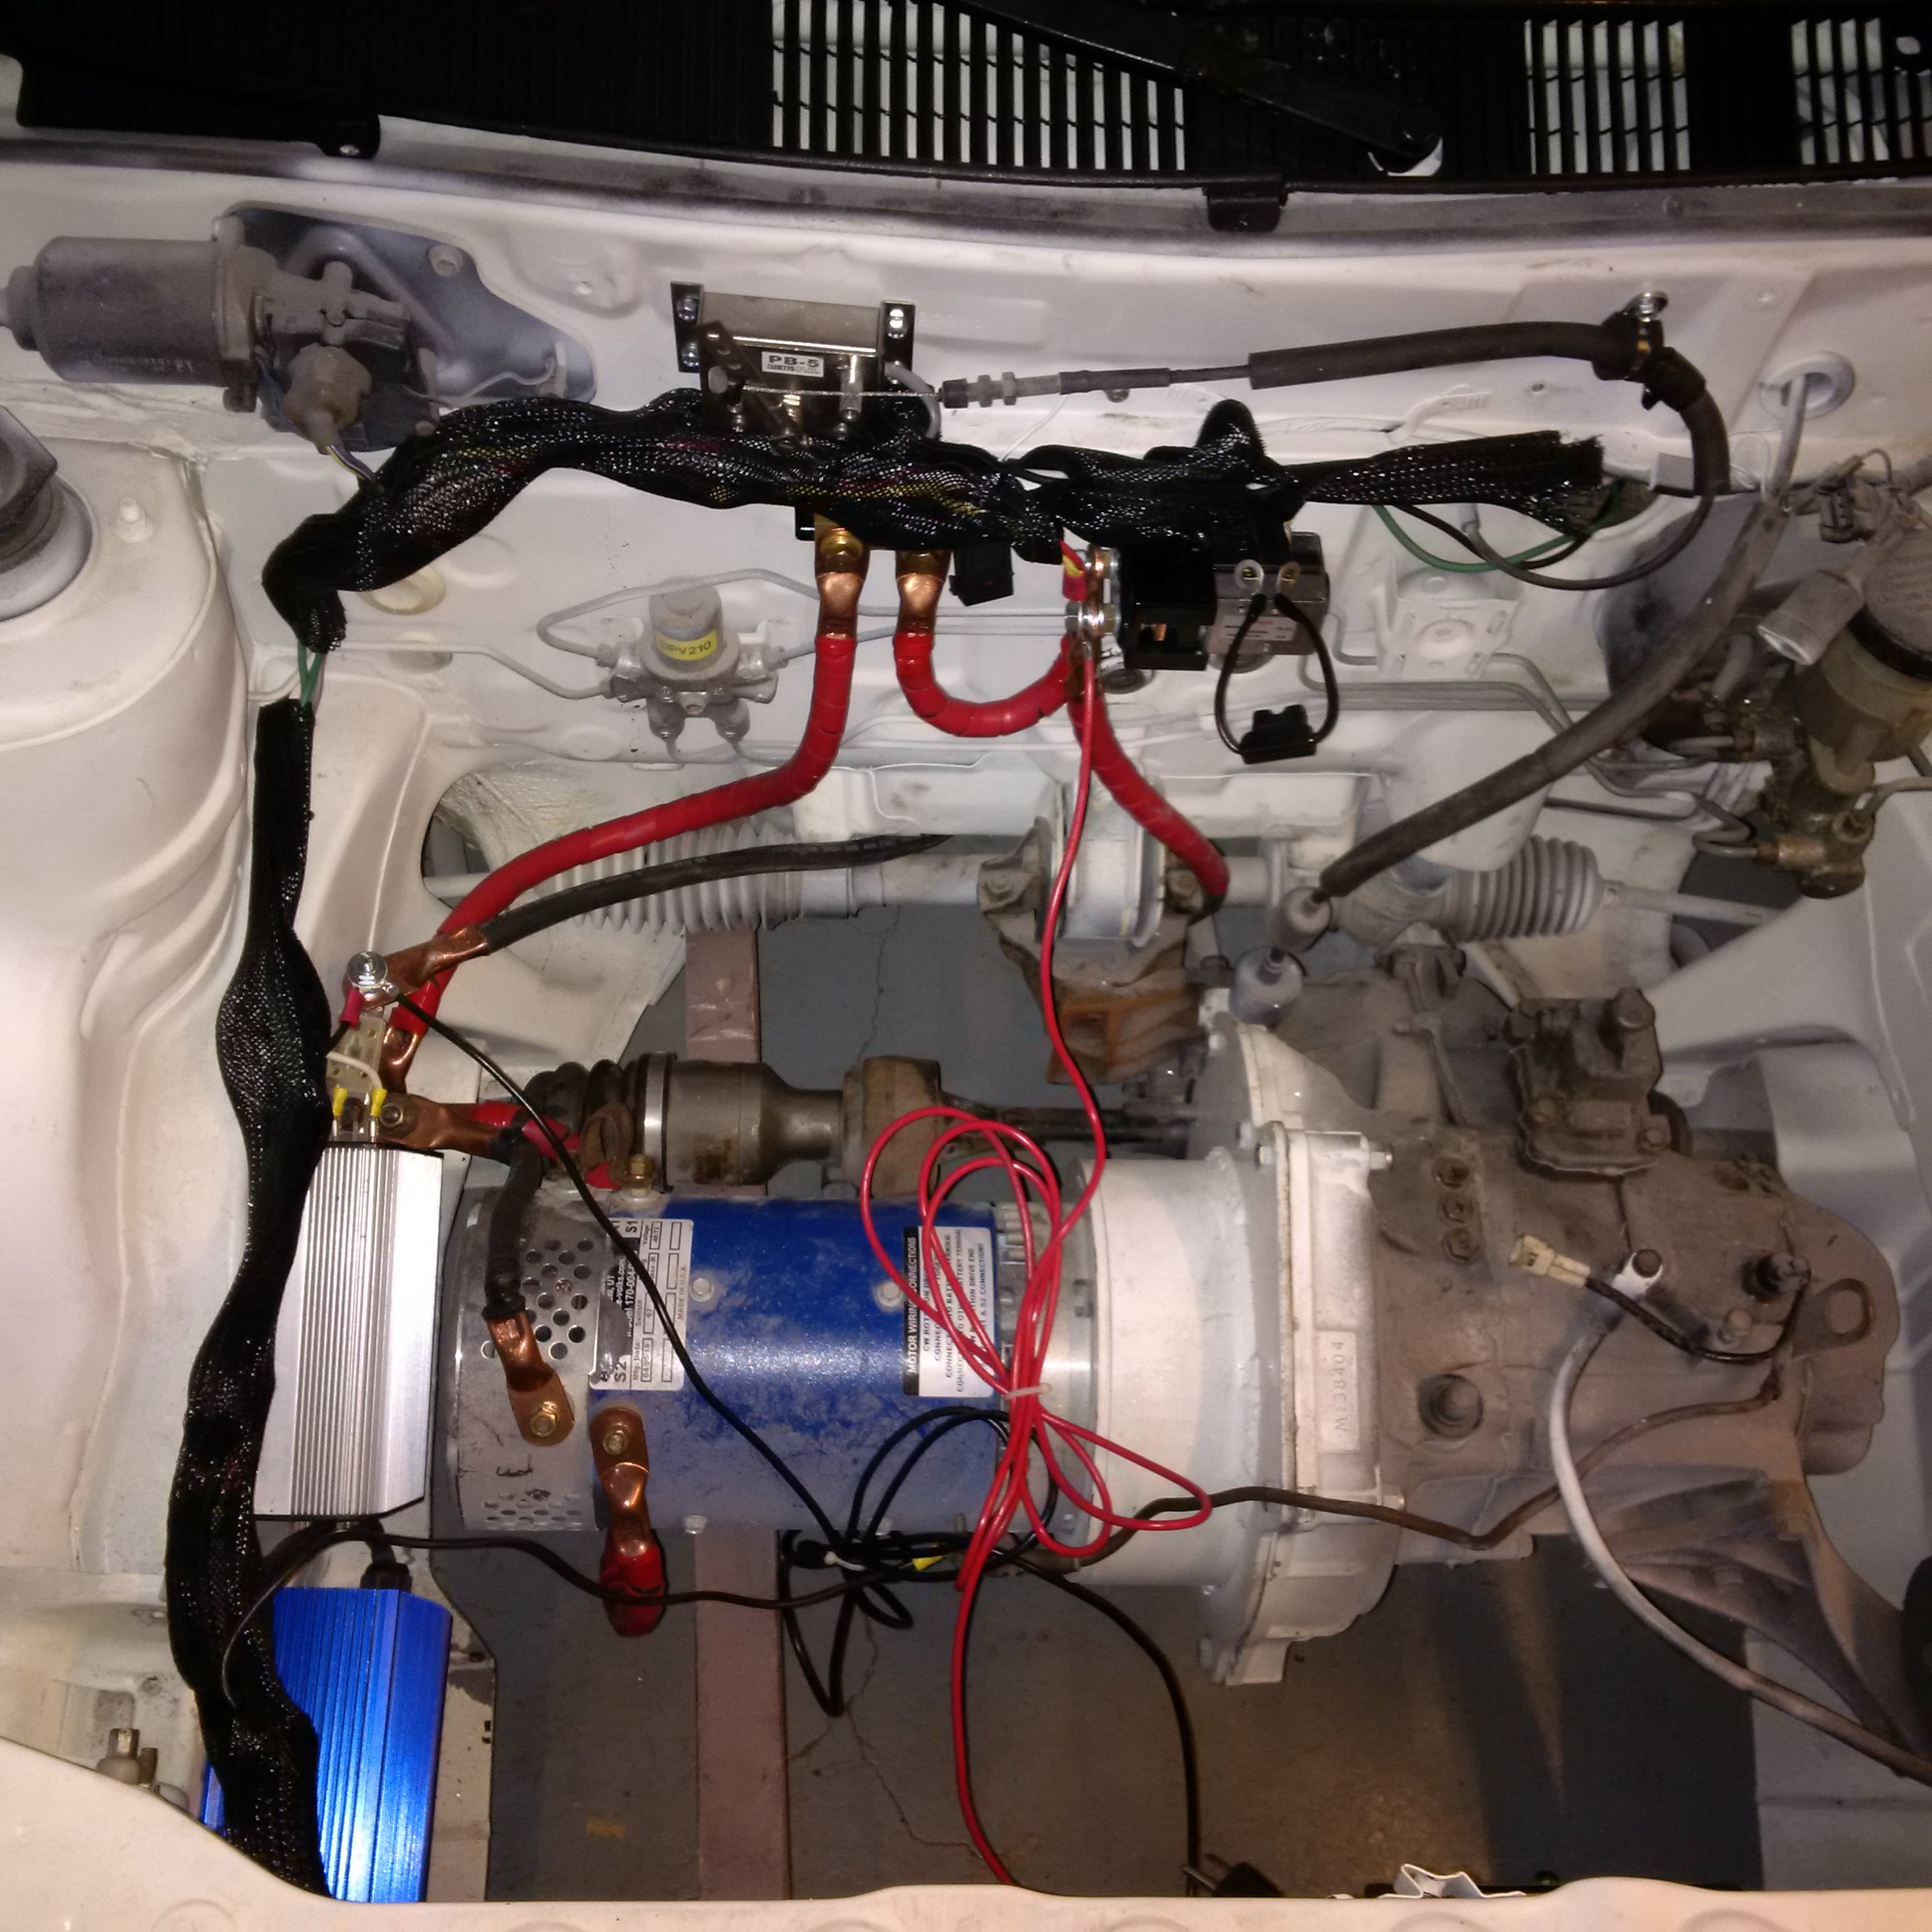
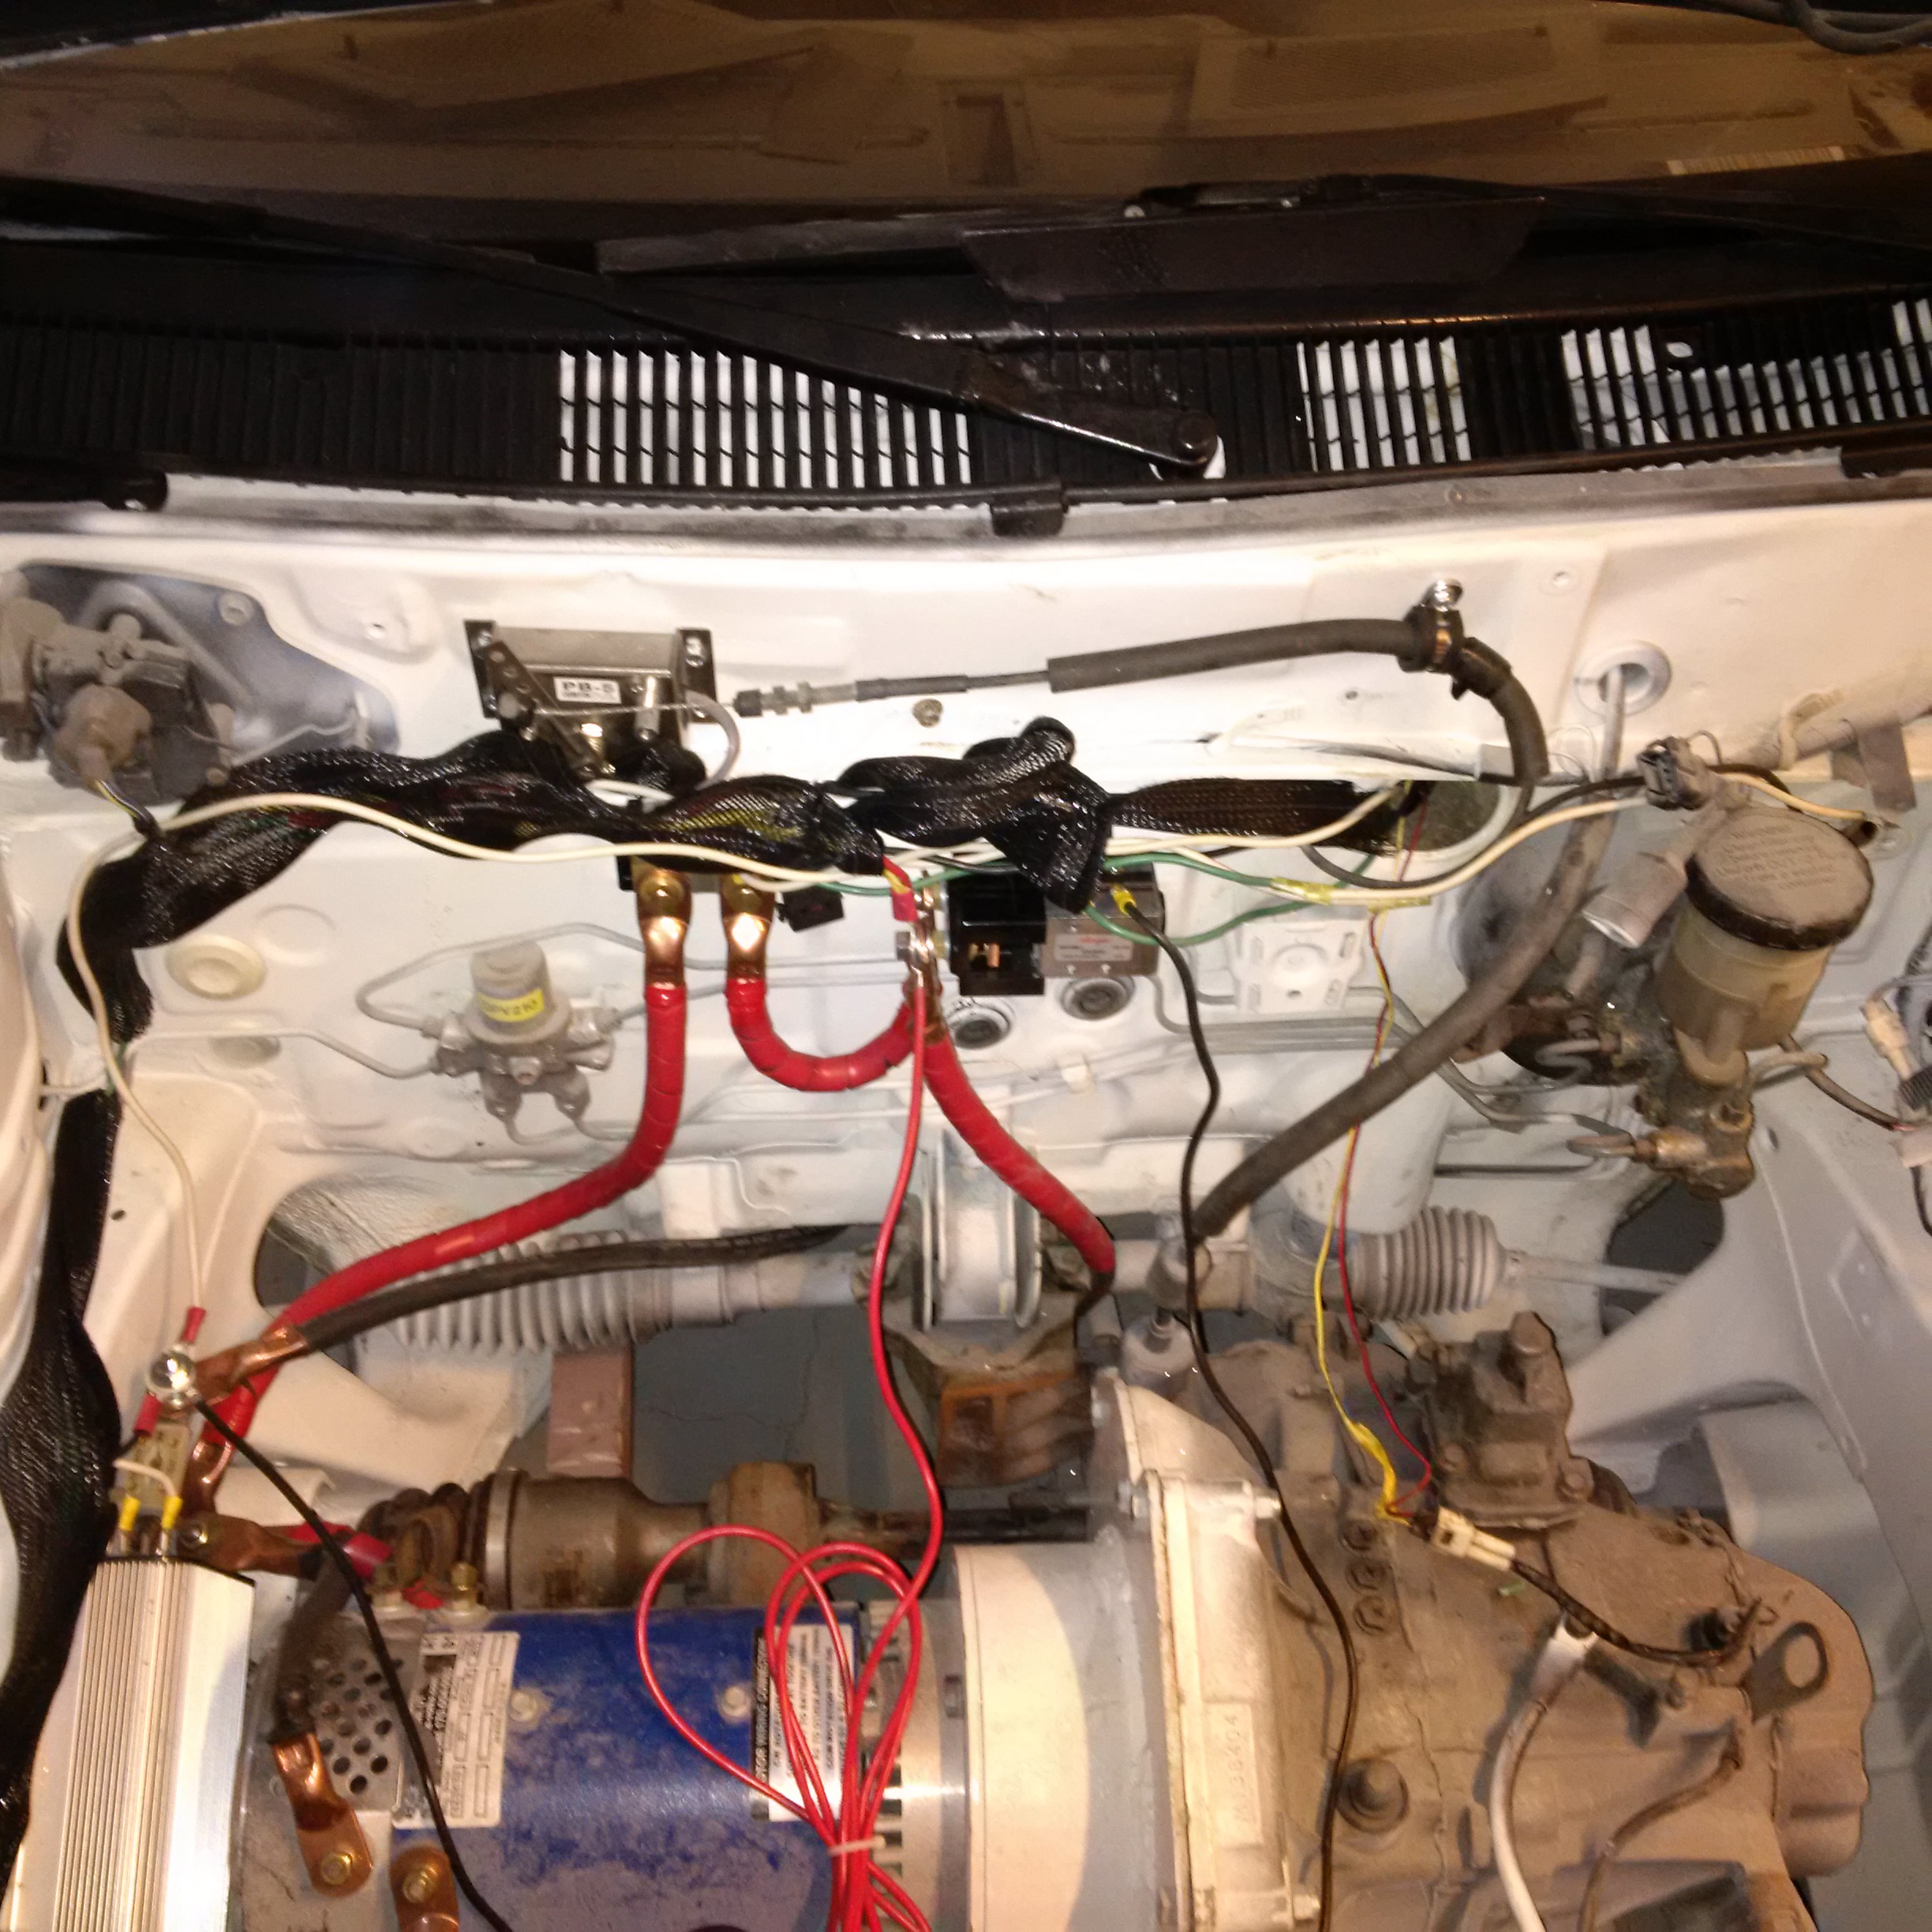
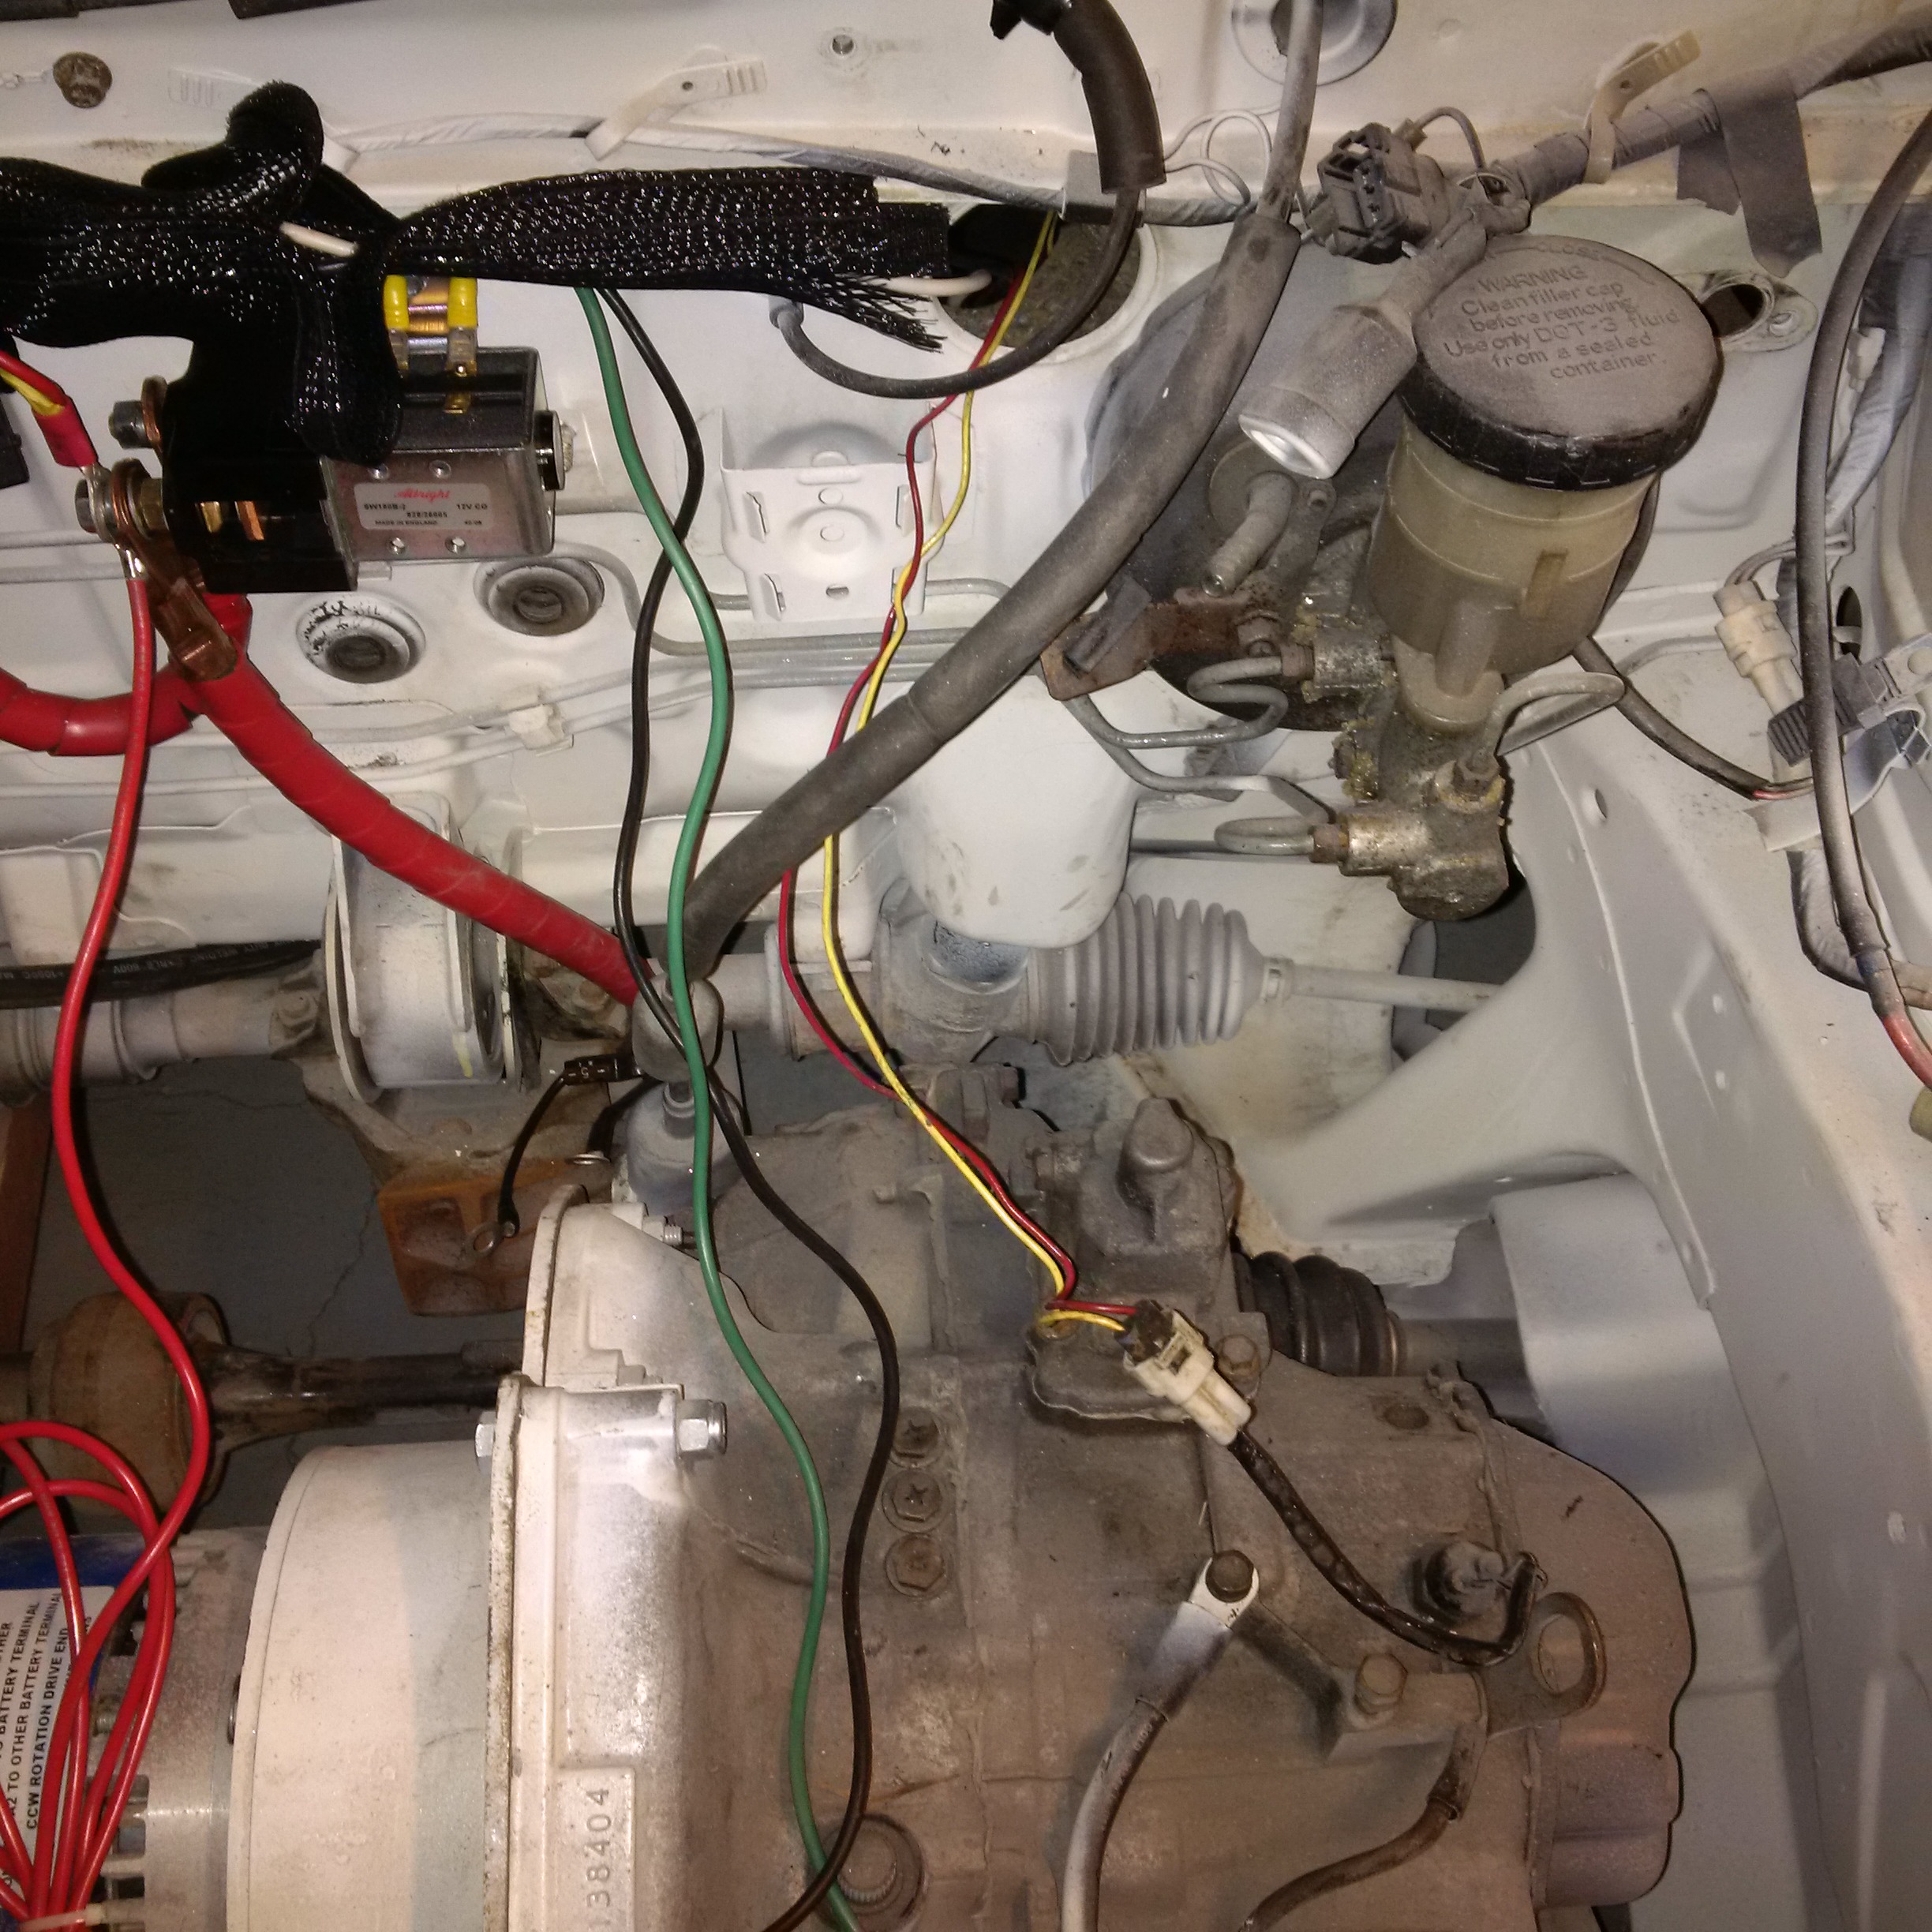
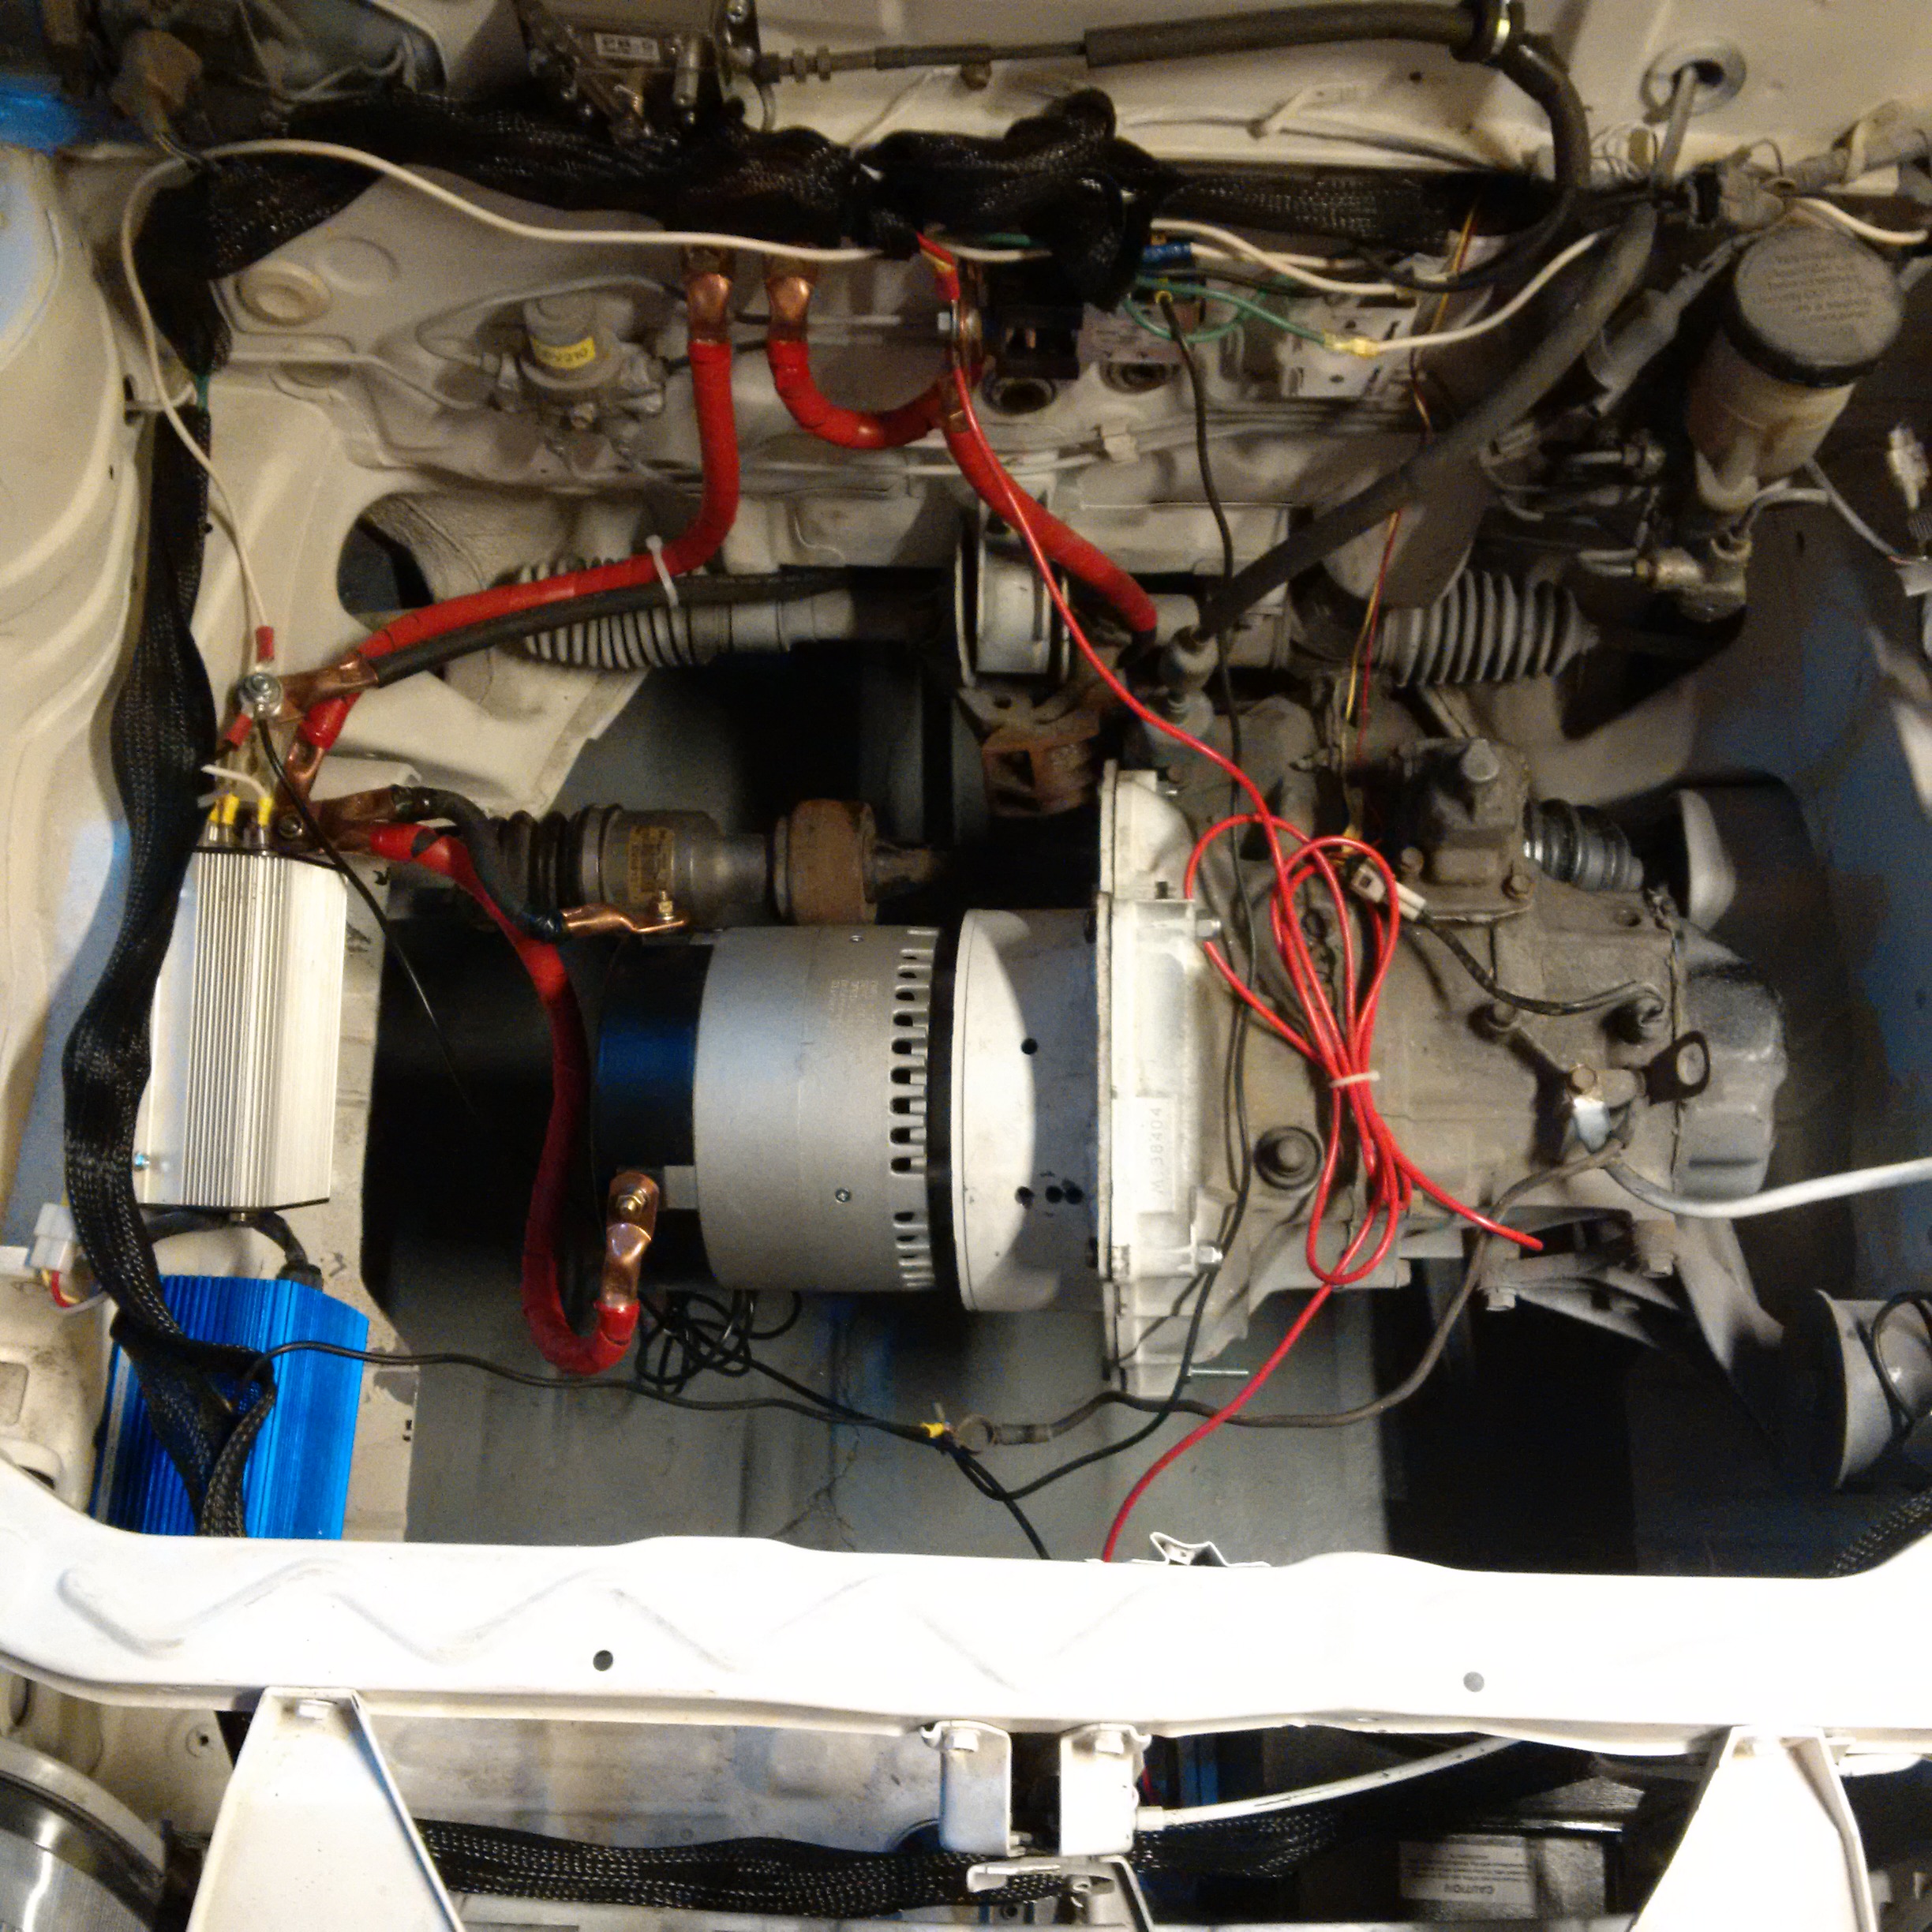
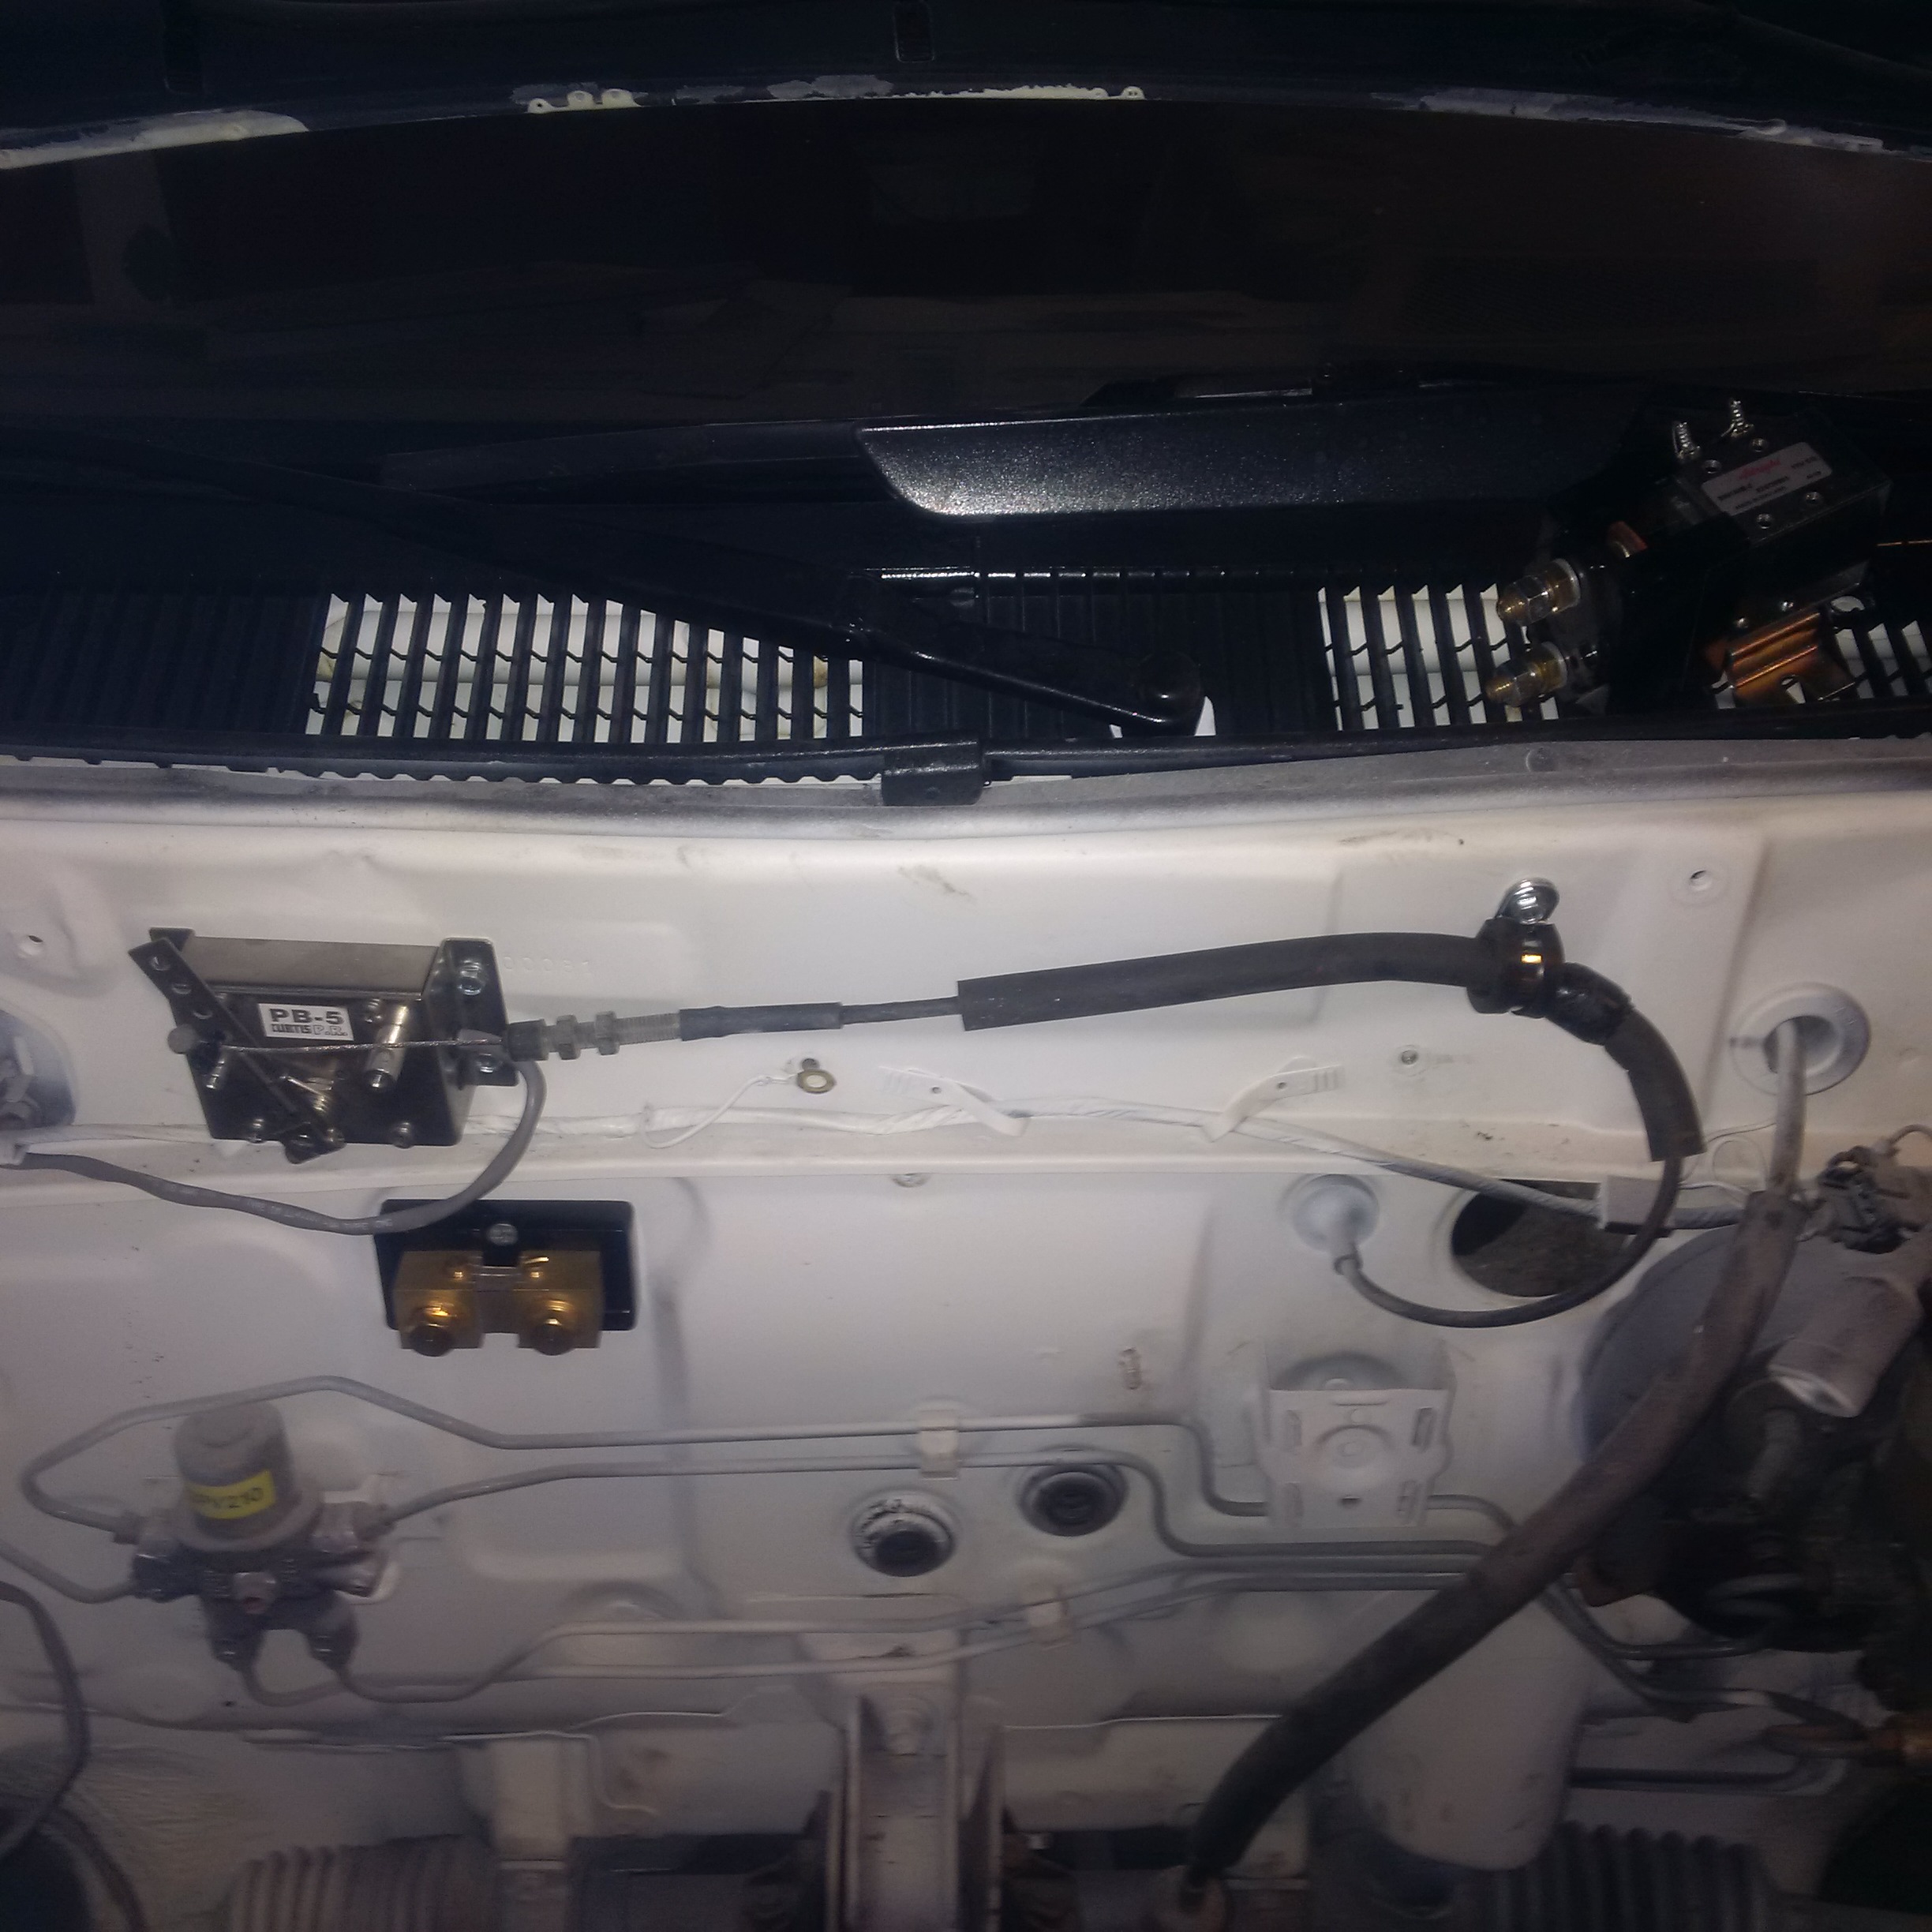
Some major progress Feb 21, 2016. Powered up the engine through the controller, contactor, and shunt. Tested out the throttle box and it worked great. Did some forward and backward in the garage a few feet and it was very jumpy. I have the the RX7 wheels back on it after getting painted and they're installed with alloy lug nuts. Then there is the picture of the new cabling in the engine bay. Brakes and emergency brakes were both closely inspected and checked out.
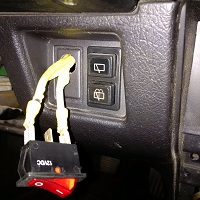
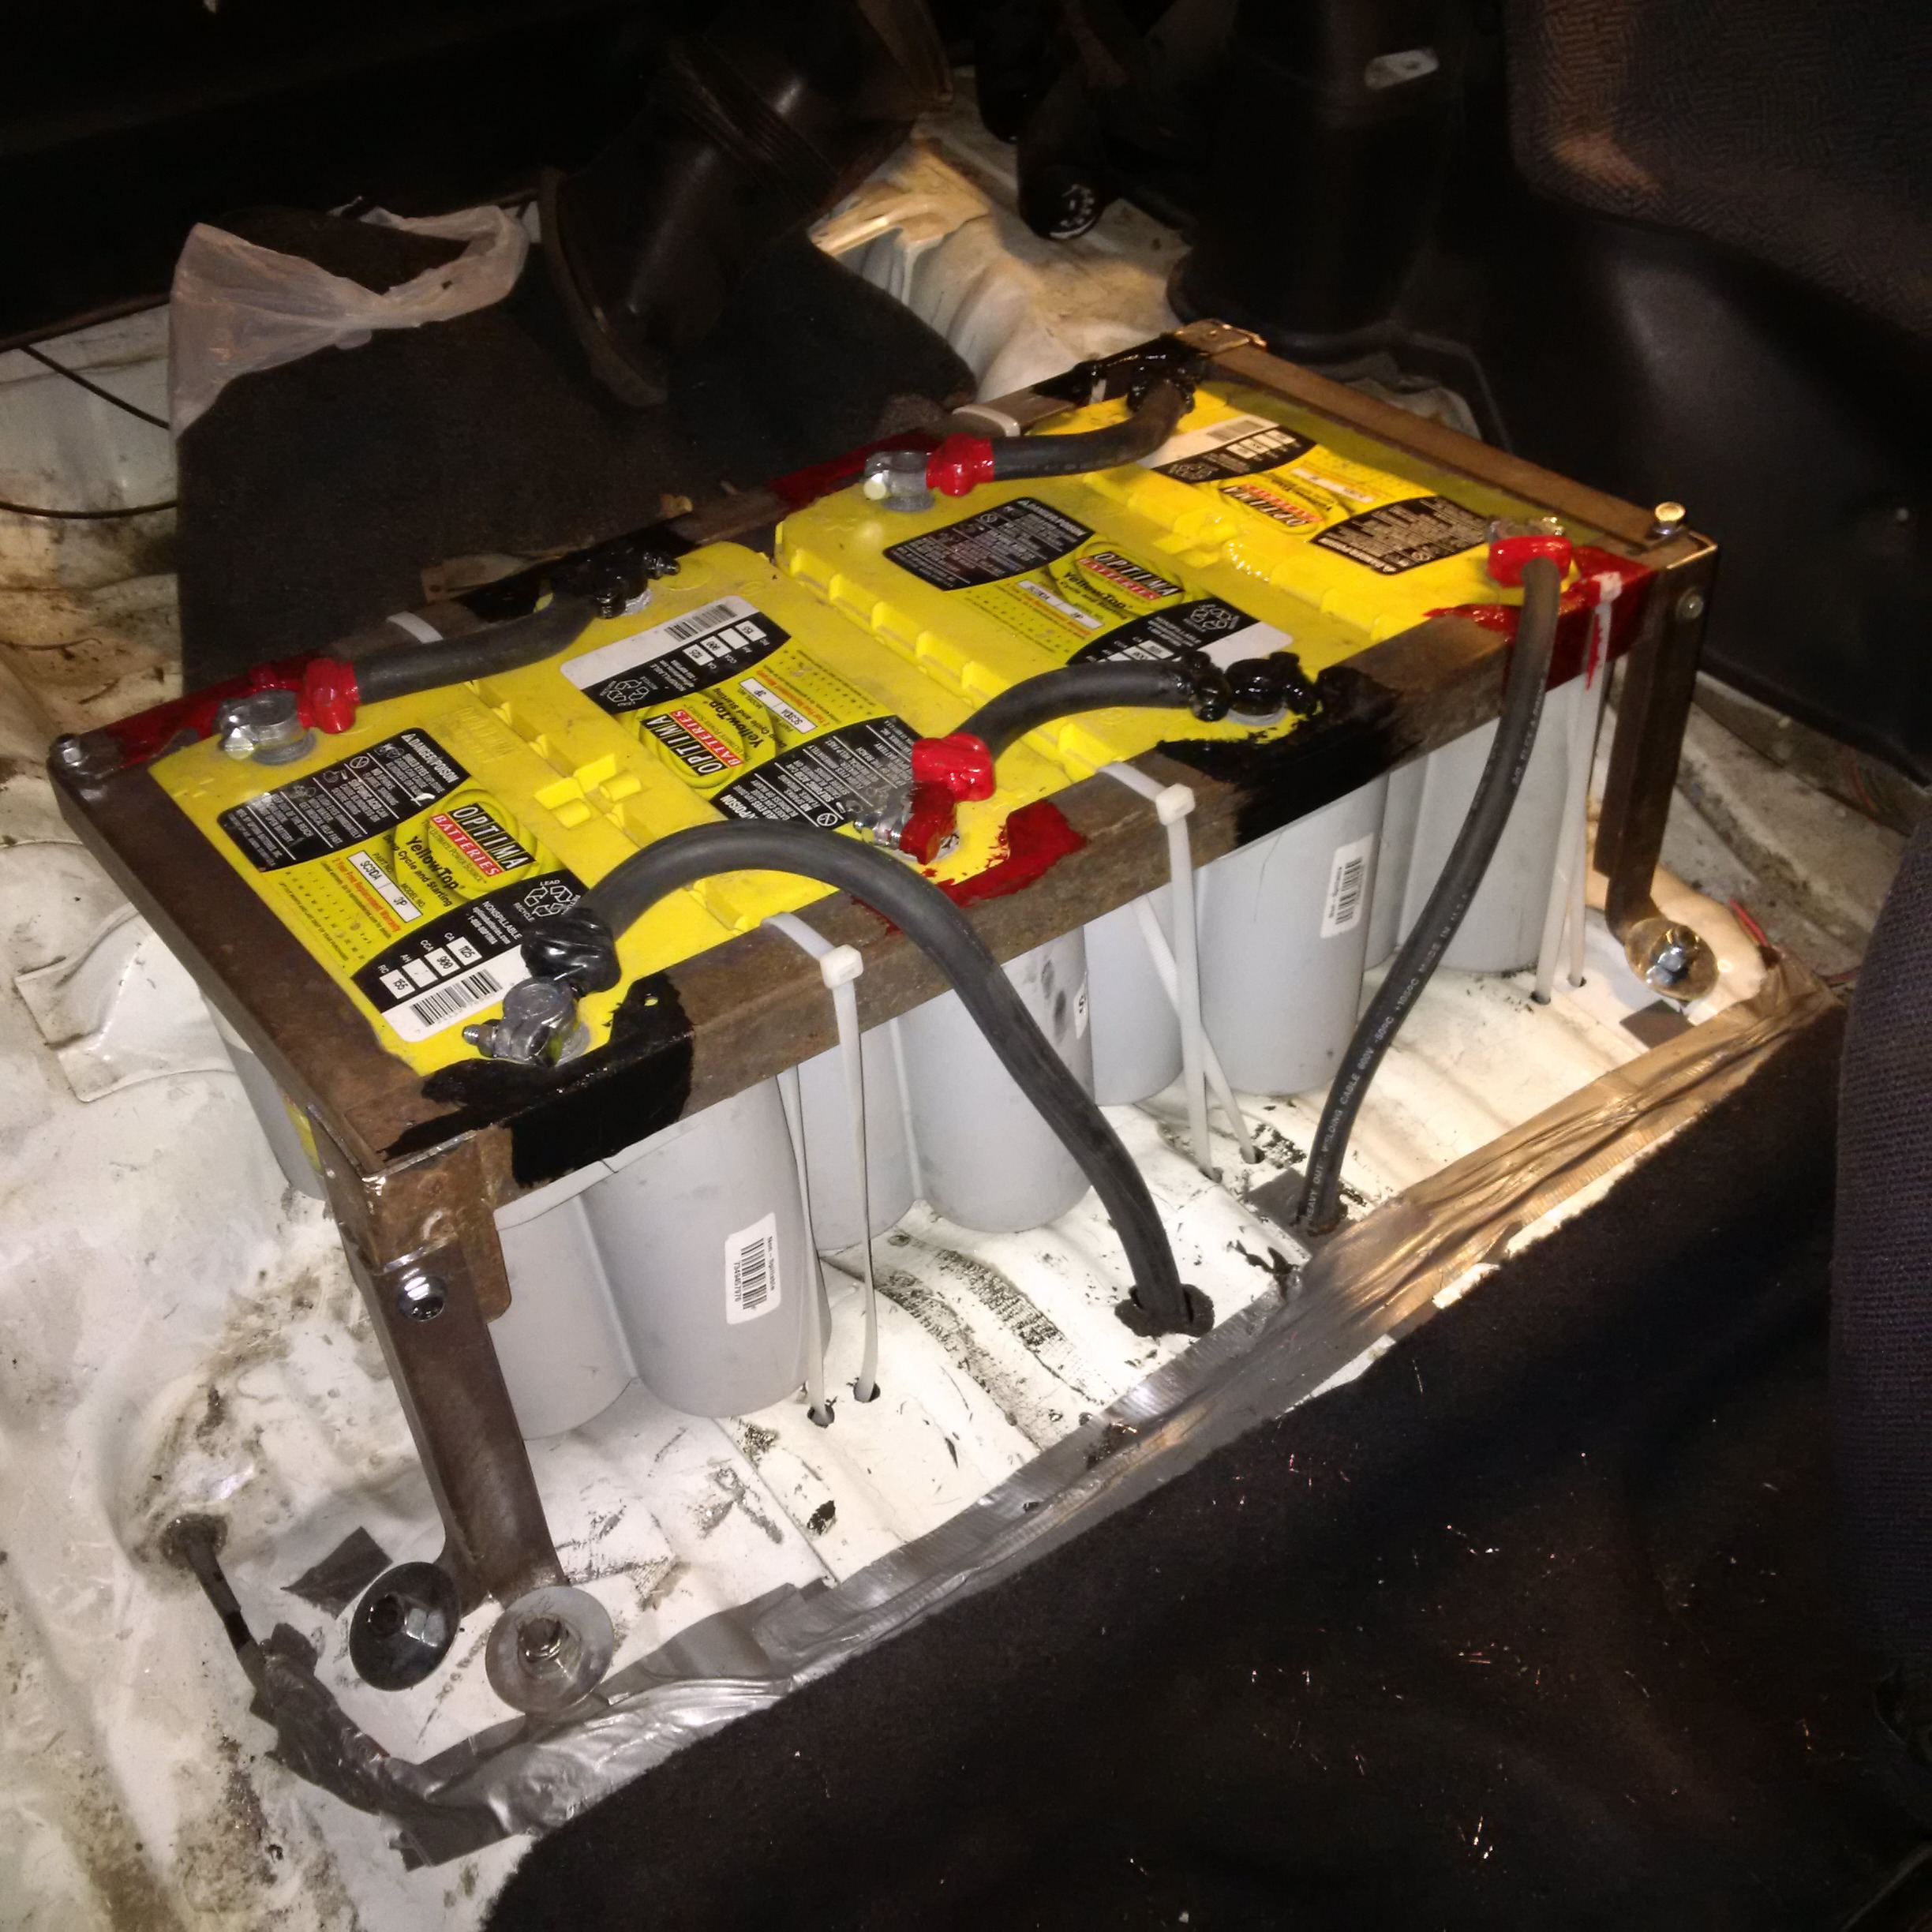
I have the beginnings of the battery holder but I still need to run the 2/0 welding cable back there for power with the high amperage connectors and then wire up the dc/dc converter. I don't think I'll need more than 30A to run the headlights and accessories if I have LED lights. I have the upper bracket done after turning an old bed frame into something useful with a couple hours on the grinder. There's also a picture with a support bracket to tie the bracket to the floor of the car. Then there's the cabling that I recently finished and got the charger hooked up to test. The eventual plan is to replace the angle iron with aluminum which they have from Princess Auto or Metal Supermarket
Did some digging and found my D&D series ES-15-6 has an operating amperage of 100a and 330a peak. That's why it's so jumpy with a 500a controller.
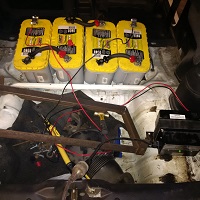

The cables to tie the batteries together was some 4/0 I got on sale on Princess Auto March 2, 2016. There was a scrap piece so I made an offer and they took it. I used most of the copper on the 4/0 and stuffed it into the standard post terminals. I lock-tited the threads on the clamp and then painted the black with some brush-on electrical tape. I plan to get some red and then do all the connections on the front of the car once I have the fittings I want to use in place and torqued up.
Did some research at Costco and found they have some deep cycle marine batteries that are about 1000 amps but have a high Ah rating for $137 each. Thinking that if I end up needing more amps that I could mount a string of four of those in the front under the hood across the old radiator mount. My plan is to prove that although weight is king, proper aerodynamics can make a heavier car much more efficient. I won't be cutting any springs until I know what my final battery layout is. If I push the secondary set of 4 batteries further forward that might potentially load up the front springs better so I don't need to cut them and reduce lift because of the way it sits now.
Even further down the road, I've been researching some cool things like 48V 100A generators from China that come in at about $2400 USD and could turn my car into a hybrid. Also very cool is the possibility of removing the transmission, motor, and axles and replacing them with dc brushless hub motors in each rear wheel with a separate controller.
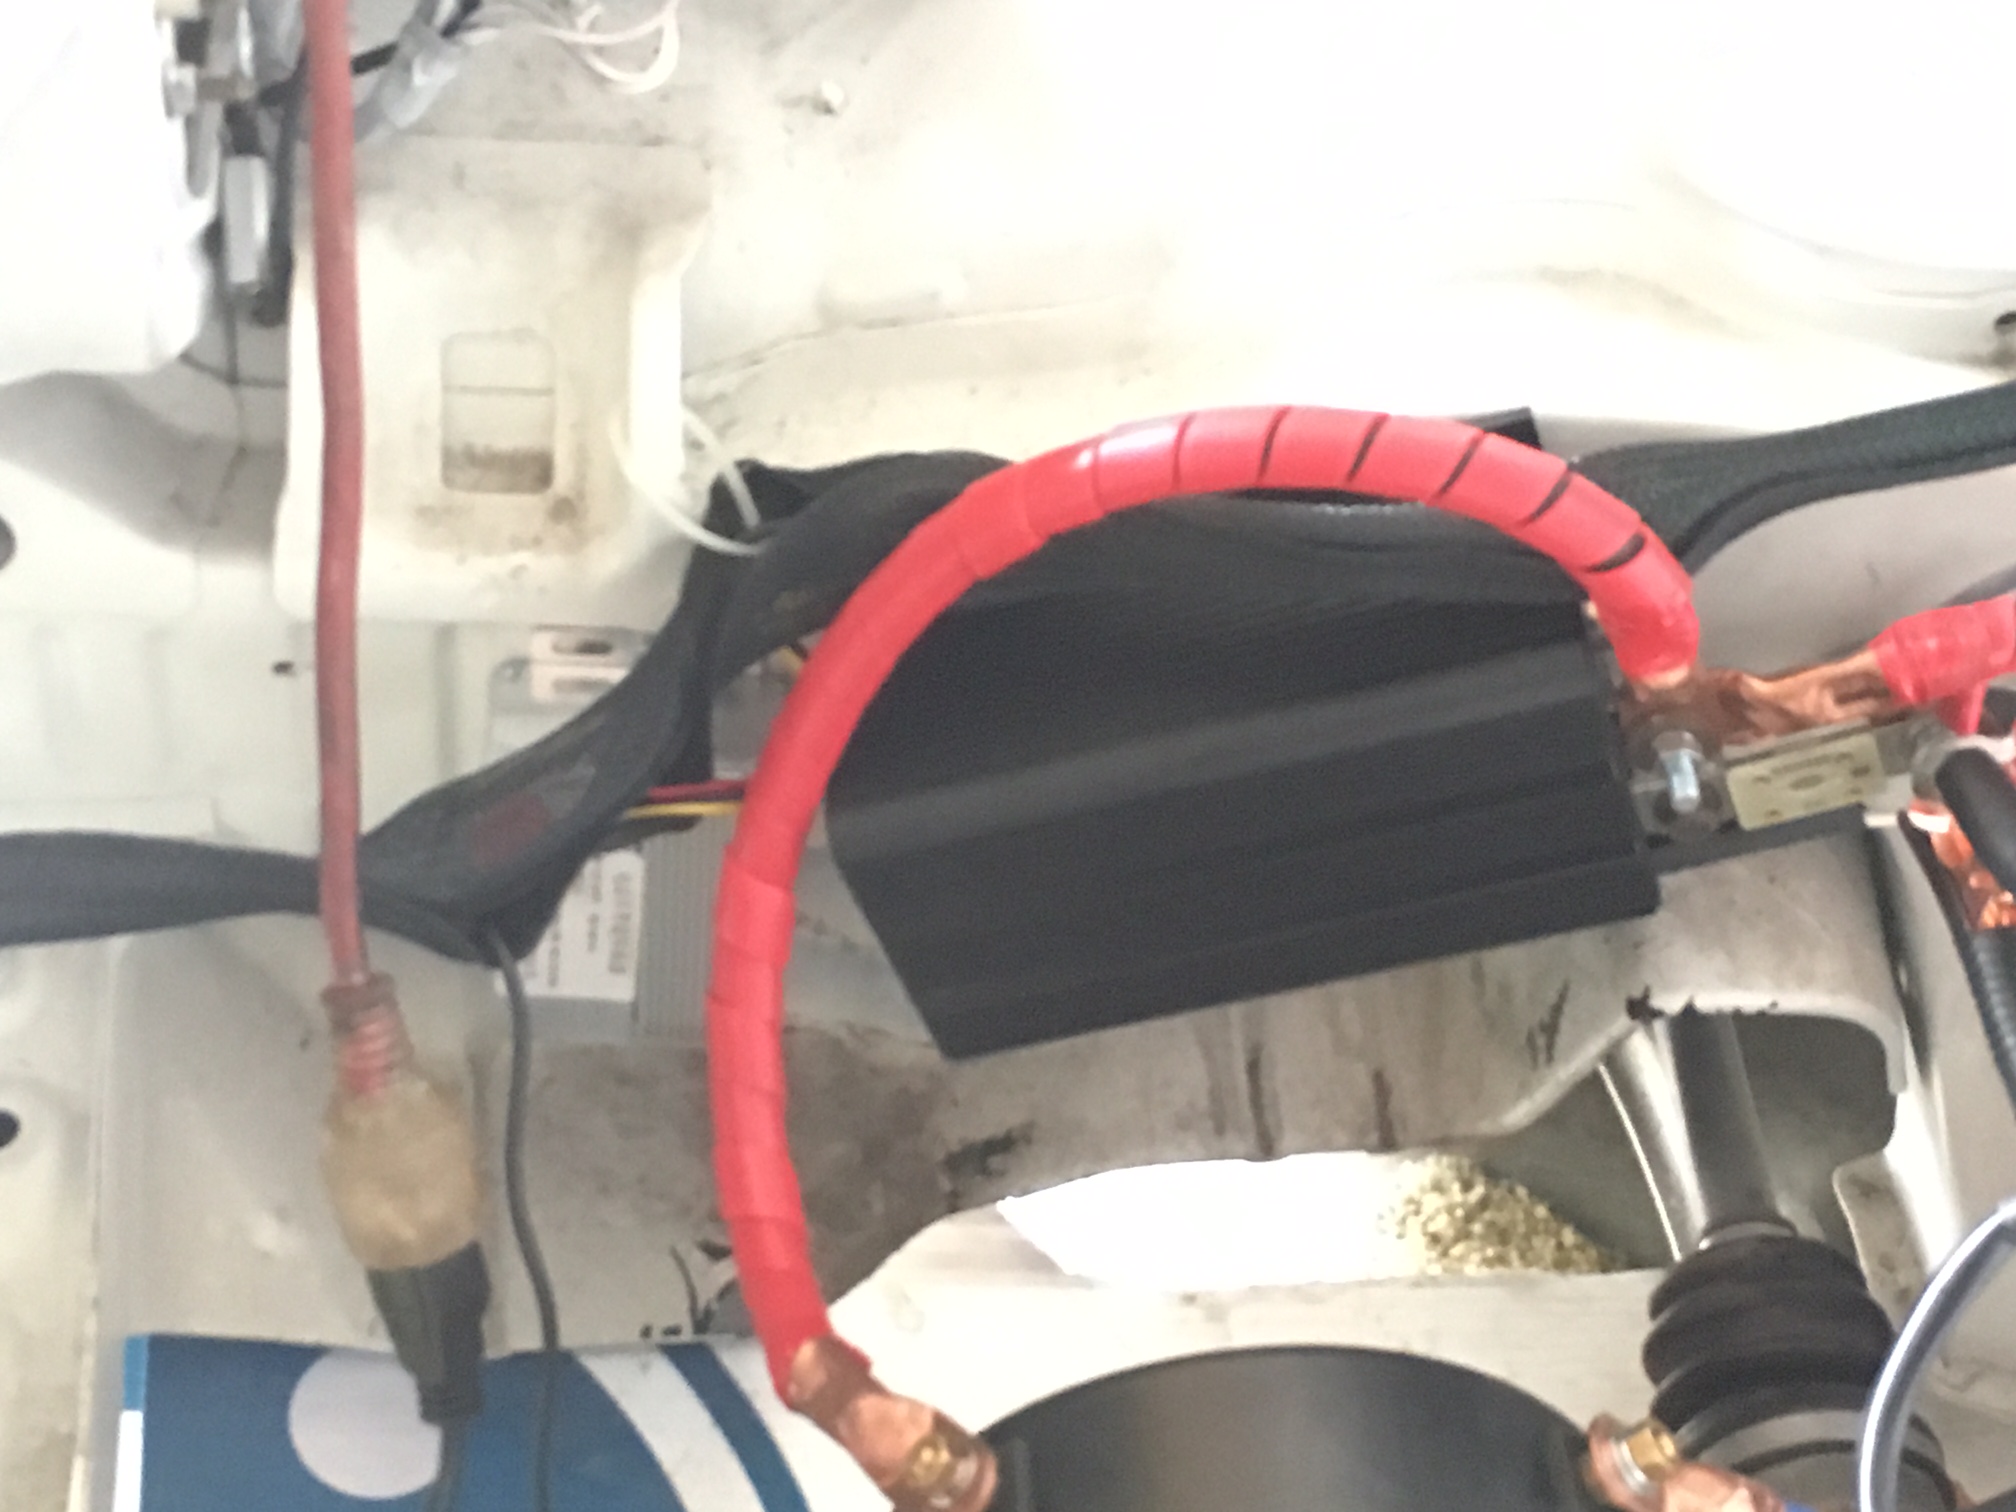
Got a bunch of stuff done March 5, 2016. Finished the battery bracket, tied it to the floor of the car, got some brush on electrical tape to mark each terminal on the edge of the bracket, ran the 2/0 cable from the front of the car to the battery pack, and tested out the 48v to 12v dc dc converter and tested it with a radiator fan. I also moved the charger to the front of the car.


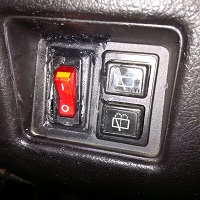
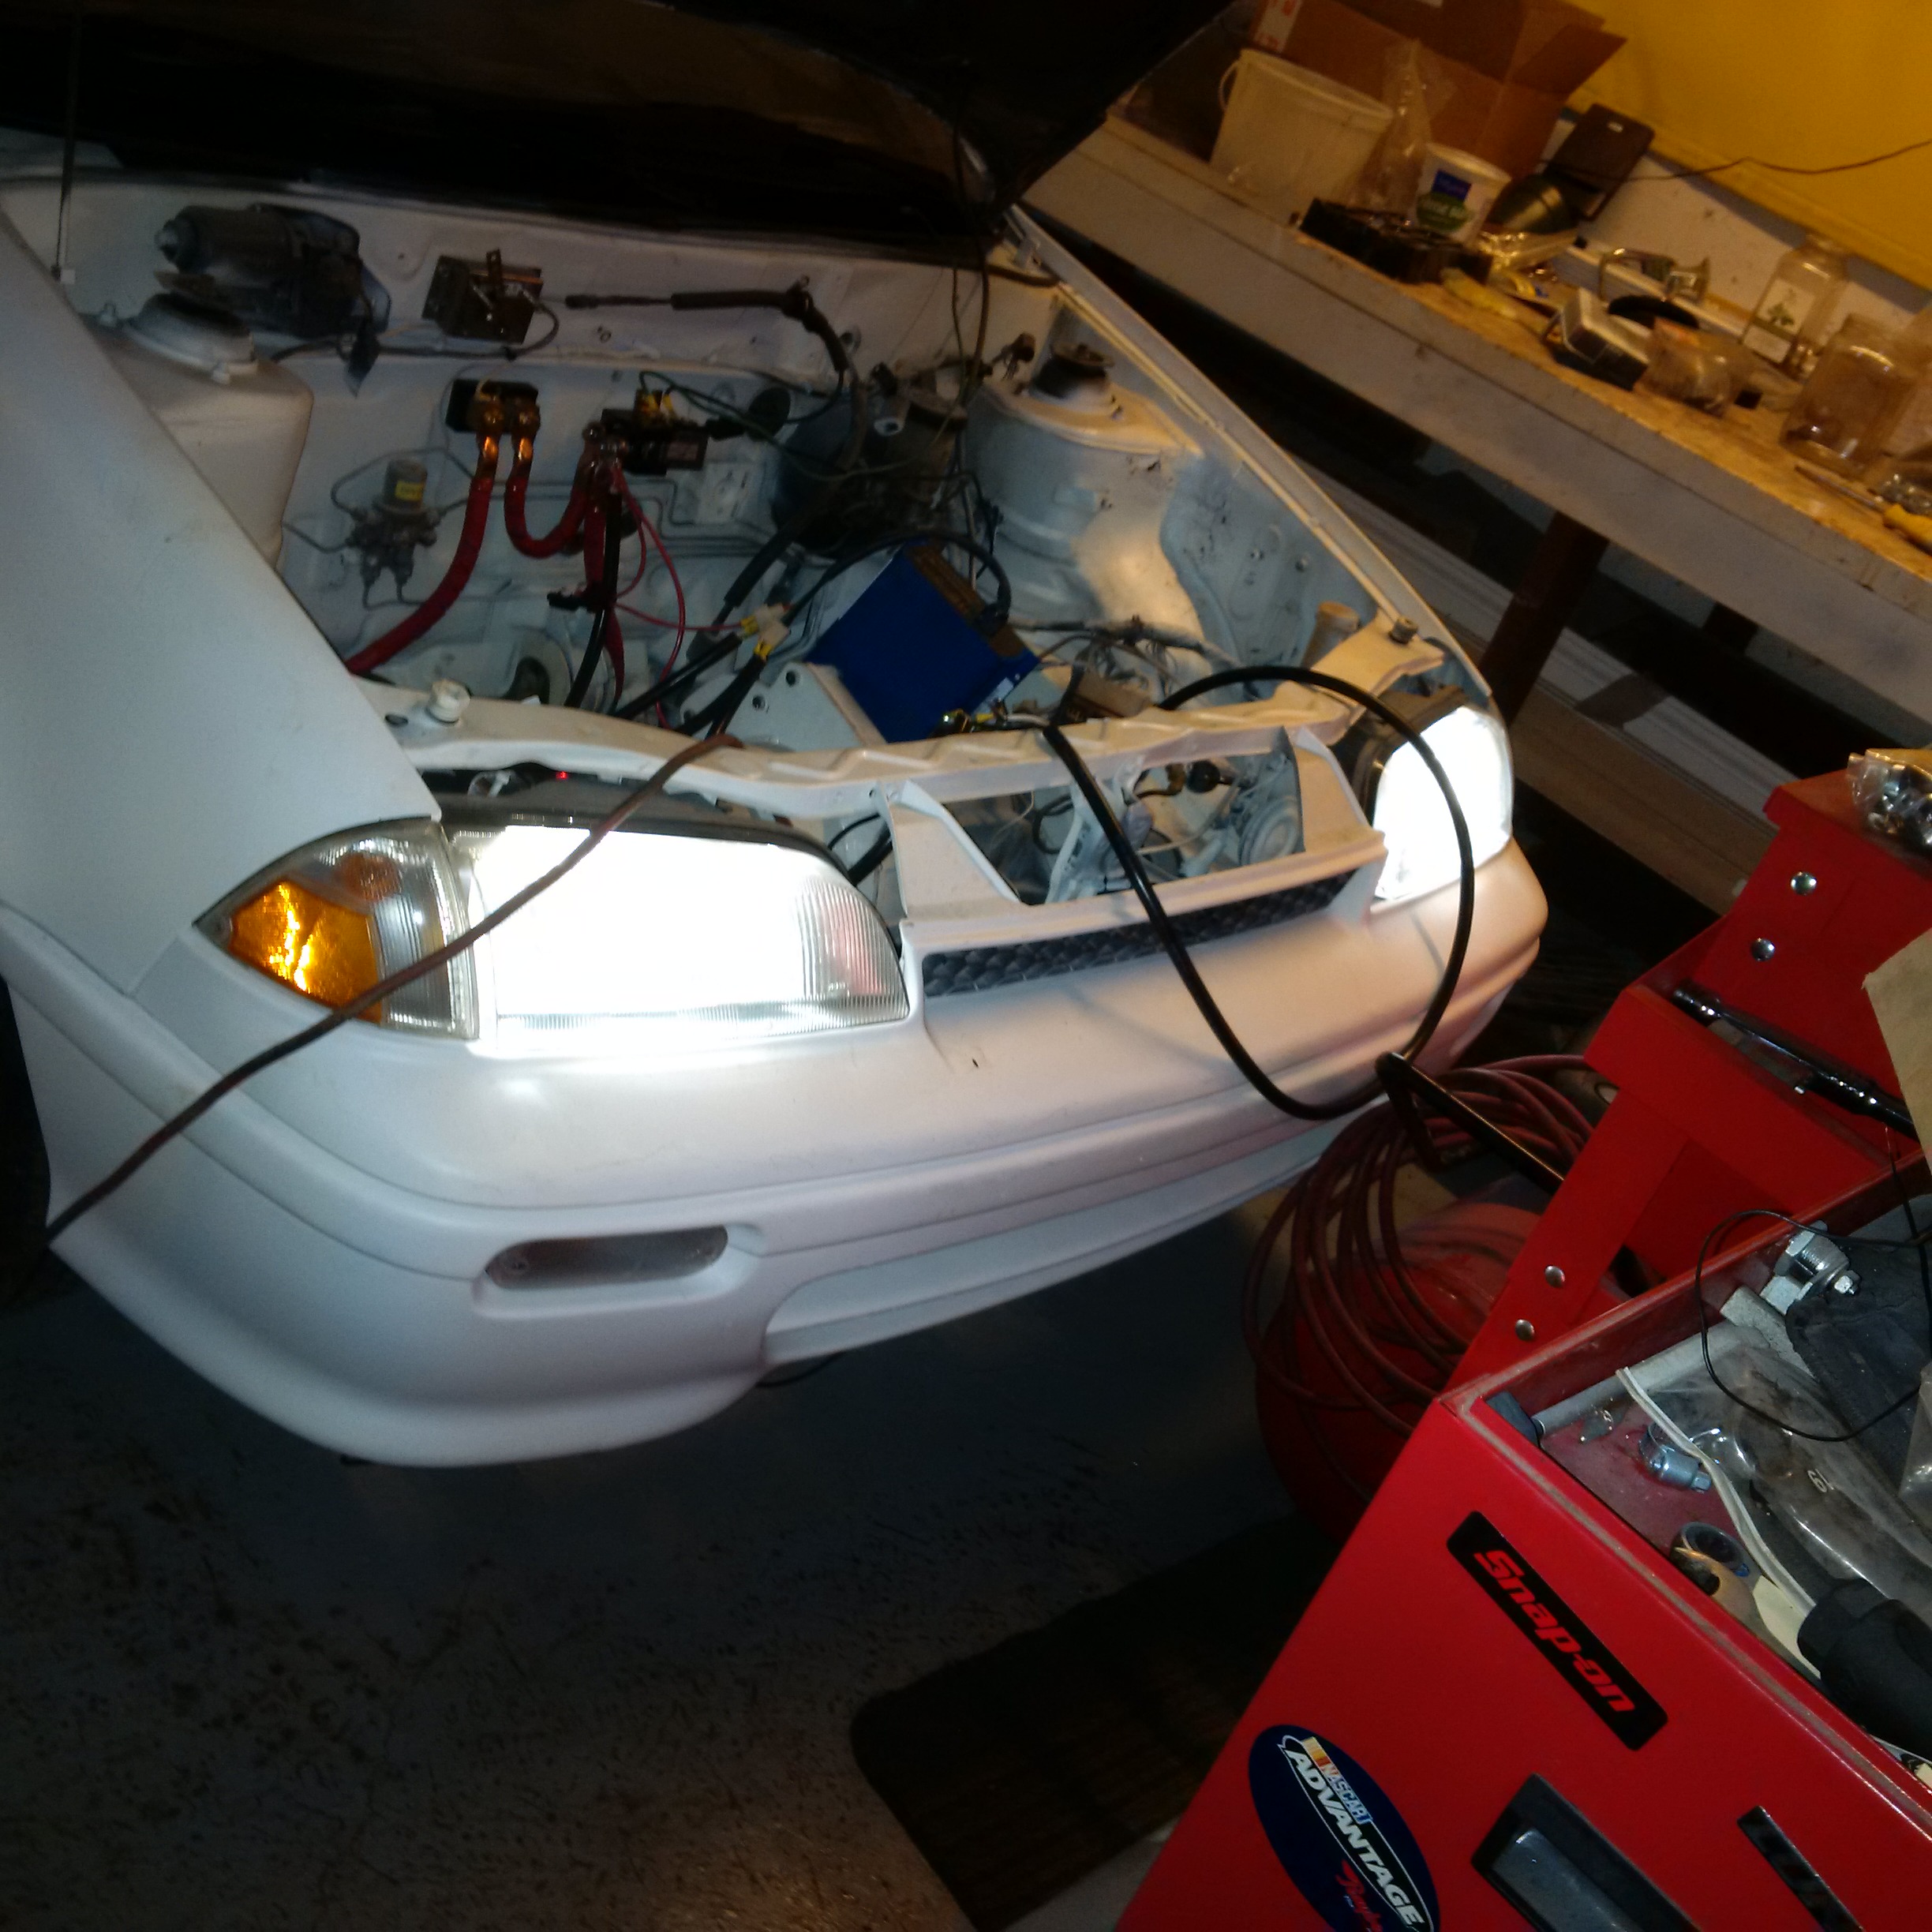
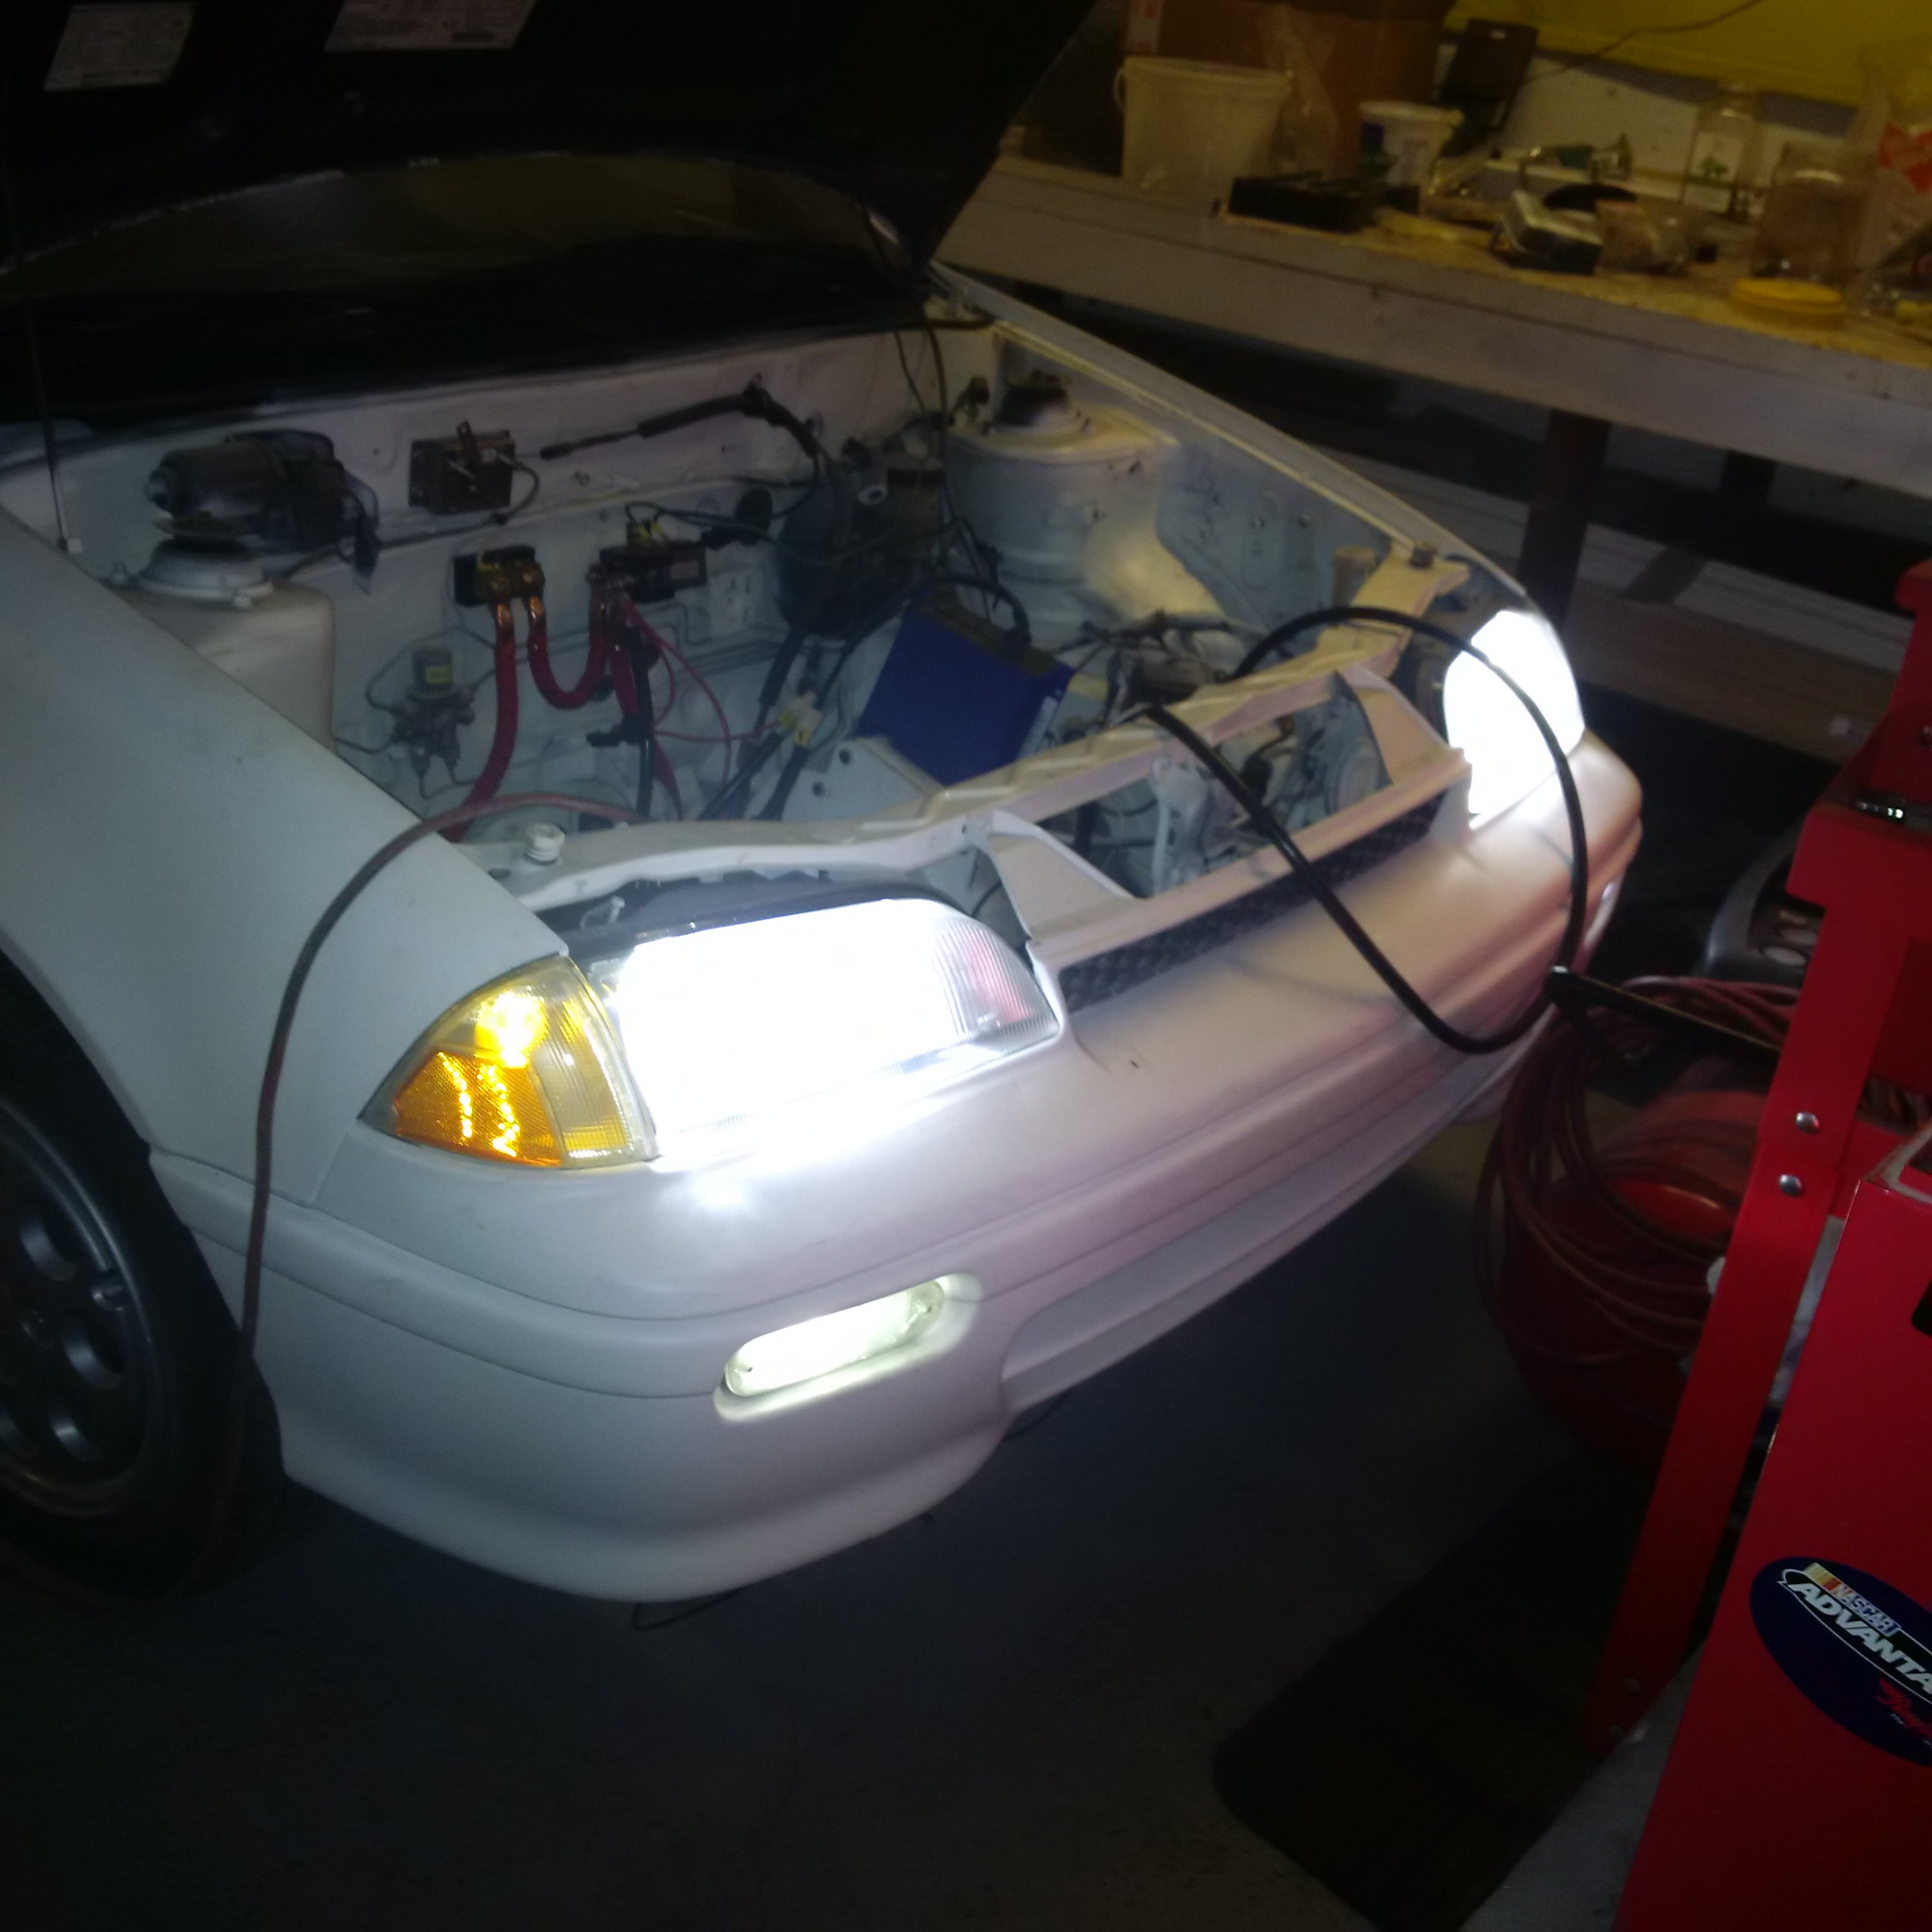
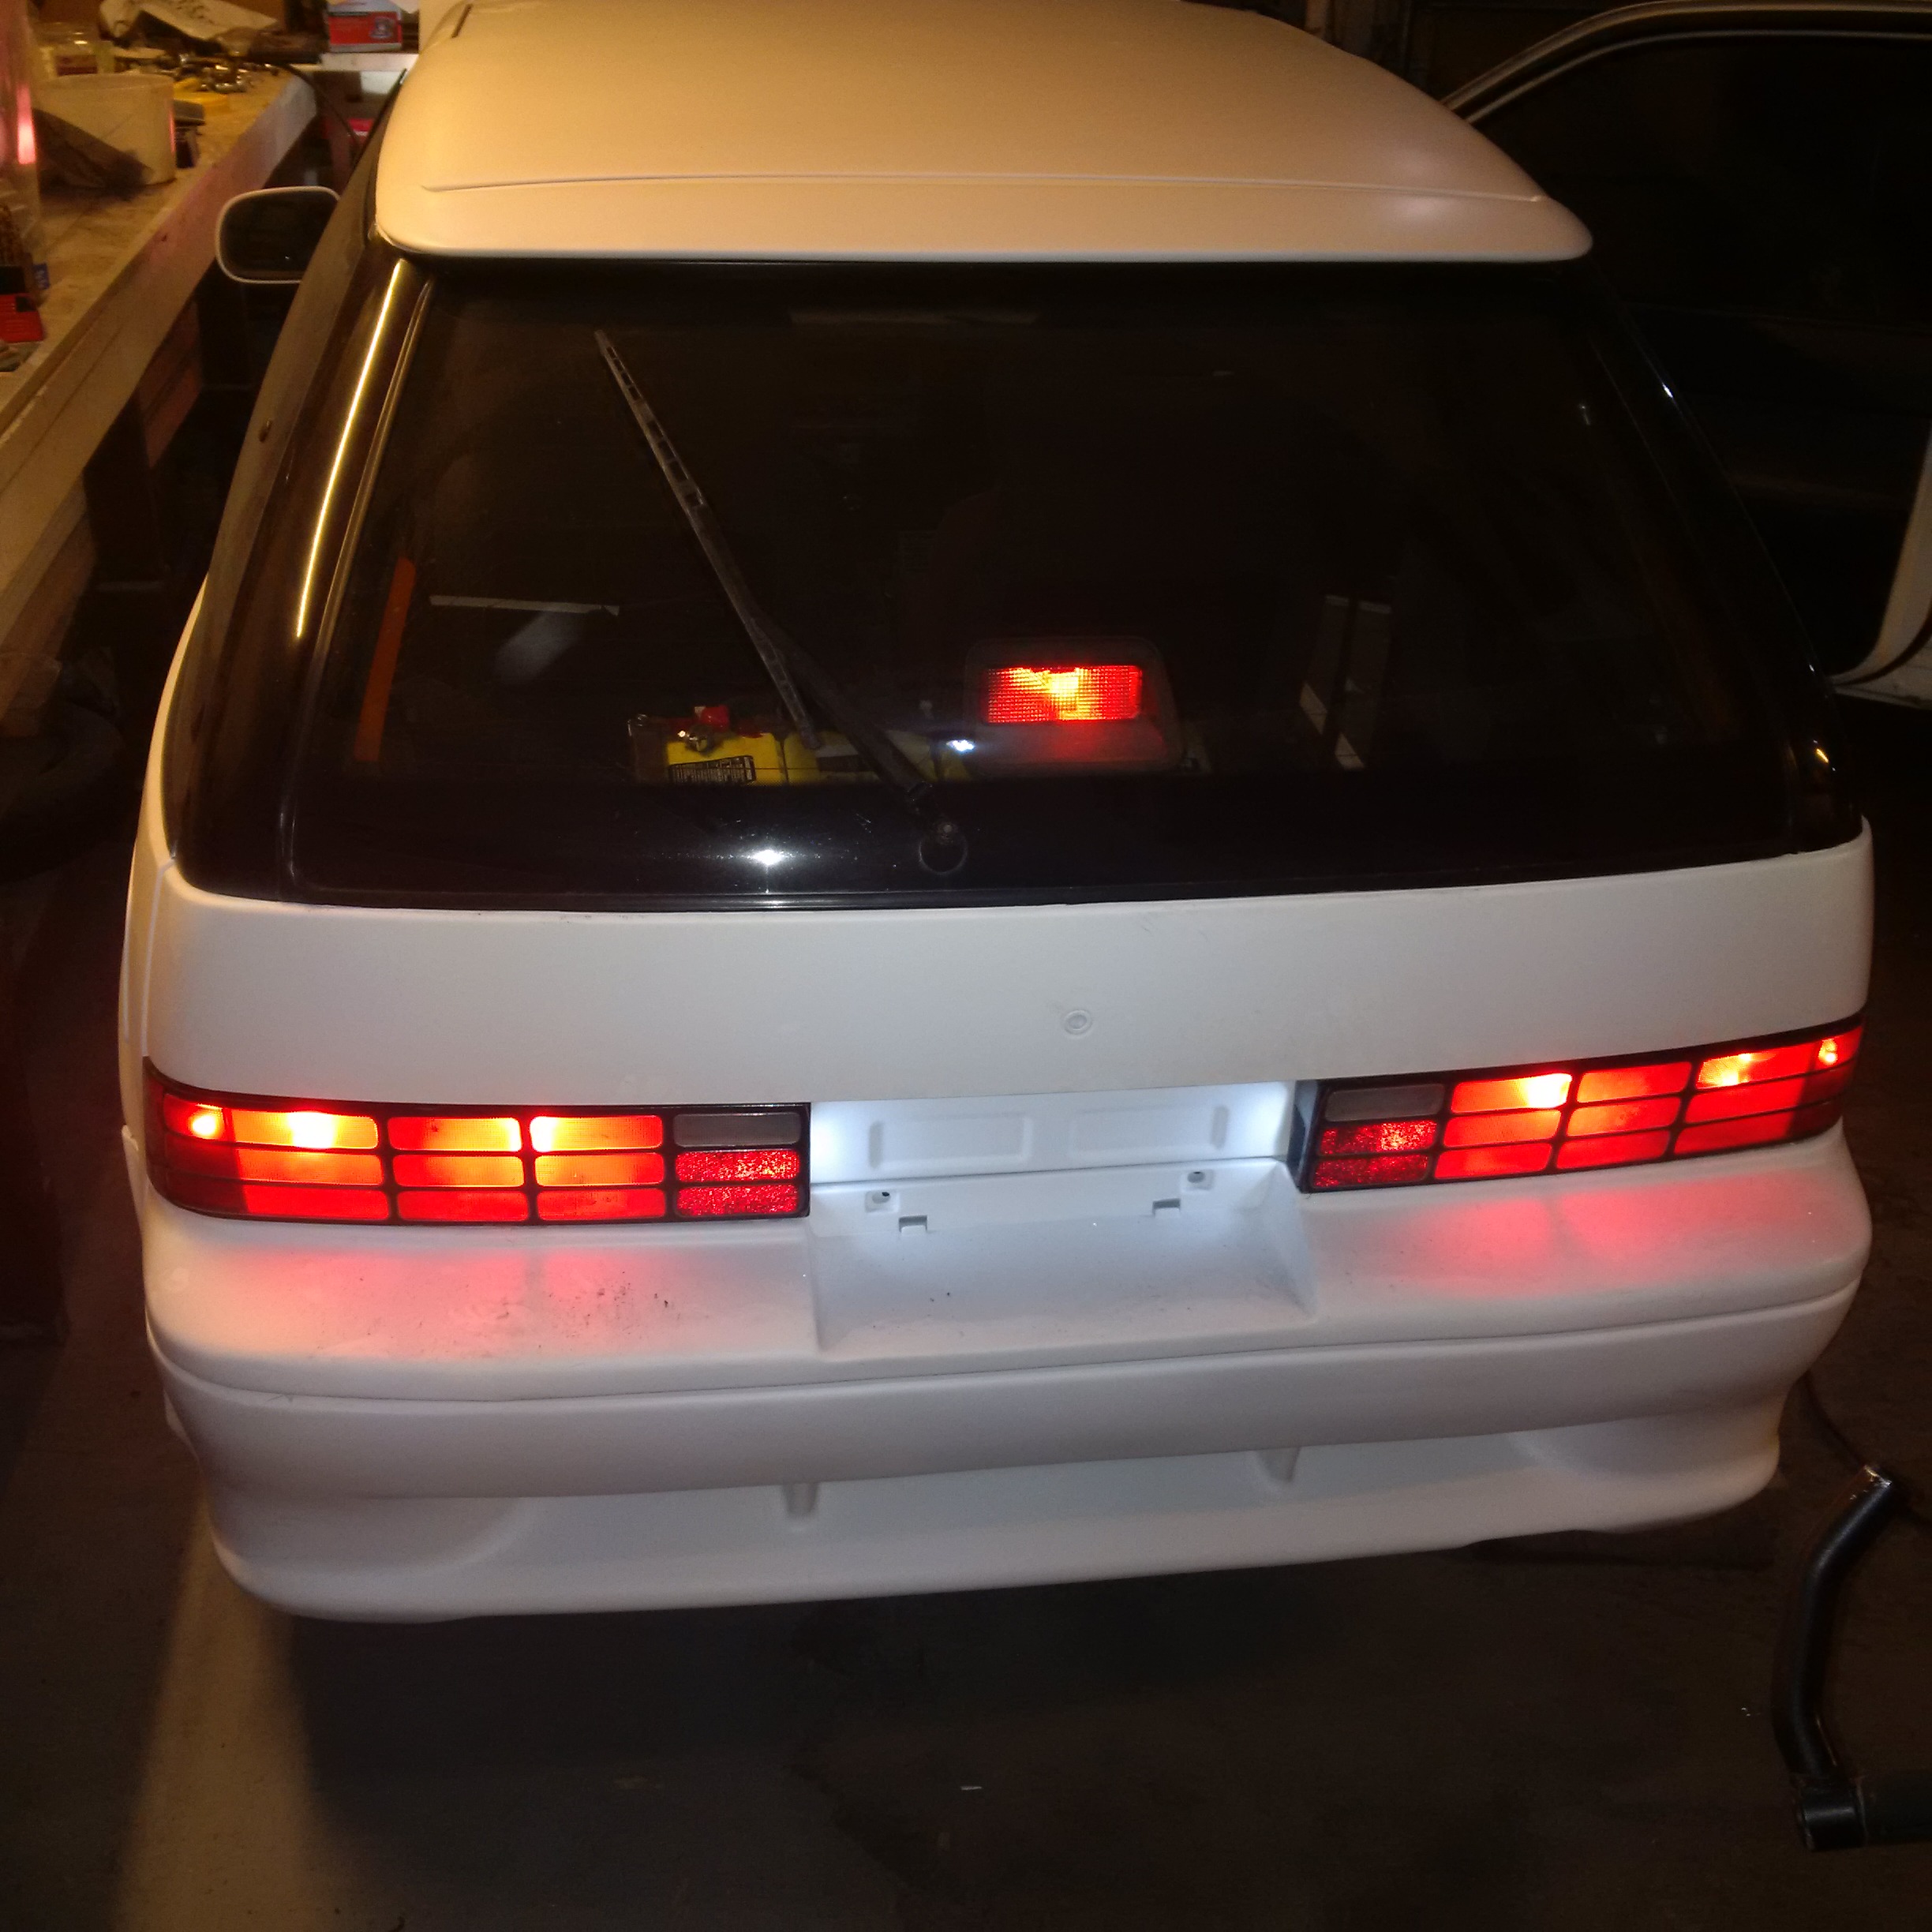
Got a bit more done March 7, 2016. Hooked up the dc dc converter to the 12v main fuse box. Here are some of the pictures with the lighting working. One of the headlights has a bad high beam so I'll have to get that dealt with. Some of the sockets were corroded so they're going to need some tlc with a small wire brush to get them cleaned up. Horn is broken so I have to replace that. Everything else seems to work more or less including the heater blower motor and the rear defrost. I have to test the rest of the electrical out and omit whatever I don't need. Working on converting all the exterior lighting to LED bulbs. Need to figure where I'm going to permanently mount the dc dc converter and tidy up the wiring. I don't see any trouble running just off the dc dc converter without a battery other than the clock keeps resetting to 1:00 but that could be a good way to help me track my runtime.

Finished the conversion to LED lighting except for the resistors to stop the signals from hyperflashing. Thinking I'll spray the inside of the front signal lights with plastidip blaze orange for some colour. I'll have to try some different resistors as the 50w 3.6 ohm, 6 ohm and 8 ohm weren't right and then the lights weren't bright enough. Completed the work March 8, 2016.
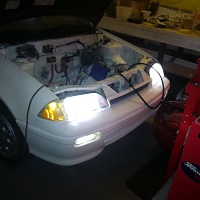


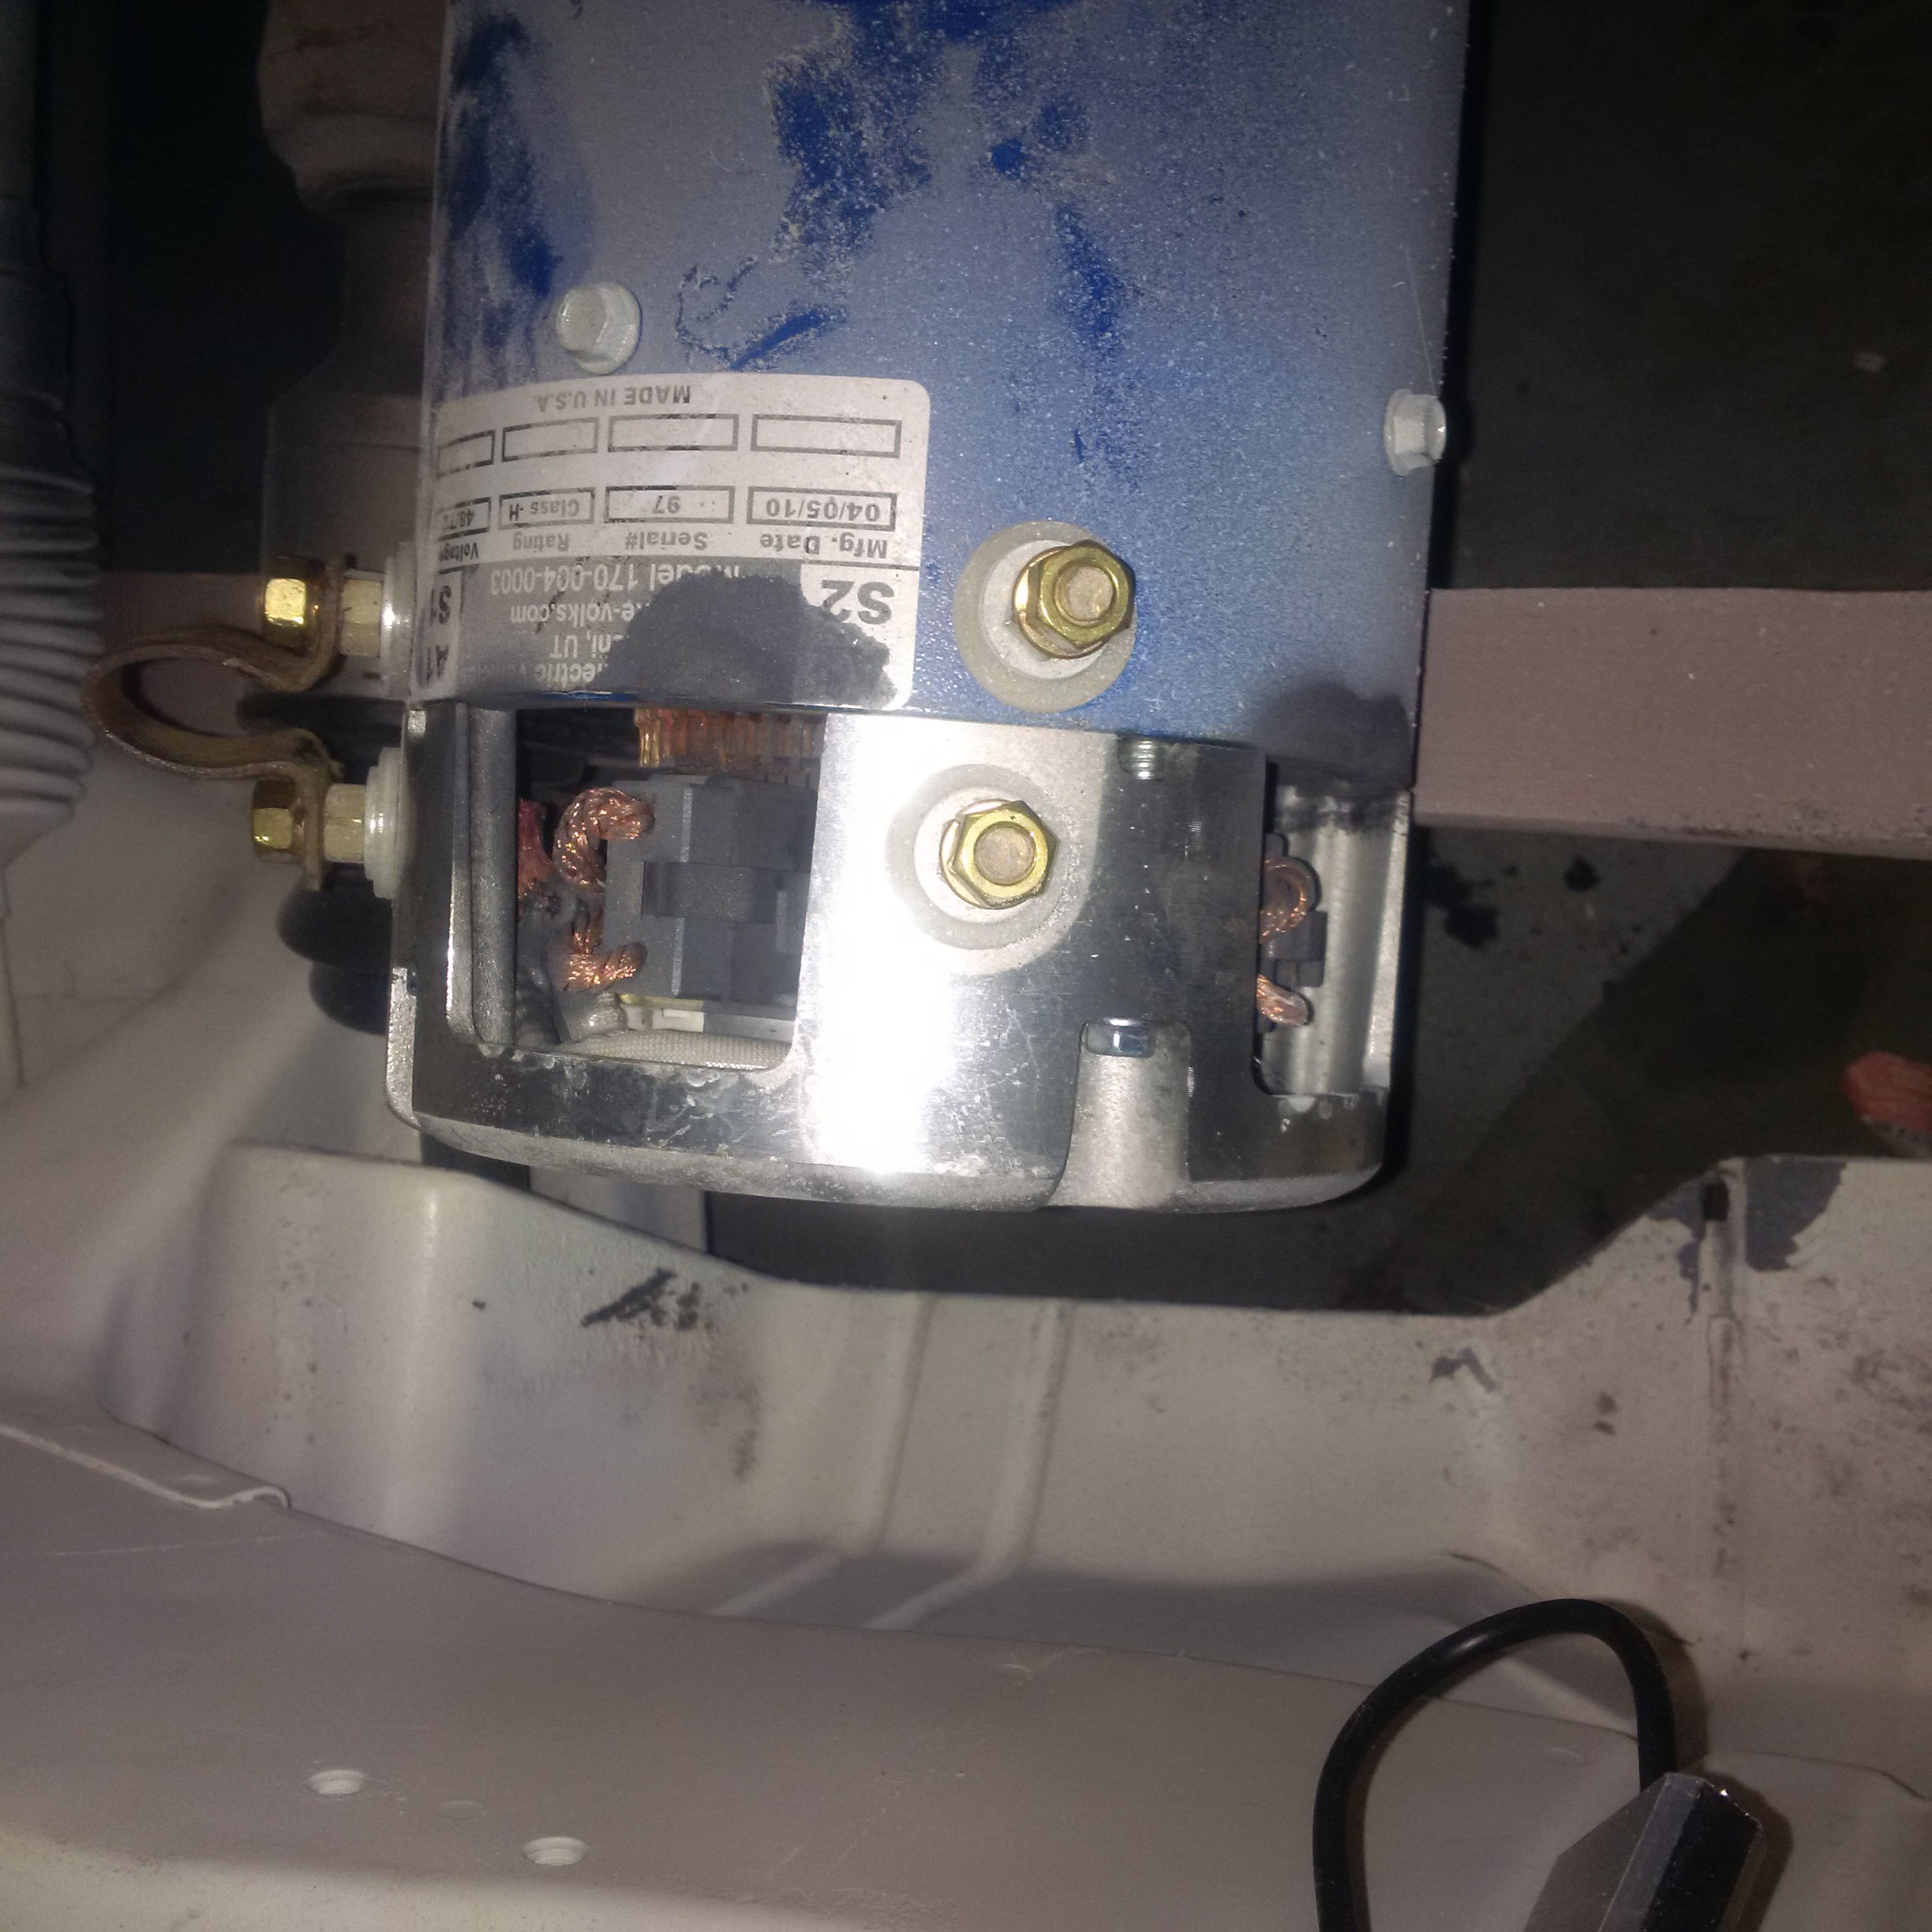
Finished the conversion of the exterior lighting to LED on March 9, 2016. Painted up the front signal lenses with blaze orange plastidip for colour. Managed to stop the hyperblink with a Tridon EP34 flasher which is LED friendly so no wasted power on resistors - yay!!! Also did some research to find my 48v charger is a lot better than I thought. Here are the specs (OBET 48/15).

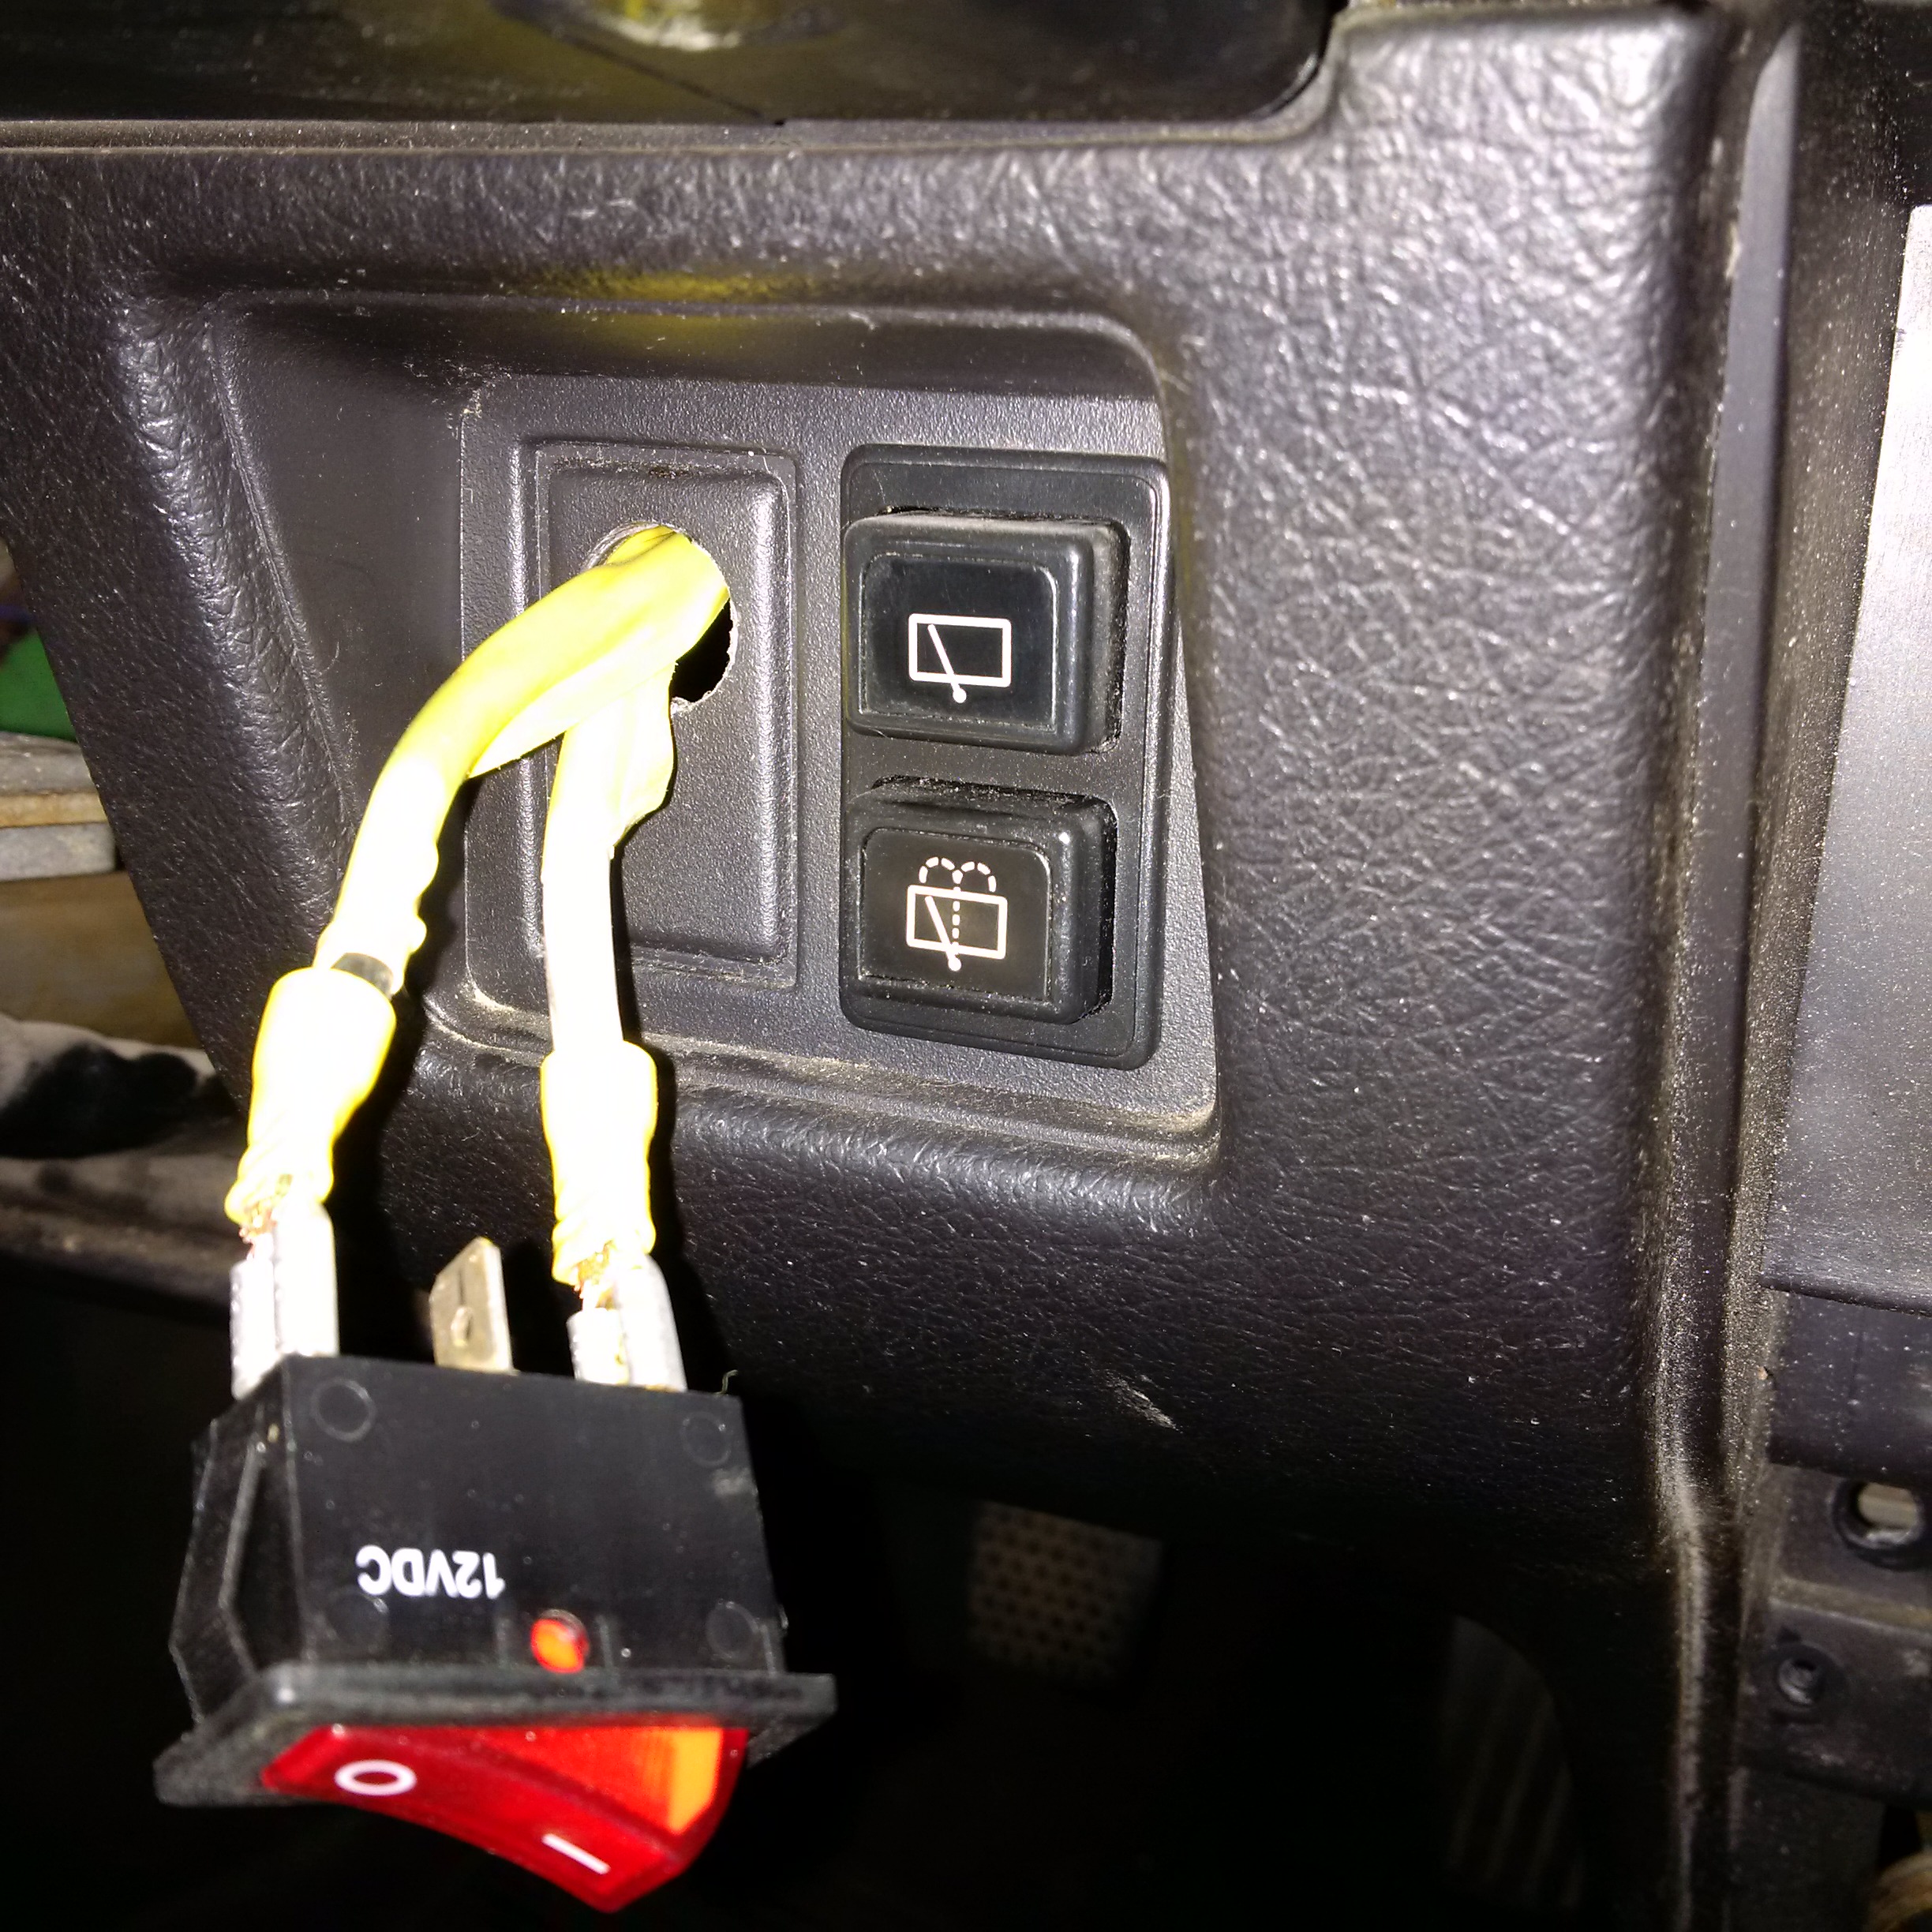
Got a bunch more done March 15, 2016 and got the dc dc converter mounted in front of the controller, wired up, and some of the looming to make it look nice. Also put the 12 volt mains back together and got the main fuse box cover back on. I also have some work to do with a dremel to make the 12 volt mains switch for the dc dc converter fit flush. The charger will need to be mounted in its permanent place tomorrow. Also removed an ancillary bracket off the top of the transmission.


More electrical work done March 16, 2016 with the gauges working, the contactor going through the switched 12v key power and the reverse lights are working. The wiring for the reverse lights switch was thrown out with the ECM harness so I went to the wrecker to grab the two wires (red/yellow) I needed and the connector while trimming off all the ICE (internal combustion engine) wiring. Also fixed the broken horn with a replacement from the wrecker and got the other marker light pigtail I needed for the front.


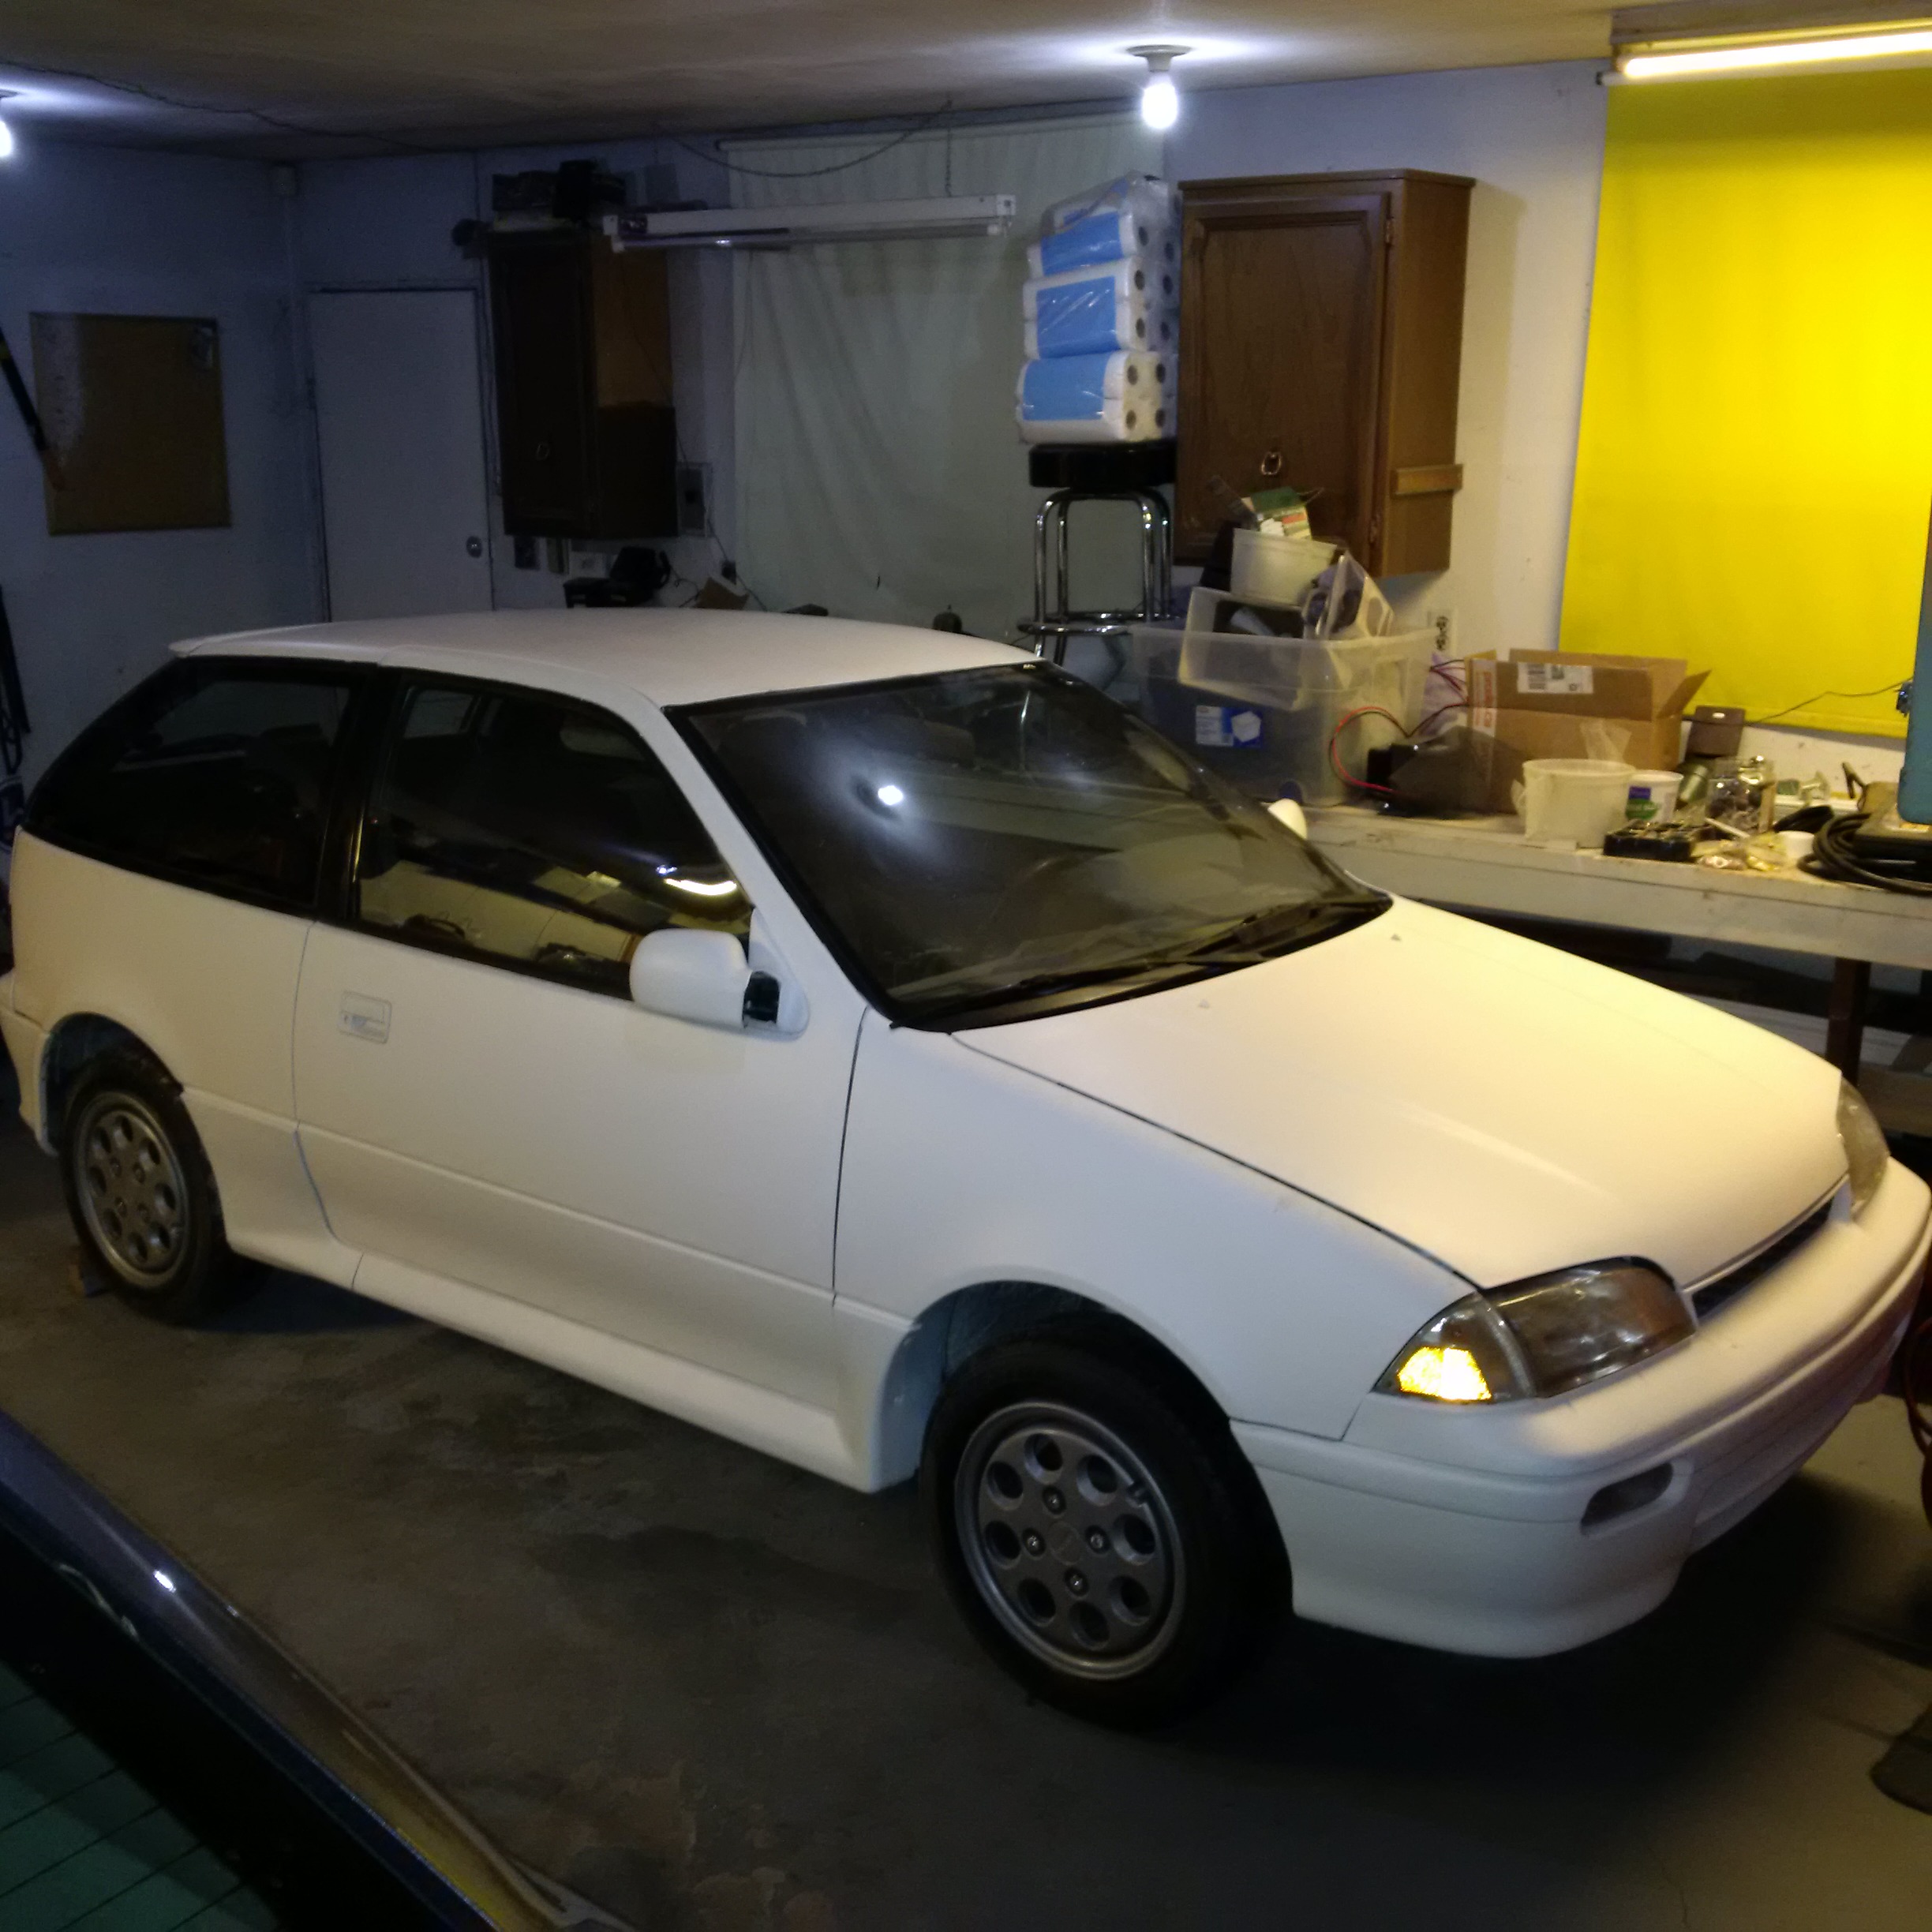
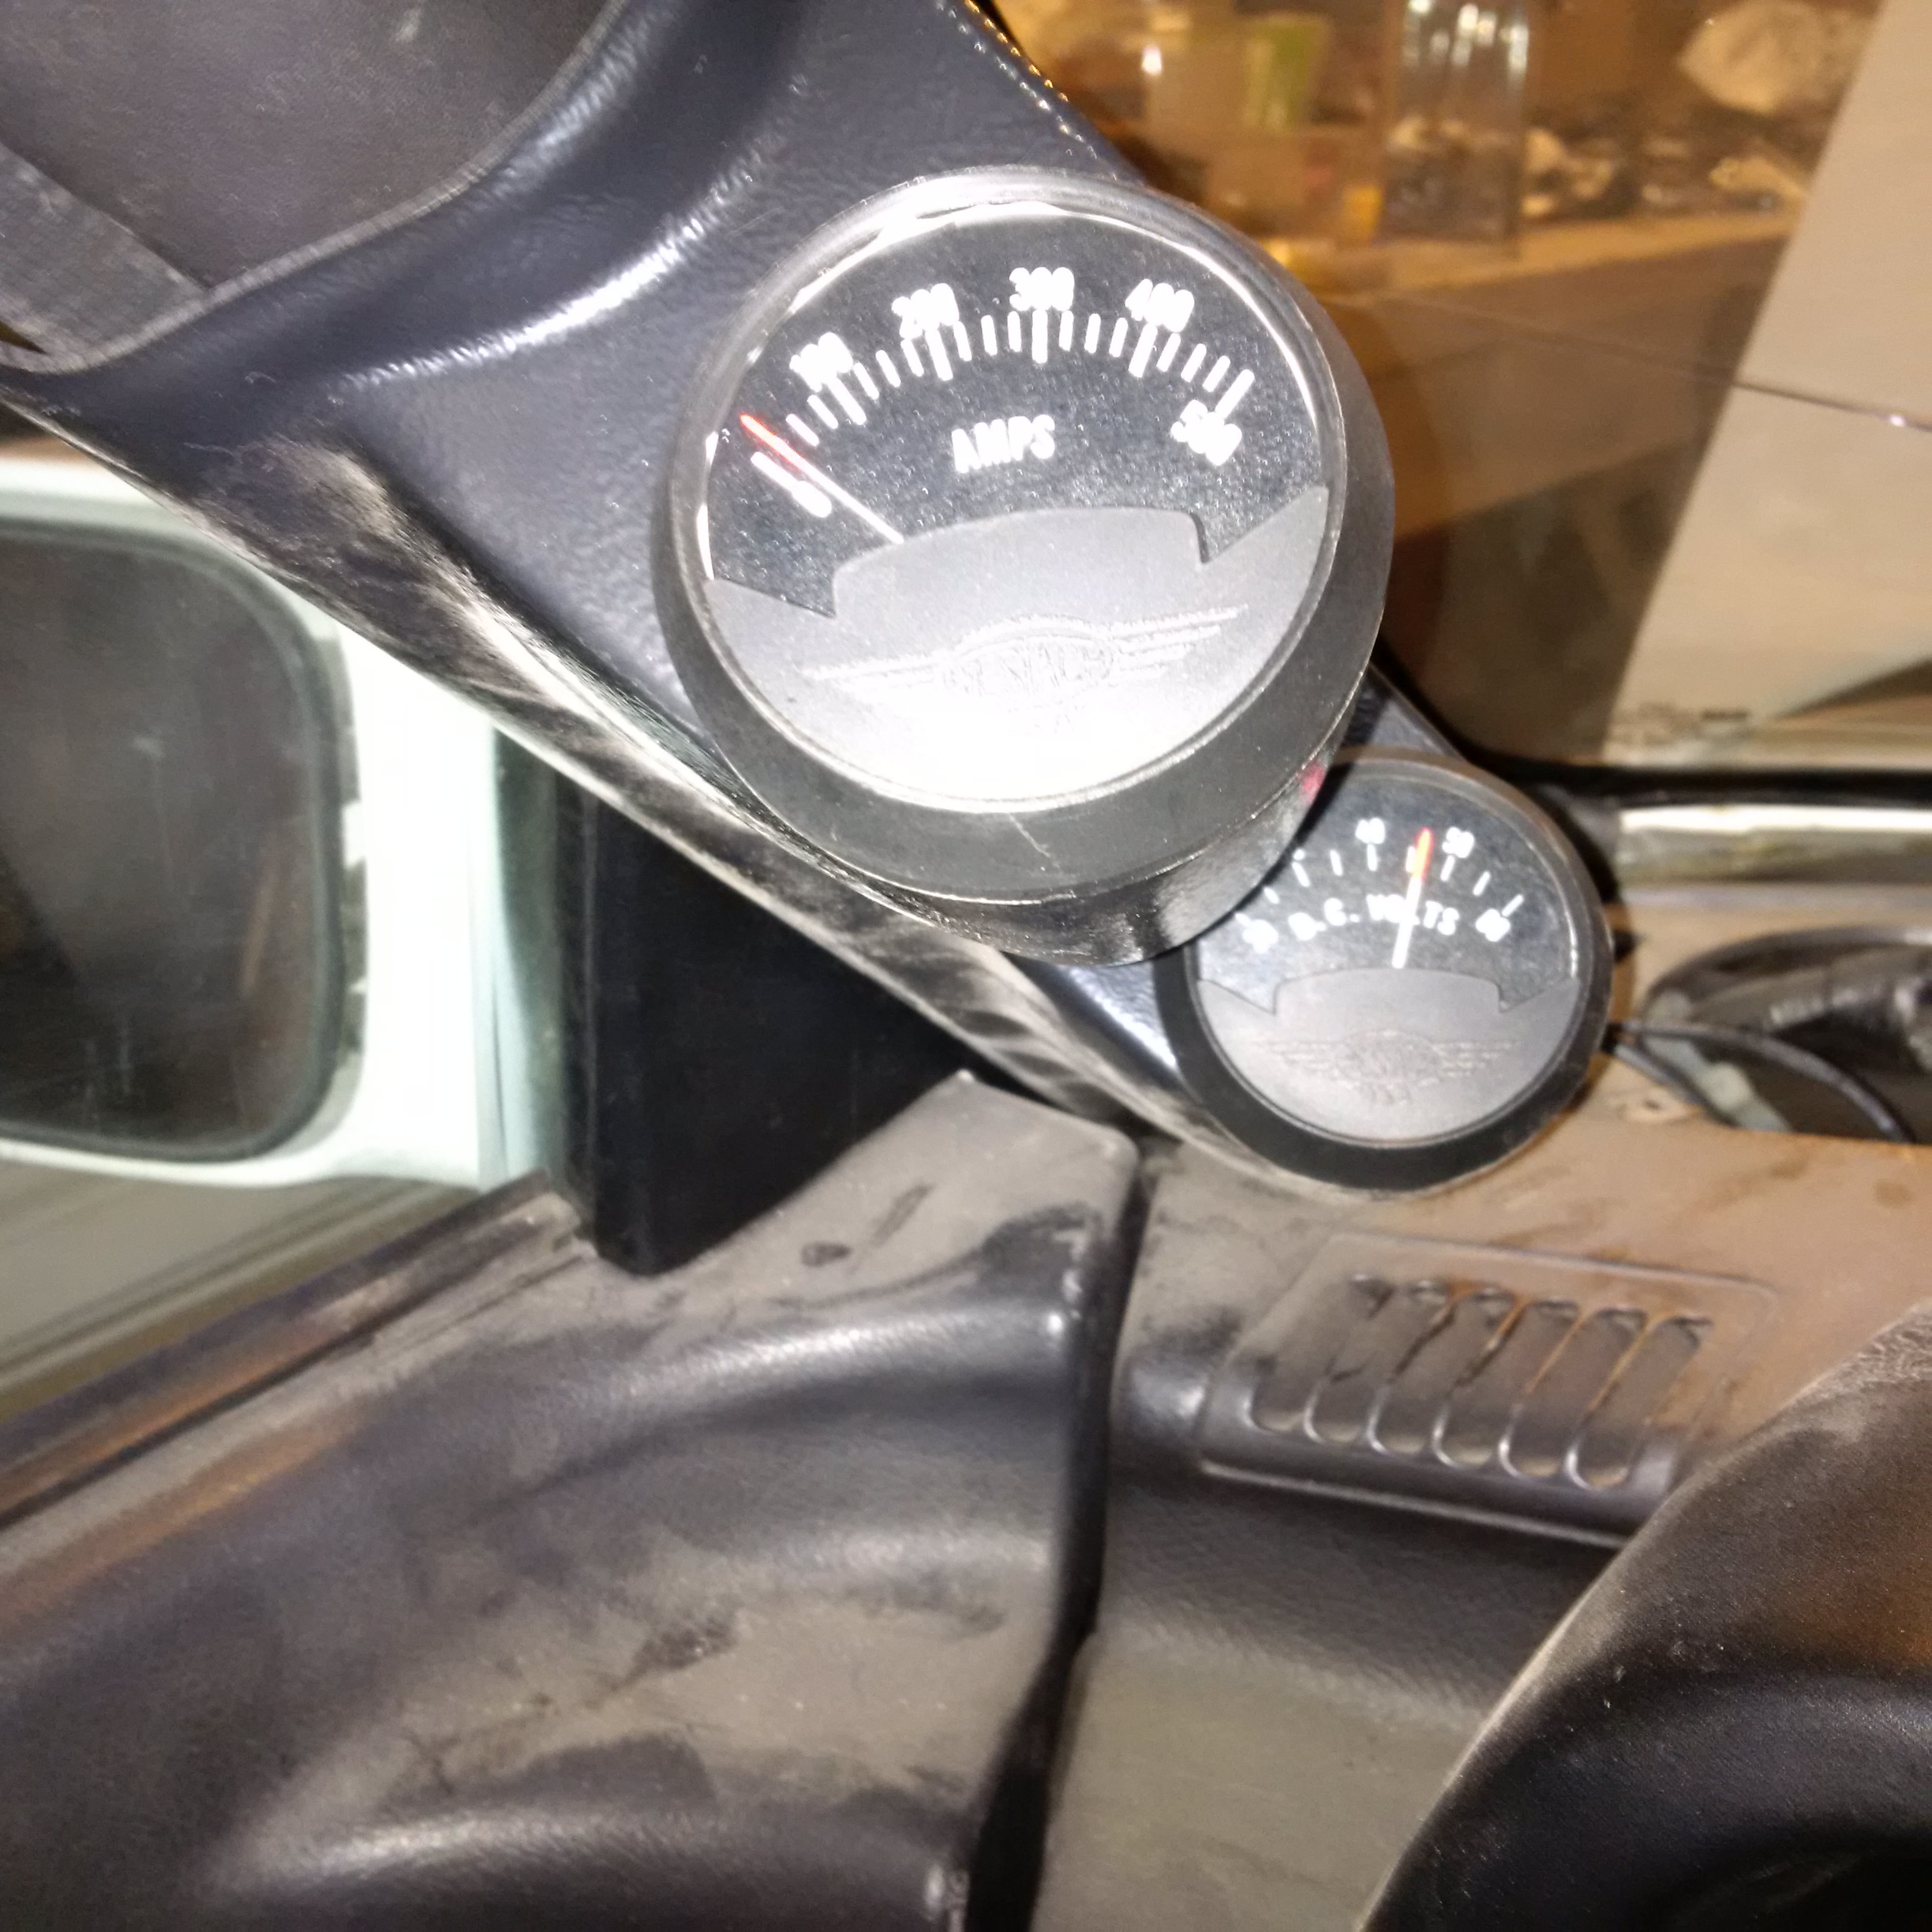
Washed it up pretty good on March 18, 2016 and vacuumed in out. Took all the loose parts out and will sort all that out after. Took it for a test spin up and down the alley. The speedometer doesn't work so have to look at that and the amp gauge stopped working so have to recheck the wiring on that. Driving was pretty cool but learned in a hurry that extra brake pressure is required without brake boost assist but the ceramic pads dig in good. Also catching me off guard was that gearing down does nothing with an electric motor that has no resistance if you're expecting to slow down.

I also ordered some spare parts to add to my spare 400A controller so I now have a spare 400A contactor for $50 usd with free shipping from Aliexpress coming in as well as a spare 30A dc dc converter for 48v down to 12v for $50 cad all in from Aliexpress as well.
Doing some research looks like it doesn't have to be a fortune to scale the car up to 72v which the current D&D ES-15-6 can handle. Just need a controller, charger, and dc dc converter. Then I'd just add 2 more of the Optima D31's in series to reach 72v.
Fiance says the seats aren't comfortable enough and it seems possible that some leather seats from a TSX may do the trick since I already have one for the driver's side sitting in my basement.
The speedometer does work just not sensitve on the lower range. Got the car insured and registered March 30, 2016. Registration says fuel type Electric!!! Went to the post office today and put 4 km on the odometer. Thinking of ways to secure the batteries without a big heavy bracket. Added the car to EVAlbum online at http://evalbum.com/5177. Ordered the stuff to get the car up to 72 volts including the dc dc converter, controller, charger, and batteries.
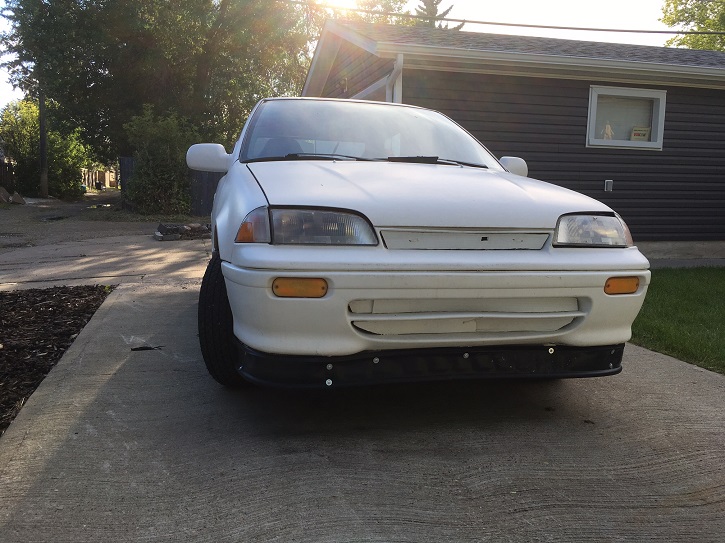
Did a bunch of work this week. That first long trip managed to rip the two brackets off for the front sway/stabilizer bar so I managed to save the one and then make a new one out of a piece of bed frame bending it around a 22mm socket in the vice and some persuasion from a hammer. Also mounted the main 12v switch now to turn on the dc dc converter. Then created a front grille block and left a bit open on the one side for cooling of the dc dc converter, controller, and motor brushes. Not much heat after 10 km run. Also replaced the gear oil in the transmission with 2L of Mobil Dexron VI which has a crazy low viscosity index and added 4 oz of NMF and 2 heaping teaspoons of tungsten disulfide. Car coasts noticably better and accelerates easier now too. Front end picture taken April 10, 2016.

Did some shopping today and picked up a new DC 200A multifunction meter that looks really good and a meter for measuring how much power I'm using to charge the car to learn how efficient my charger is. I also setup a page on ecomodder to track the efficiency as I go through my mods and get digital gauges to actually measure things more accurately.
Fixed the ammeter wiring later in the day on Apr 14, 2016 and went for a cruise. Pulling about 300A maximum. Topping out at around 55 kph on the level. Just realized I have a shorter gear ratio in the GT than the standard 1.3L Swift from Team Swift. Now on the hunt for a 1.3L SOHC 5 speed Suzuki MV3. Using this final drive ratio calculator I can expect an improvement in speed by about 34% out of the swap.
Been doing some shopping and grabbed some white cable loom from Ikea on the cheap. It's even white to match the car. Haven't changed anything on the car this week of April 15, 2016 but took it out a couple of times for a quick scoot of 5km each. Realized I calculated my battery pack size all wrong and found this battery pack calculator. For trying to build a battery pack and manage cost and estimated range, I found another useful battery calculator. So really, I found I have only 2.88kw usable from a 3.6kw pack. Being that I'm doing approximately 400Whr/mi, that's a maximum of 7.2mi which is about 11.58km which is about what I've seen. Of course this is mostly a guess because I cannot tell what my battery voltage is very precisely with a wide-sweeping analog gauge but I found this chart to be really handy. Also there is this handy charge time calculator
Also found a really cheap e-scooter battery pack with battery management and charger along with free shipping so I will definitely keep an eye on this. Also found this really awesome site http://www.electric-cars-are-for-girls.com/. Spending time desulfating the 12v cells individually with a Battery Minder 12117 April 20, 2016.
Aired up the tires to max pressure 44 psi from 36 psi that I was running earlier. Finished desulfating the cells and they're looking really good now. Installed an airtab on the rear wing and then two more on each side of the rear glass about half way up the car along the trailing edge. The idea is that this collapses the wake behind the car quicker. On big trucks, these air tabs are supposed to be much closer together but I believe it's a function of the frontal area so I'm spacing mine out with the tiny CdA of the Swift. Just did a 14.5km run with the Swift off a full charge. Batteries were at about 42.5 volts when done.

Also found some justification for not going perfectly smooth and using plastidip as the final coating of the car. Some surface turbulence can be a good thing.
Fastskinz
Mythbusters Golf Ball Taurus
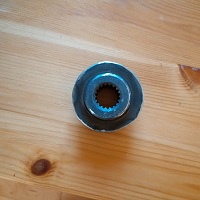
Some sad news Apr 22, 2016 on the way back from Dairy Queen, the motor shaft broke off on the engine after accelerating and hitting a pothole at the same time that I couldn't see in the dark. Here are the pictures.
The first picture is the transmission with the engine out. Removal took about 30 minutes flat with some help. The second picture is the motor with the coupler with the piece of engine shaft still in there. Thinking the next coupler will be a lovejoy coupler as that will have a little give. Either that, or I need to pick a motor with a larger diameter output shaft that's stronger. I had no sign this was about to fail when it did and I previously had the car as fast as 65 kph and also rev'd it to the max in neutral a couple of times while missing shifts without issue, vibration, or pending doom. I also need to redesign the engine mount so it's suspended instead of supported which is probably the biggest issue.
Fixed the car and got the new motor in May 26, 2016!

The new Motenergy ME1003 uses way less amperage. Efficiency has gone up about 25%. Got the power meter measuring exactly what it takes at the wall to charge up the car and I'm averaging about 1.16 cents per mile for cost of power. About to start adding the belly pan and logging regular small trips at Ecomodder
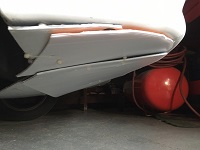
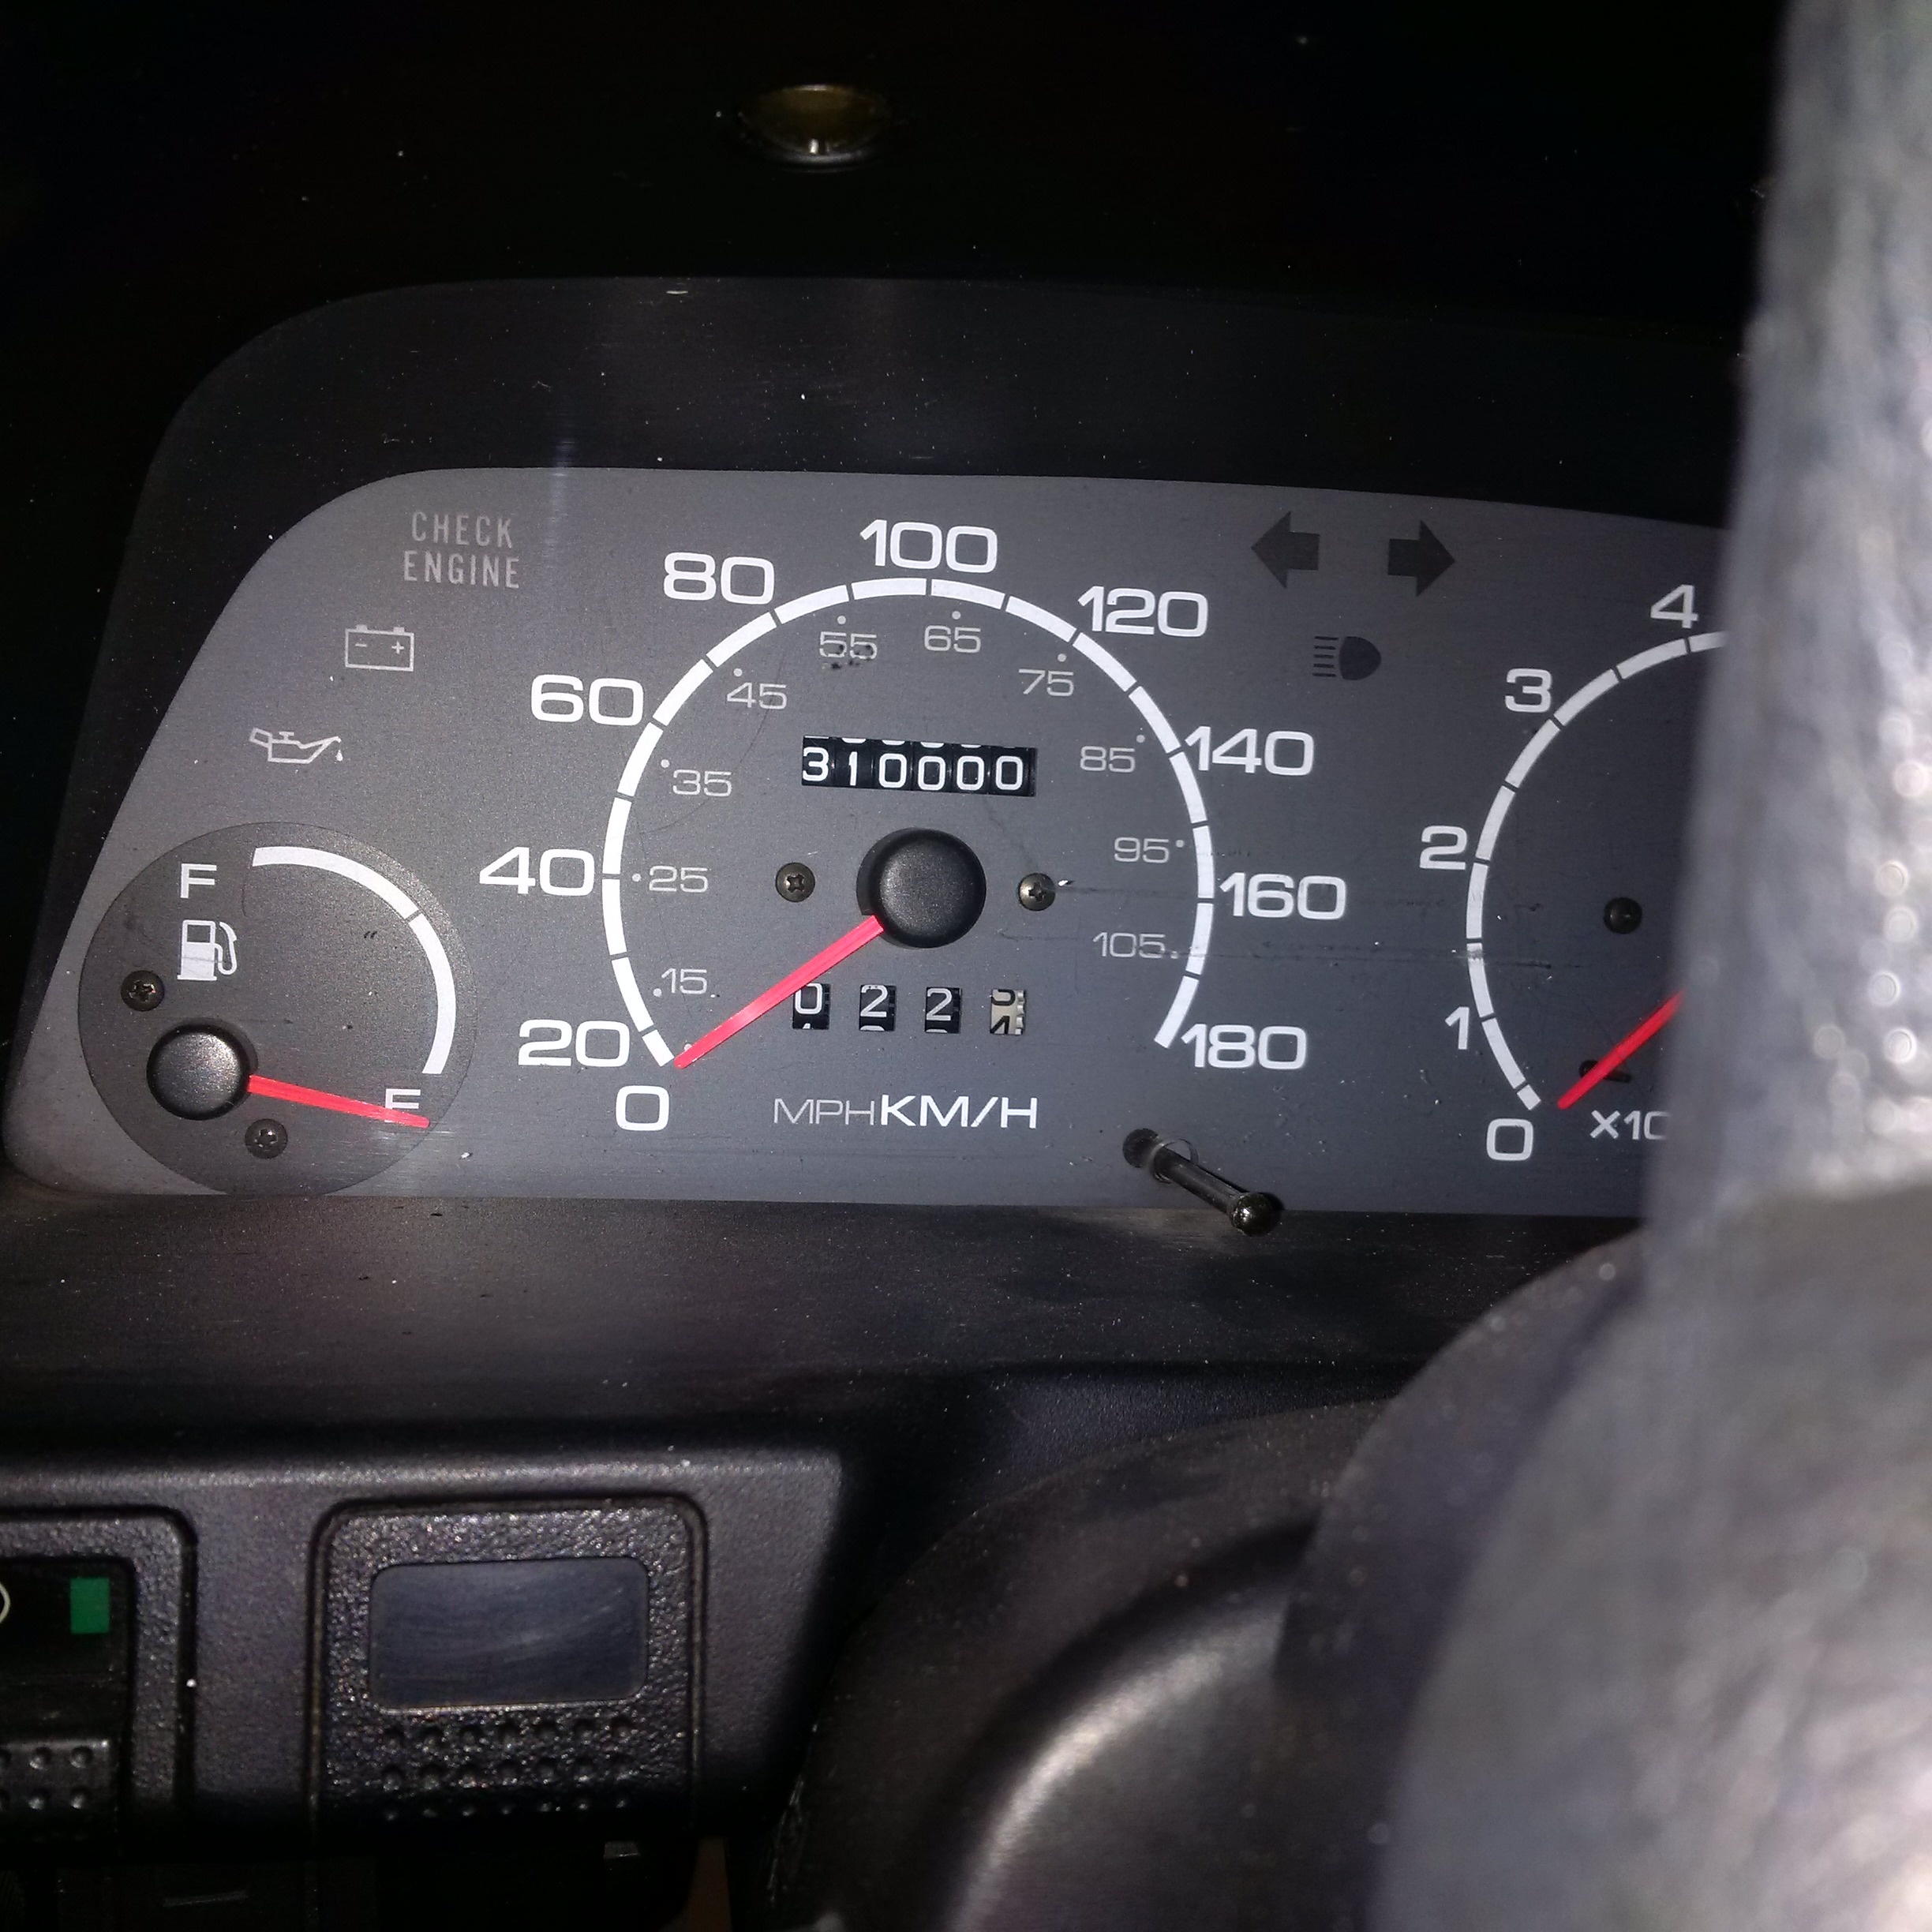
Did a bunch of work June 22, 2016 and tidied up the cabling for the power underneath the car before starting to work on the rear third of the belly pan. Went for a test drive after just doing the first bit on the belly pan and went 22.4 km and the odometer hit 310K! Also got the spline carved out of the old clutch disc to pursue getting a lovejoy coupler built by Alberta Rewind.

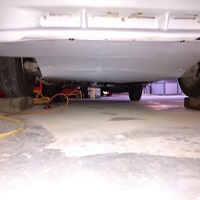

Finished off the belly pan almost right until the front bumper and thinking of making an aluminum air splitter so picked up a set of air shears at Princess Auto. Went for a test drive June 28, 2016 after this change and the car coasts unbelieveably better than ever. Still planning to repack the wheel bearings with NMF and WS2.
Thinking for fun to keep the electric motor at higher revs and no major changes in torque load to see if there's a chance of swapping the 5 speed MV3 from Suzuki to a CVT of some type. This Jatco CVT looks promising.
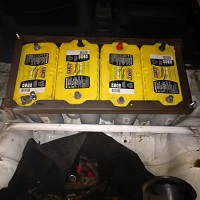
Did some work July 28, 2016. Two weeks ago replaced an Optima yellow top with a $100 battery with a higher Ah rating from Rocky's Battery after one stopped holding charge properly. Then just finished
the very front of the belly pan that had been missing for some time and went for a test drive. Acceleration was noticably easier so I'll know the new numbers when it's done charging.
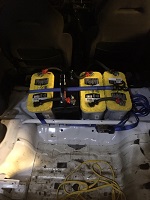
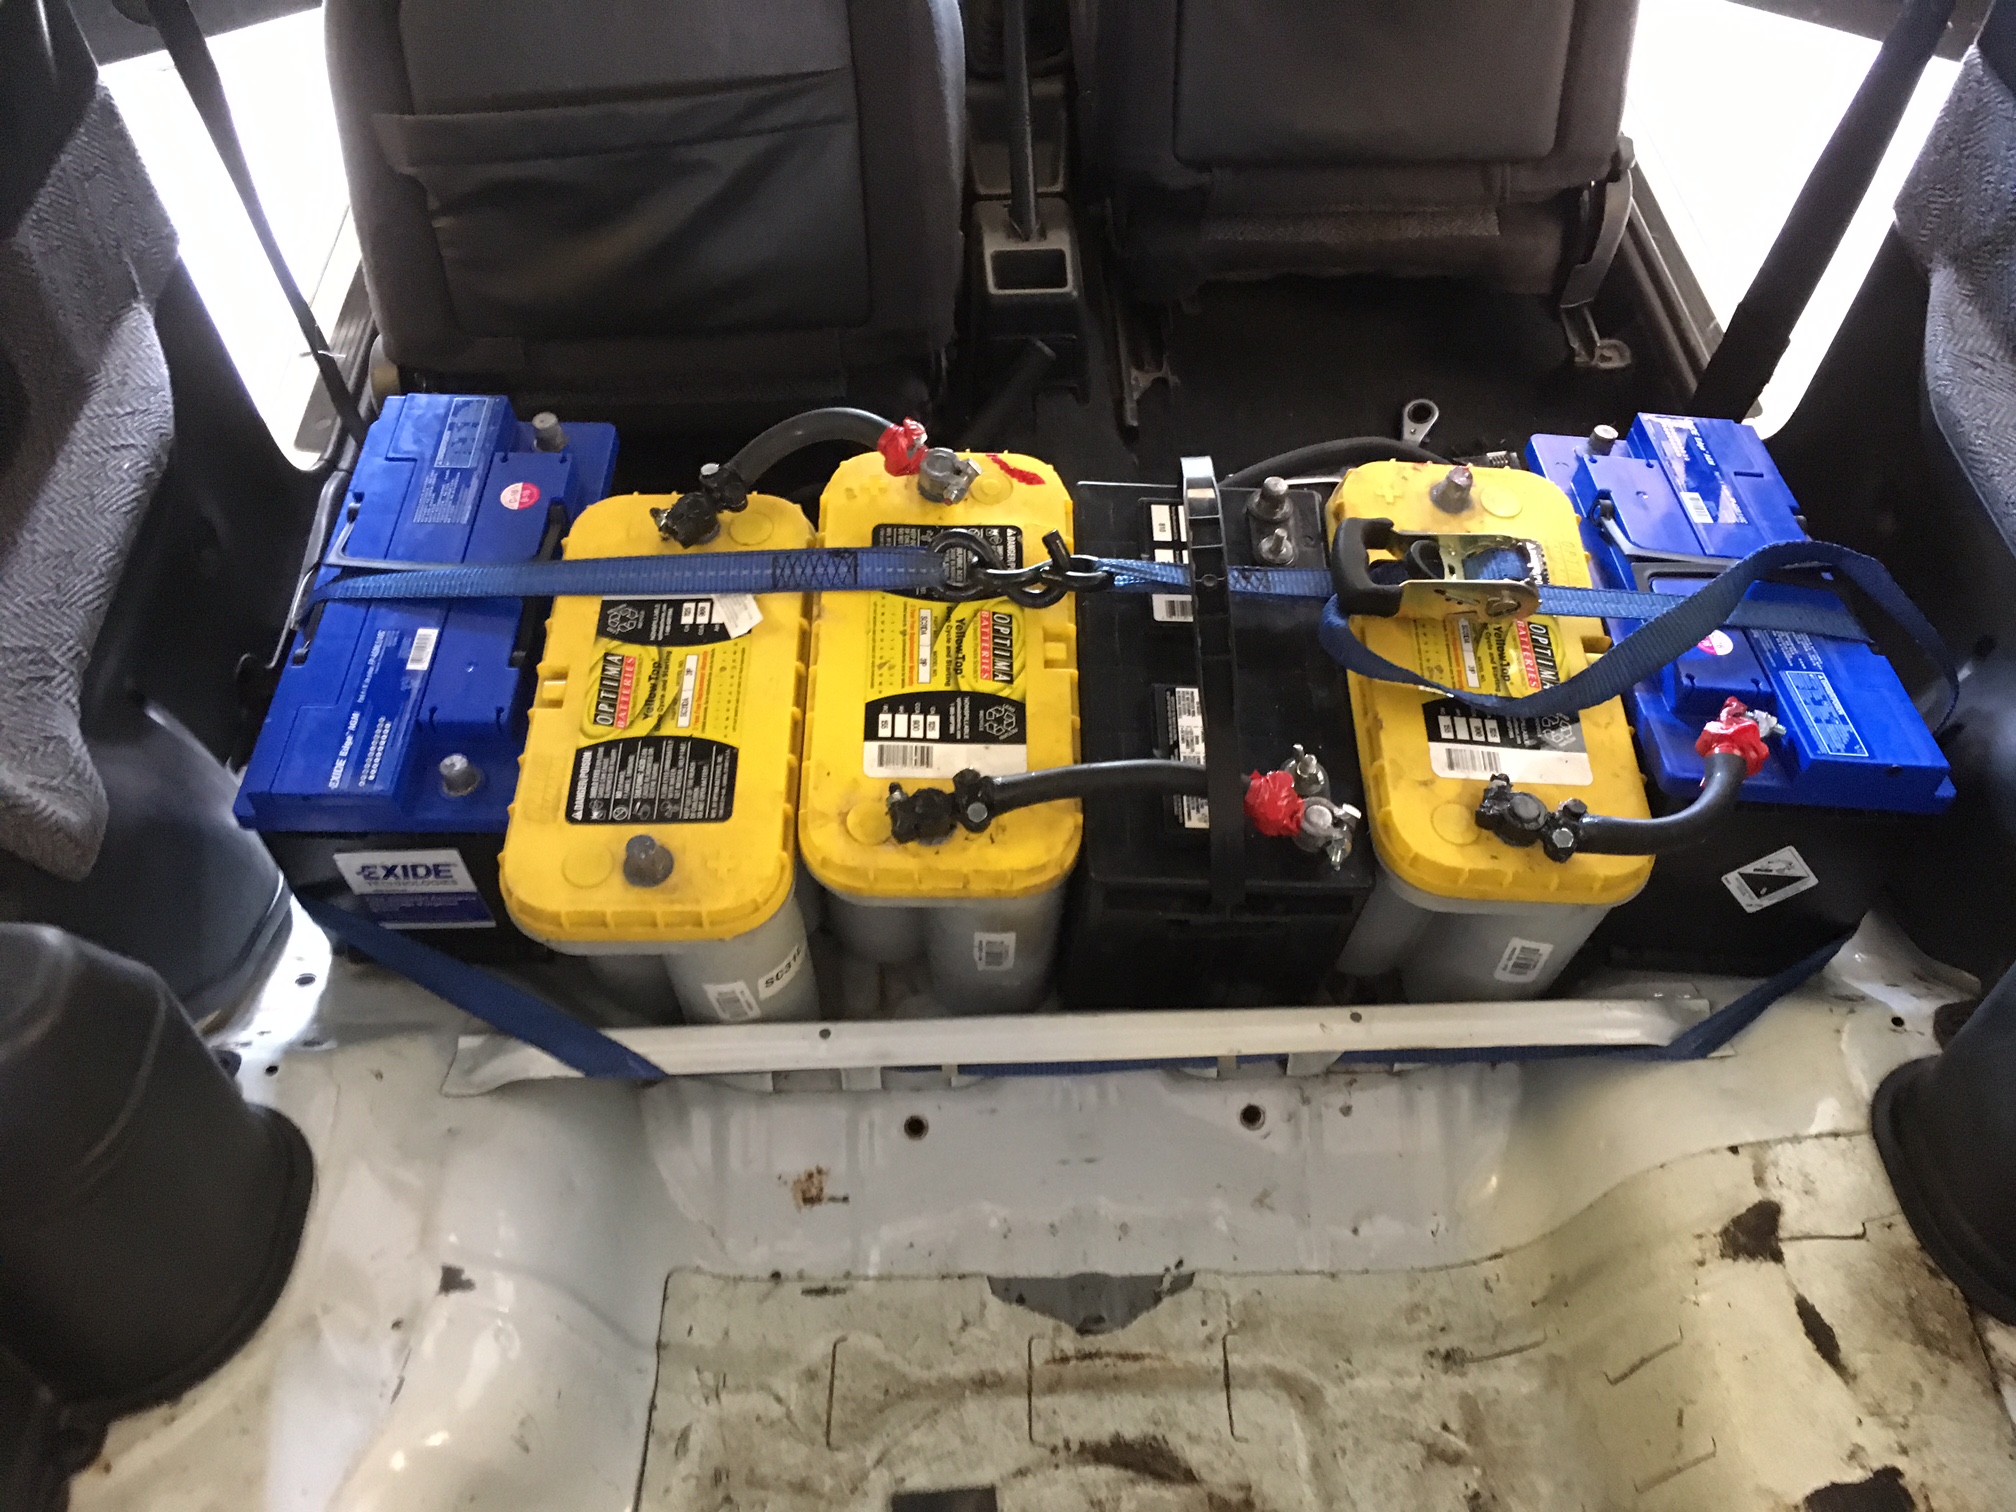
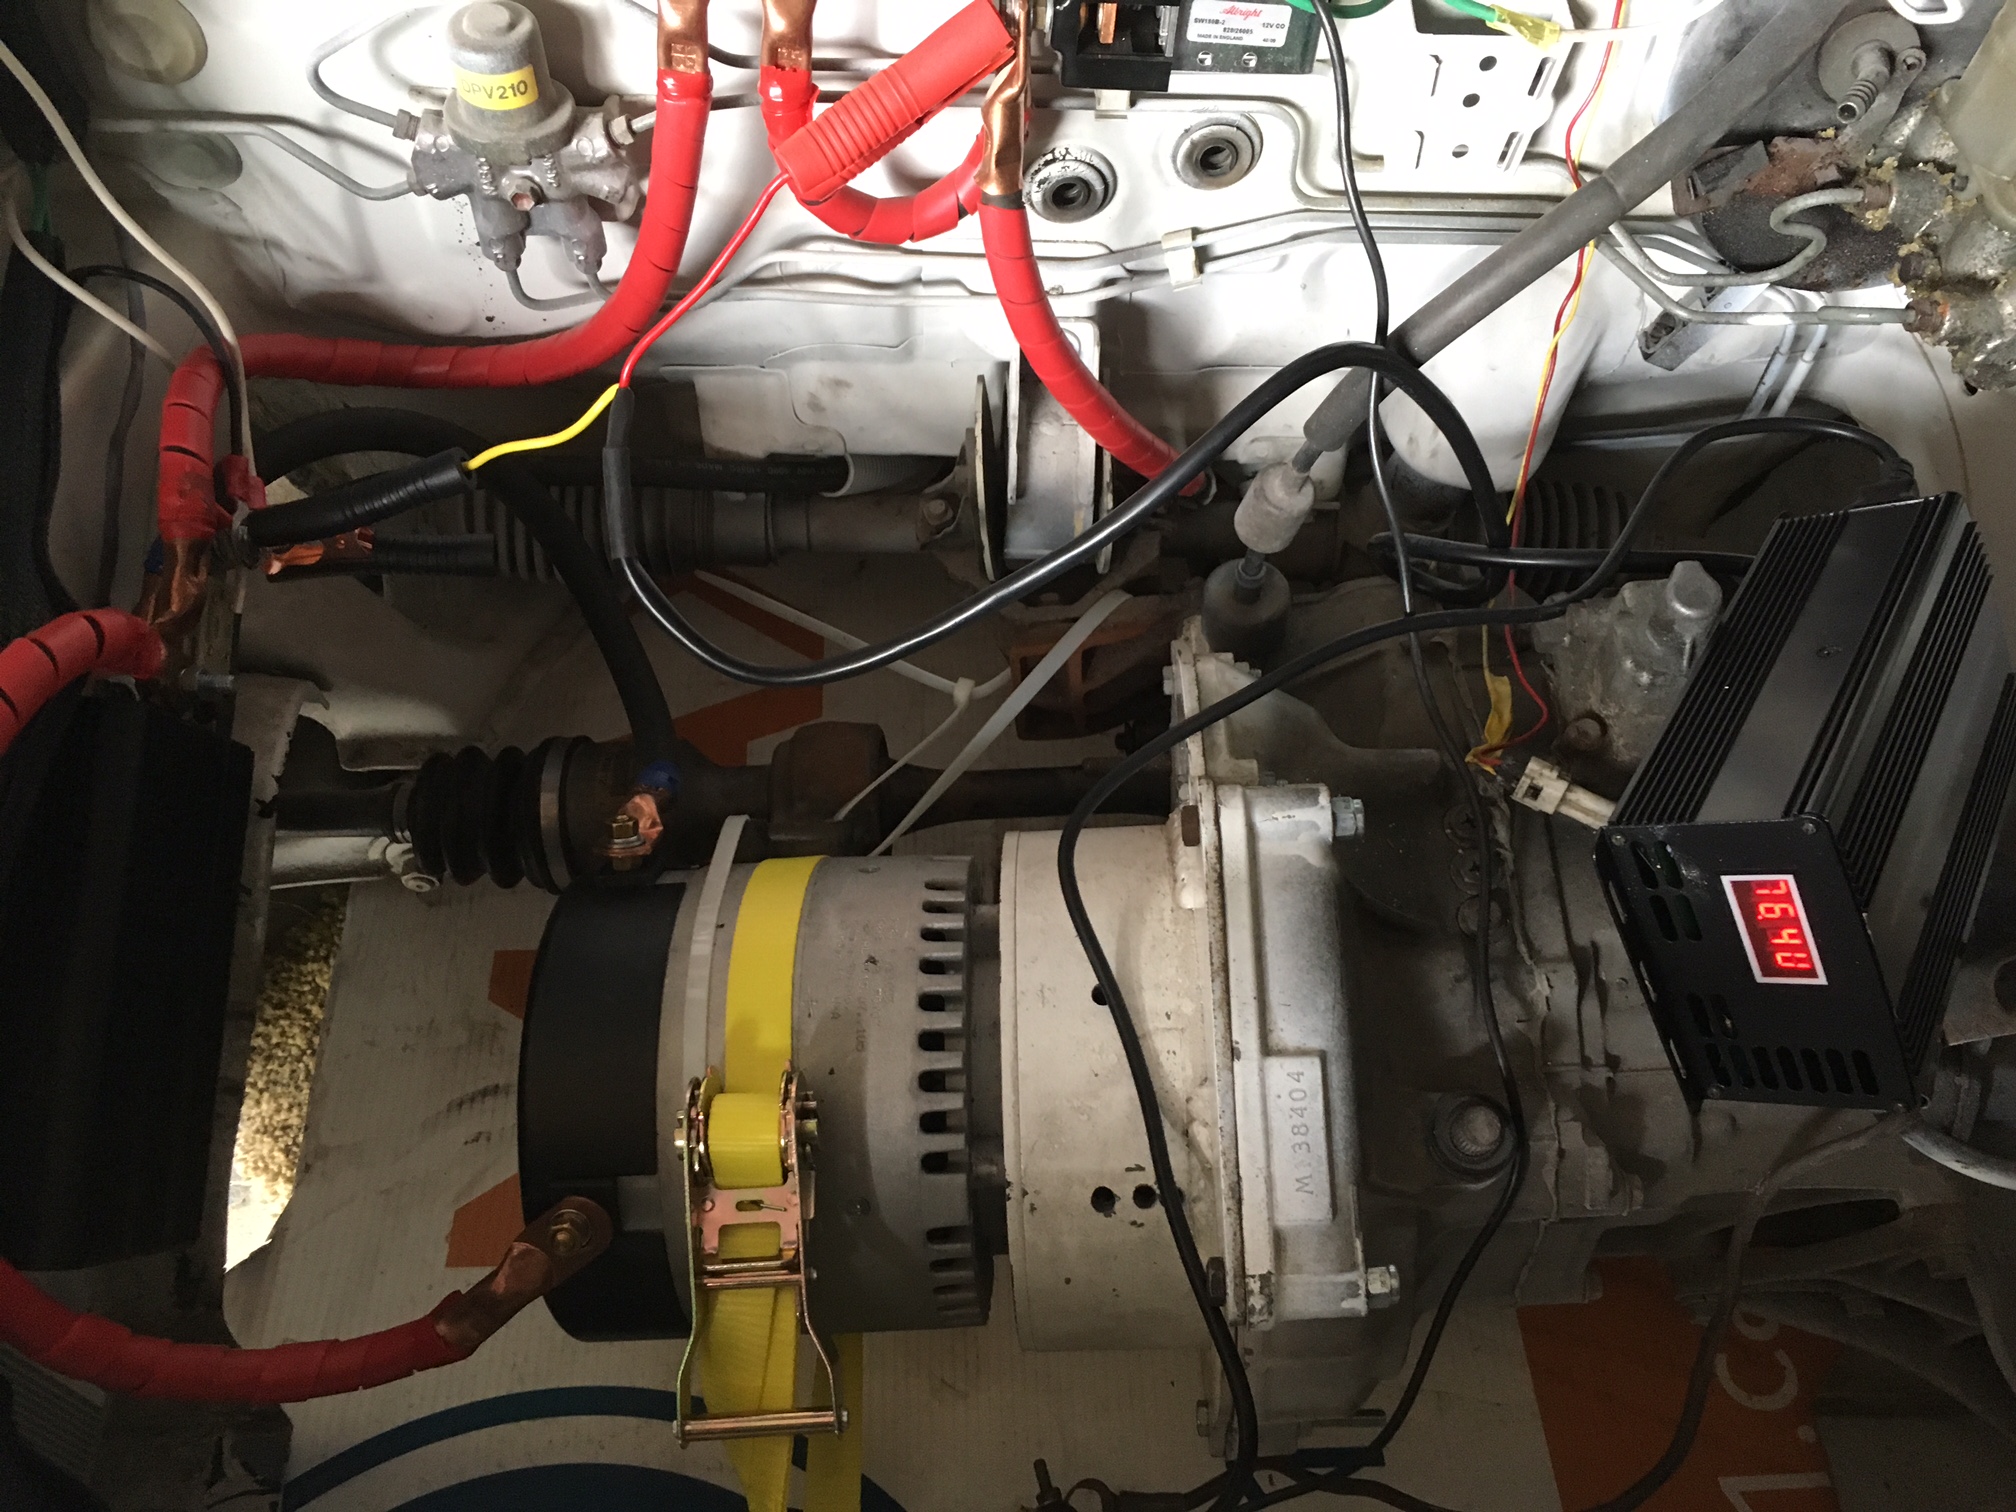
Completed the conversion to 72 volt on Aug 9, 2016. Here are some pictures of the new battery setup, dc converter with controller, and the new charger.


Up to almost 1000 km on the car now in EV form as of Oct 19, 2016. Looking at other ways to improve efficiency but haven't had any time to work on the car. Would still like to get
to a suspension drop. Also came across these amazing ADB bearings, but they're a fortune. Maybe one day
when I'm rich and have no financial worries. Also researching the use of a CVT and what that might look like and how it might
improve performance and efficiency. Looking at possibly the N-CVT from an older Nissan Micra but looking for something that won't require elaborate
electronics to run. Put the Blizzaks on for winter now...
Winter is brutal on lead acid batteries without running a warmer. Learned that much. Didn't do much driving and the batteries really took a dive. Had a heck of a time rejunivating them back to full charge. Designed and installed a front air dam which seems to be really helping get around a solid 200 Wh/mi for efficiency after switching back to the summer tires as of June 2017.
Got talking with someone from Europe who converted a small car there with a 48V setup and a CVT. Figured I'm doing better efficiency than I could get with a mechanical CVT. Electronically controlled CVT would probably be much more efficient but complexity would skyrocket.
Doing some further digging on CVT's, the Suzuki Cultus actually had. However any gains in efficiency would likely be lost by the power required to drive the pump.
Suzuki Cultus Came With CVT!
CVT diagram for G13B Engine


